Hermes Handbook
A living, bilingual field guide for running Hermes as a reliable personal AI assistant.
Hermes is documented here as it is installed, used, tested, and improved. English is the default language at hermes.skywirex.com; the Vietnamese edition is available from the language switcher.
What This Handbook Covers
- Provisioning a Linux server and securing remote access.
- Installing Hermes, connecting models, and choosing the right interface.
- Designing safe gateways, context files, tools, memory, and reusable skills.
- Automating research, development, content, business, and monitoring workflows.
- Recording decisions and turning repeated work into better procedures.
How To Read It
Start with VPS and Installation, then configure Security and Context. The remaining sections are reference material: read them when a workflow requires them and update them with verified notes.
Documentation Status
This is a handbook under development, not a finished product. Short topics are intentional starting points for the learning journey.
VPS
1. VPS — Putting Hermes on Your Own Infrastructure, Running 24/7
This is the most foundational chapter in the entire handbook: everything discussed in chapters 10, 11, 16, 17 — skills, integrations, content, business workflows — is only truly “always on” when Hermes runs on a server that never goes down, not on a personal laptop that loses the connection the moment you close the lid.
This chapter is about infrastructure — server, privileges, network, backups. Actually installing Hermes onto that infrastructure (installer, Docker, dependencies, systemd service) belongs to chapter 2.
Recommended configuration: a 4GB RAM VPS
This is a sensible resource level for an agent that runs seriously — not the bare minimum to “get it running”, but enough headroom to run stably over the long term:
| Component | Why it is needed |
|---|---|
| Main gateway (Telegram/Discord/Email…) | Background process, light on resources but always resident |
| Several MCP servers at once | Each server is its own process; RAM adds up |
| Cron jobs running in the background | Schedules can overlap, creating parallel agent sessions |
| Local STT/TTS (if you choose an offline provider) | Small models, but still a few hundred MB up to 1GB+ |
| Buffer for processing large attachments (PDFs, images) | Avoids out-of-memory on sudden heavy tasks |
With 1-2GB RAM the system still runs, but it is easy to hit OOM when several MCP servers plus one heavy file-processing session collide. 4GB provides a safety margin without paying for an oversized configuration you do not need.
Docker or direct install — decide this before moving on to chapter 2
If you are comfortable with Docker, run Hermes in a container from the start instead of installing directly on the OS. The reason lies in how the infrastructure in this chapter operates:
- Natural isolation — fits the “do not run as root” principle in 1.2; a container is by itself an additional isolation layer.
- Compact backup/migration — fits 1.6; the entire state lives in a single volume.
- Clean rollback — changing versions is just changing the image tag, with no dependency conflicts against other software on the VPS.
If you are not used to Docker, a direct install is still a reasonable choice — the infrastructure principles below (dedicated user, SSH, firewall, Tailscale, backups) apply almost identically; only the concrete deployment steps differ. Each installation path is detailed in chapter 2.
The five layers to build, in strict defensive order
This is the single most important thing to grasp before diving into the sub-sections — the order is not accidental:
- Dedicated User (1.2) — limits the damage of any incident, whether you install directly or run Docker.
- SSH Access (1.3) — the only admin entry point; it must be absolutely safe.
- Firewall (1.4) — open only the ports that are truly needed, no more.
- Tailscale (1.5) — a private network layer so you do not have to open any public port at all.
- Backups (1.6) — because agent memory, skills, and configuration accumulate over time; if lost, they are truly gone.
A real incident worth remembering — why this order is not just theory
The official documentation records a real attack in June 2026: a Hermes dashboard left exposed and unauthenticated on the public internet was discovered by an automated scanner, leading to the attacker making the agent install a backdoor SSH key onto the very server. Since that incident, Hermes requires authentication on the dashboard port when bound outside loopback — the “shortcut” of skipping this step is gone, whether you run Docker or install directly. This is why the infrastructure steps in 1.2–1.5 should be completed before Hermes actually goes into operation in chapter 2 — not something done afterwards just for show.
Linux OS
1.1. Linux OS — Picking the Right Server
Suggested configuration
- RAM: 4GB — enough headroom for multiple MCP servers, parallel crons, and attachment processing without OOM worries.
- vCPU: 2 cores is comfortable; 1 core still works if the budget is tight.
- OS: Ubuntu 24.04 LTS — best supported for both installation paths in chapter 2.
- Disk: at least 20-30GB if you plan to run Docker (images + layers + data volume); a little less for a direct install.
Notes
- Lock in the RAM/CPU and OS choice at this step, because chapter 2 (Installation) assumes the server is already ready to spec — avoid discovering missing resources in the middle of the install.
- Do not pick a VPS under 4GB if you plan to run Docker + several MCP servers + local STT/TTS at the same time — containerization adds a small overhead on top of a direct install.
- If you are unsure between Docker and a direct install, read 2.1 and 2.3 first to picture the long-term operating process of each, then decide — instead of switching halfway through.
Dedicated User
1.2. Dedicated User — Isolating Privileges
The core principle, for both installation paths
Hermes runs a shell-execution tool — that is part of what an agent is. If this process runs with admin (root) privileges, a single model reasoning error, a problematic community skill, or a successful attack can all escalate into full control of the server.
- If installing directly (2.1): Hermes must run under a dedicated system user with no standing sudo.
- If using Docker (2.3): a container is already an isolation layer by itself, but the container should still run as a non-root user inside, and the host Linux user operating Docker should be in the
dockergroup rather than running asrootdirectly.
The concrete steps to create the user and configure the service to run under it are covered in 2.6 (Systemd Service) and 2.3 (Docker).
Notes
- Whichever path you choose, do not permanently add the Hermes operating user to the
sudo/rootgroup unless truly needed — grant it temporarily for admin operations, then revoke it. - Finalize the user/privilege decisions before running the installer or
docker runin chapter 2 — reworking them after the install is usually more complex than doing it right from the start.
SSH Access
1.3. SSH Access — The Admin Gateway Must Be Tight
Principles, not specific configuration steps
SSH is the front door into the server itself — independent of whether you choose Docker or a direct install in chapter 2. Three principles to settle at the infrastructure layer, before touching the Hermes installation:
- Only accept key-based login; no passwords.
- Consider changing the default SSH port if the server is still exposed to the public internet.
- Always confirm an alternative access route (e.g., through Tailscale in 1.5) works before locking down the public route — do not lock yourself out of the VPS.
Notes
- On VPSes with a browser-based management console, avoid pasting commands with special characters through it — many providers mangle characters, silently corrupting long install commands (especially the
docker runwith many environment variables in 2.3). Always work over real SSH. - End goal: the public SSH port fully closed, access only via the Tailscale IP — reaching this goal before starting the install in chapter 2 keeps the entire process on a channel that is already safe.
Firewall
1.4. Firewall — Open Only the Ports You Actually Need
The port map to know before installing
| Port | Used for | Open publicly? |
|---|---|---|
| Dashboard/Web UI, Desktop Remote Gateway | Authentication mandatory | No — loopback or via Tailscale |
| OpenAI-compatible API server | Optional | Only when an outside client truly needs it |
| SSH | Administration | No if you already have Tailscale |
| Telegram/Discord/Slack… | Outbound connections | No ports need to be opened |
General rule: deny all inbound by default; open only what is actually necessary, via Tailscale.
A specific note if you choose Docker in 2.3
Containers expose ports to the outside in Docker’s own way (operating iptables directly) and can accidentally bypass the OS’s default firewall rules if not configured correctly at container start. Safe port mapping is detailed in 2.3 — but the infrastructure principle here remains: decide first which ports are allowed to be open, then configure how Hermes runs to match that decision, not the other way around.
Notes
- Lock in the firewall policy (default deny, allow only via Tailscale) before running any install command in chapter 2 — avoid discovering an exposed port only after the install.
- Re-audit the rules after adding every new integration (MCP HTTP server, webhooks…) — a new integration may need a port that you forget to close after testing.
Tailscale
1.5. Tailscale — A Private Network Without Open Ports
Its role in the infrastructure picture
Tailscale builds a WireGuard-based mesh VPN between your VPS and your devices. The VPS does not need any public inbound ports at all — this is the network layer that should be in place before you configure the Hermes dashboard or API server in chapter 2, because how those services bind their address (loopback, Tailscale IP, or 0.0.0.0) depends on whether Tailscale is already ready.
Notes
- Do not use any form of dashboard authentication bypass — Hermes has removed this shortcut; always pair Tailscale with a real authentication provider (Basic Auth for a trusted network, OAuth/OIDC for wider access). The concrete configuration is in chapter 2.
- If you plan to connect multiple MCP clients to the agent on the VPS, the recommended path is the Tailscale IP with a scoped token — far more stable than keeping a live SSH session around.
- Install Tailscale and confirm device-to-device connectivity before fully closing public SSH in 1.3 — reversing the order is the most common way to lock yourself out of the VPS.
Backups
1.6. Backups — Backing Up Agent Memory and Configuration
Why this is not a box-ticking step
Hermes accumulates value over time: agent memory that learns about you, skills it creates itself through the improvement loop (10.5), conversation history, tuned MCP/plugin configuration. Losing this data means losing built-up “memory” — it cannot be recovered by reinstalling the software, however you reinstall in chapter 2.
A difference to know before choosing an install path in chapter 2
- Direct install: data is scattered across configuration folders on the host — you need to know the exact paths to back up the right and complete set.
- Docker: if you mount the volume outside the container from the very first run command (2.3), backup becomes far simpler — one volume folder to save, and the container can be deleted and rebuilt from the image at any time without losing anything.
For exactly this reason, the “how will we back up” decision should be made before running the first install command in chapter 2 — with Docker in particular, forgetting to mount the volume from the start is a mistake that is hard to fix later without temporarily losing data.
Notes
- Do not think only about backing up configuration — API keys, email passwords, agent-created skills, and the memory database all need to be in backup scope, whichever install path you choose.
- Test a restore at least once before you actually need it — a backup that has never been restored is an unverified backup.
- Before upgrading Hermes to a new version (details in 2.5 — Updates), always take a separate manual snapshot/backup, whether you run Docker or a direct install.
Installation
2. Installation — Installing Hermes on the Server
Chapter 1 covered the infrastructure (VPS, user, network, backups); this chapter is where Hermes actually lands on that server and gets running. There are two paths — the direct install script or Docker — and as noted in chapter 1, you should commit to one path up front, not mix them halfway.
The four stages of a complete install
- Install Hermes and configure the initial model (2.1 or 2.3, depending on the path you chose) — get Hermes onto the machine and make it ready to use.
- Make sure the environment is right (2.2) — the Python, Node, and system dependencies that both paths need underneath.
- Verify (2.4) — run
hermes doctorbefore trusting that anything works. - Turn it into a long-lived background service (2.6) — so Hermes does not depend on an open terminal session.
And because this is not a once-and-forget task, 2.5 (Updates) closes the lifecycle — the upgrade procedure differs depending on the path you chose in step 1.
Official Installer and Model Setup
2.1. Official Installer and Model Setup
The install command
curl -fsSL https://raw.githubusercontent.com/NousResearch/hermes-agent/main/scripts/install.sh | bash
If you want to inspect the script before running it (recommended for production environments):
curl -fsSL https://raw.githubusercontent.com/NousResearch/hermes-agent/main/scripts/install.sh -o /tmp/hermes-install.sh
less /tmp/hermes-install.sh
bash /tmp/hermes-install.sh
A few useful options
install.sh --no-venv          # do not create a dedicated virtualenv
install.sh --skip-setup       # skip the interactive setup wizard, configure it yourself later
install.sh --branch main      # choose the git branch to install (default: main)
install.sh --dir <path>       # change the install directory (default: ~/.hermes/hermes-agent)
What happens during the install
The script builds Python 3.11 and Node 22 via uv, clones the source into ~/.hermes/hermes-agent, and then asks whether you want to install the gateway as a background service — if you agree, it automatically invokes the step equivalent to 2.6. It finishes with an interactive setup wizard to configure the model provider.
Notes
- On environments without an interactive terminal (running via CI/CD, automation scripts), use
--skip-setupand configure.envyourself afterwards — the script detects non-interactive mode and will remind you to runhermes gateway installmanually later instead of asking on its own. HERMES_HOME(~/.hermes) is the real data folder — know this path from the install step onwards so you can prepare the backup strategy in 1.6.- If installing on Android/Termux, note the installer’s specific warning: the system may kill background processes when Termux is suspended — not suitable for the always-on server role.
Initial model setup
After Hermes is installed, configure at least one model provider. The installer normally opens this setup wizard automatically. If you skipped it with --skip-setup, run:
hermes model
This is the interactive entry point for provider setup. Choose a provider, complete its authentication flow (OAuth or API key), and Hermes writes the result to ~/.hermes/config.yaml. The hermes model command configures providers; /model inside a chat session only switches between providers and models that are already configured.
Nous Portal — The Recommended Starting Point
One OAuth, everything included
hermes setup --portal
A single command: log in via OAuth, set Nous as the provider, and enable the Tool Gateway (web search, image generation, TTS, cloud browser — covered in chapter 8) at the same time — no individual API keys needed. This is exactly the choice recommended “if you only have time to set up one integration”.
Access 300+ models through one subscription
/model anthropic/claude-sonnet-4.6    # general purpose, best agentic
/model openai/gpt-5.5-pro             # strong reasoning + tool calling
/model google/gemini-3-pro-preview    # huge context window
/model deepseek/deepseek-v4-pro       # cost-efficient coder
Routing actually runs through OpenRouter underneath — meaning availability and failover mechanics are equivalent to a real OpenRouter API key, the only difference being that billing goes to the Nous subscription instead of per-provider credits.
It does not exclude other providers
If you already configured OpenRouter, Anthropic, or any other provider beforehand, Portal is just one additional option, not a replacement — switch back and forth with /model within a session or hermes model between sessions.
Notes
- Always check
hermes portal infoif you suspect requests are not going through the subscription as expected — local configuration can “drift” to another provider without you noticing. - Because the Tool Gateway features (8.3, 8.6, 8.7) come bundled with Portal, this is the least-effort choice for newcomers — you avoid having to separately register for Firecrawl, FAL, Browser Use, and OpenAI, one account each.
- For OpenRouter-specific features (routing preference, sticky sessions, advanced cache_control), note that these extensions are not guaranteed to work through Portal, because the serving backend is not always OpenRouter.
OpenAI Codex — Using Your Existing ChatGPT Subscription
Authentication via device-code OAuth
Hermes authenticates through ChatGPT’s OAuth device-code flow, stores credentials in ~/.hermes/auth.json, and can directly import existing Codex CLI credentials from ~/.codex/auth.json — no re-login needed if you have already used Codex CLI.
Limits to be aware of
The official documentation states clearly: it has not been specifically published which ChatGPT plans are eligible, and how usage through Hermes counts against that plan’s Codex limits — this is a gray area you need to check in practice when using it; there is no guaranteed number up front.
Notes
- If you already have a ChatGPT subscription used with the Codex CLI, take advantage of the credential import instead of logging in from scratch — save a step.
- Because usage limits are not clearly defined, closely monitor actual consumption over the first few sessions, especially if you plan to use it for heavy workloads (cron jobs running many turns per day).
- For coding tasks that lean heavily on strong reasoning, this is the natural choice if you are already familiar with the OpenAI ecosystem — it pairs well with chapter 15 (Development).
Anthropic — Claude via API Key, or Conditional OAuth
Two separate paths, not one
- OAuth (Claude Max): runs through Claude Code-style authentication, and only works with a Claude Max plan with additional usage credits purchased — the base Max allowance is not consumed by Hermes; only the extra credits/overage you purchase are used.
- Claude Pro cannot use this OAuth path — instead you must use
ANTHROPIC_API_KEY, billed pay-per-token at the standard API rates of the organization that owns the key.
hermes auth add anthropic    # set up OAuth
# or configure ANTHROPIC_API_KEY in .env for the API key path
Notes
- Confirm exactly which Claude plan you have before choosing an authentication path — confusing Pro with Max is the common cause of OAuth failing for no clear reason.
- If you only have Claude Pro (not Max), go straight to
ANTHROPIC_API_KEYinstead of trying OAuth — save debugging time. - Claude models via Anthropic directly have a different context window than through another provider (for example,
claude-opus-4.6is 1M on direct Anthropic but only 128K through GitHub Copilot) — always check the actual context length for the exact provider you are using, and do not assume it is fixed by model name.
OpenRouter — One Key, Hundreds of Models
Why this is the popular choice for people who want to experiment
A single OpenRouter API key gives access to 400+ models from 70+ providers, with automatic failover for supported models — one provider having an incident does not interrupt your whole work session.
Minimum context requirement
Most configurations require a model with at least 64K tokens of context — models with a smaller window may be rejected at startup, because the system prompt plus the tool schema can already fill a small window, leaving no room for actual conversation.
Provider Routing — fine-grained control over which backend serves a request
provider_routing:
  sort: "throughput"        # "price" (default), "throughput", or "latency"
  only: ["anthropic"]       # only use these providers
  ignore: ["deepinfra"]     # skip these providers
  order: ["anthropic", "google"]  # try in exactly this order
Shorthand syntax: add :nitro to a model name to prioritize throughput, :floor to prioritize the cheapest price.
Notes
- For models with low rate limits (free tier, around 20 req/min), multi-step tasks (agentic loops, the improvement loop in chapter 20) hit the ceiling very fast — switch to a provider with higher limits mid-session, or configure a fallback provider when you need heavy workloads.
- Use
data_collection: "deny"inprovider_routingif you need to exclude providers that may store/train on your data — important for sensitive work. - For comparing many models under the same agent without wanting to manage multiple accounts, OpenRouter is the fastest way to experiment — one key, switch models with
/modelwithout any additional configuration.
Local Models — Running Fully On-Machine
The two main options: LM Studio and Ollama
LM Studio is supported as a first-class provider — with authentication, doctor checks, reasoning support, and automatic model listing via /models directly from the app. For other self-hosted endpoints (Ollama, or any OpenAI-compatible server), use custom configuration:
model:
  default: "qwen3.5:9b"
  base_url: "http://localhost:8080/v1"
  context_length: 131072   # set explicitly if the system cannot auto-detect
Why you need to declare context_length manually
The system auto-detects context length through multiple sources (Anthropic API, OpenRouter metadata, models.dev…), but for a self-hosted endpoint, none of those sources knows about your model — you must declare it explicitly to avoid Hermes applying the inaccurate 128K default fallback.
Notes
- A local model is the right choice for data that must absolutely never leave your machine — consistent with the “keep the sensitive-data processing surface as small as possible” principle repeated in 11.3, 16.6, and 8.7.
- For local models used for auxiliary tasks (vision, compression, 8.5 and below), carefully check the context window of the summary/compression model — if it is smaller than the main model, compressing context mid-long-conversation can silently fail, losing the middle of the conversation with no replacement summary.
- Local models are usually not as strong as large cloud models for complex agentic tasks (multi-step tool calling) — consider using one as the main model for simple tasks, combined with a fallback to the cloud when higher accuracy is needed.
After setup: switching models and configuring fallbacks
Once one or more providers are configured, use /model inside a session to switch models:
On-the-Fly Switching
Three levels of switching, three different scopes of impact
/model <provider>/<model>            # change for the current session
/model <provider>/<model> --global   # write to config.yaml, applies to new + current session
/model <provider>/<model> --once     # change for one turn only, auto-restores the old model right after
--once is useful for “asking Opus just this once” (escalating a hard question to a stronger model) or “using a cheap model for a trivial question” — no need to remember to switch back. Note: a single --once switch breaks the prompt-cache prefix twice (switch out, then switch back in) — with a prefix-caching provider (Anthropic, OpenAI), the turn after restoration may be slower than usual because the cache has to be rebuilt.
Fallback providers — automatic switching when something goes wrong
fallback_providers:
  - provider: openrouter
    model: anthropic/claude-sonnet-4
  - provider: nous
    model: anthropic/claude-sonnet-4.6
When the primary provider encounters an error (rate limit, overload, authentication failure, connection loss), Hermes automatically switches to a backup provider mid-session without losing the conversation. The chain is tried one entry at a time; activation happens only once per session — it does not keep retrying the whole chain continuously.
Auxiliary task routing — separating the auxiliary model from the main model
By default, auxiliary tasks (image analysis, web page summarization, context compression, session naming) route through exactly the main model you chose — convenient, but potentially expensive if the main model is a pricey reasoning type (Opus, MiniMax M2.7…). Explicitly set a cheap/fast model for these auxiliary tasks, independent of the main model:
auxiliary:
  vision:
    provider: openrouter
    model: google/gemini-flash
  compression:
    provider: openrouter
    model: google/gemini-flash
Notes
- Configuring fallback providers should be mandatory for any production workload (especially cron jobs in 17.4/18) — a provider hitting its rate limit in the middle of the night should not break an important job.
- Always check that the context window of the auxiliary compression model is at least equal to the main model — if it is smaller, the context compression command will fail and silently lose the middle of the conversation, exactly the risk mentioned above.
- Use
--oncefor the occasional questions that need an expensive model, instead of switching--globaland forgetting to switch back — avoiding accidentally running the entire rest of the session on a more expensive model than necessary.
Installation checklist
- Install Hermes with the official script.
- Configure at least one model provider.
- Run
hermes doctorafter provider setup (see 2.4). - Start a chat session and verify that the selected model can respond.
- Configure the long-lived service only after the installation works.
Python and Dependencies
2.2. Python and Dependencies — What Runs Underneath
The core dependency set
Whether installed via script or Docker, Hermes needs: Python 3.11+ (managed via uv for fast, isolated installs), Node.js 22 (for JS components such as the WhatsApp bridge and some npx-based MCP servers), ripgrep (fast code search inside the file tools), and ffmpeg (audio processing for voice messages, TTS/STT).
Installing extra dependencies for the messaging gateway
If you only use the CLI, the default install set is enough. But to fully enable the Telegram/Discord/Slack gateway, you need to install a separate dependency group:
cd ~/.hermes/hermes-agent && uv pip install -e ".[messaging]"
Why this section stands on its own instead of being folded into 2.1
This is the most common source of “installed but not working correctly” errors — for example, a background service (launchd on macOS, systemd on Linux) starts with a minimal PATH that cannot see the Homebrew, nvm, or cargo you installed afterwards, leading to “node not found” errors when running the WhatsApp bridge, or “ffmpeg not found” when processing voice.
Notes
- If you install system tools (Homebrew, nvm…) after the gateway service is already installed, you must rerun
hermes gateway installto capture a fresh PATH snapshot — this is the most easily forgotten step. - When you hit a port conflict, check quickly with
lsof -i :8080before guessing at other causes. hermes config showis the fastest way to verify that the configuration is actually being loaded correctly, before going deeper into debugging.
Docker
2.3. Docker — The Containerized Path
The official image: Hermes Agent docker image
Tip: Pull the stable image tag, since Hermes is developing fast and the latest tag may contain bugs.
Example:
docker pull nousresearch/hermes-agent:stable
Full deployment with Docker Compose
Hermes Agent can be installed using Docker Compose with full configuration management — a better fit when you need to publish ports, set resource limits, or manage container-level settings centrally.
Prerequisites
- Docker and Docker Compose plugin installed (
docker compose versionshould work). - User has
sudoprivileges or is in thedockergroup. - Ports
8642and9119are available on the host (open in firewall if needed).
Prepare Directory
mkdir -p ~/hermes && cd ~/hermes
mkdir -p data
Place the docker-compose.yml file (below) in ~/hermes.
Check the UID/GID of the host user that should own the data/ folder (you will need them in docker-compose.yml):
id -u && id -g # usually 1000 and 1000 for the first user on Debian/Ubuntu
Directory structure after this step:
hermes/
├── docker-compose.yml
├── .env              ← "compose-level" .env, created in the next step
└── data/              ← Hermes stores its own data here
    └── .env           ← "Hermes-level" .env, created by Hermes itself (not by you)
Two different
.envfiles exist in this setup. They have different owners and different purposes. See Two.envfiles below before you put any secret anywhere.
docker-compose.yml
services:
  hermes:
    image: nousresearch/hermes-agent:stable
    container_name: hermes
    restart: unless-stopped
    command: gateway run
    shm_size: '2g'
    ports:
      - "8642:8642"
      - "9119:9119"
    volumes:
      - ./data:/opt/data
      - /etc/localtime:/etc/localtime:ro
      - /etc/timezone:/etc/timezone:ro
    env_file:
      - .env
    environment:
      - HERMES_UID=1000
      - HERMES_GID=1000
      - GBRAIN_TOKEN=${GBRAIN_TOKEN}
      - HERMES_DASHBOARD=1
      - HERMES_DASHBOARD_HOST=0.0.0.0
      - HERMES_DASHBOARD_BASIC_AUTH_USERNAME=${HERMES_DASHBOARD_BASIC_AUTH_USERNAME}
      - HERMES_DASHBOARD_BASIC_AUTH_PASSWORD=${HERMES_DASHBOARD_BASIC_AUTH_PASSWORD}
      - HERMES_DASHBOARD_BASIC_AUTH_SECRET=${HERMES_DASHBOARD_BASIC_AUTH_SECRET}
    deploy:
      resources:
        limits:
          memory: 4G
          cpus: "2.0"
Note that there are no TELEGRAM_* variables in this file. The Telegram bot token and allowed user IDs are entered into Hermes itself (via hermes setup or hermes config set, see Configure Telegram) and are stored in data/.env.
Set HERMES_UID / HERMES_GID to the values printed by id -u / id -g if they are not 1000.
Create the compose-level .env file
Create .env in the same directory as docker-compose.yml:
nano .env
Paste the following, replacing <...> with your actual values:
# --- Dashboard auth (required in newer Hermes versions) ---
HERMES_DASHBOARD_BASIC_AUTH_USERNAME=admin
HERMES_DASHBOARD_BASIC_AUTH_PASSWORD=<strong password you choose>
HERMES_DASHBOARD_BASIC_AUTH_SECRET=<output of: openssl rand -hex 32>
Generate your own secret for the dashboard session signing:
openssl rand -hex 32
Protect this file:
chmod 600 .env
Do not commit .env to git. If using git, add .env and data/ to .gitignore.
Two .env files: compose-level vs Hermes-level
~/hermes/.env (next to docker-compose.yml) | ~/hermes/data/.env (inside the data folder) | |
|---|---|---|
| Created by | You, before the first start | Hermes, on first start / when you run hermes setup |
| Read by | Docker Compose | Hermes itself (inside the container, at /opt/data/.env) |
| Purpose | Container settings and values substituted into docker-compose.yml via ${...} | Hermes’ own configuration and secrets: provider API keys, Telegram bot token, allowed users, etc. |
| Edited with | A text editor | hermes setup, hermes config set, or the dashboard (a text editor also works, but do not overwrite the whole file) |
| Lifetime | Lives with your compose project | Persistent state; survives container recreation because ./data is a volume |
| Typical contents | HERMES_DASHBOARD_BASIC_AUTH_*, GBRAIN_TOKEN | TELEGRAM_BOT_TOKEN, TELEGRAM_ALLOWED_USERS, LLM provider keys |
Rule of thumb:
- If the value configures how the container runs (ports, dashboard login, UID/GID), it belongs in the compose-level
.env/docker-compose.yml. - If the value configures what Hermes does (messaging platforms, model providers, API keys), it belongs in
data/.env, and you should set it through Hermes’ own commands.
Keep each variable in one place only. If the same variable exists in both files with different values, it is not obvious which one wins, and a value you change with hermes config set can appear to “not take effect”. Do not duplicate Telegram variables in the compose-level .env.
Why Telegram variables in the compose-level .env don’t work. env_file: and environment: only inject variables into the container’s environment. The Hermes gateway runs as a supervised service inside the container (see the next section), and does not reliably inherit that environment. In practice the gateway reads its credentials from data/.env, so a token that only exists in the compose-level .env is invisible to it. The symptom is this line in the logs:
WARNING gateway.run: telegram is enabled but no profile (default or secondary)
provided a bot credential for it — the platform is not being served.
What is s6 inside the container?
The image uses s6-overlay, a small init and process supervisor made for containers. Instead of running hermes gateway run directly as the container’s main process, the container starts like this:
- Init stage (as root): s6 runs setup scripts (
/etc/cont-init.d/*). These applyHERMES_UID/HERMES_GIDto thehermesuser, sync bundled skills intodata/skills/, and fix permissions. - Service stage (as
hermes): s6 starts and supervises the long-running services: the gateway (messaging platforms + cron scheduler) and, ifHERMES_DASHBOARD=1, the web dashboard. - Supervision: if a service crashes, s6 restarts it automatically without restarting the whole container.
Things worth knowing because of this design:
- You will see s6 lines (
s6-rc: info: service ... starting) indocker compose logs. They are normal. - Service processes started by s6 do not necessarily see the variables you pass with
env_file:/environment:. This is why Hermes keeps its own settings indata/.env. - To opt out of supervision and get the old foreground behavior, set
HERMES_GATEWAY_NO_SUPERVISE=1(or runhermes gateway run --no-supervise). Most users should keep the default. - The container starts as root only so that the init stage can change the UID/GID; the services themselves do not run as root.
Obsidian Vault
To connect Hermes to an Obsidian Vault, configure both a Docker volume mount and OBSIDIAN_VAULT_PATH. Setting only the variable does not mount the Vault into the container. See Obsidian for the configuration and read-only verification prompt.
Environment Variables Explained
Set in docker-compose.yml / compose-level .env:
| Variable | Description |
|---|---|
HERMES_UID / HERMES_GID | UID/GID that the hermes user inside the container runs as. Set them to the same values as your host user (id -u / id -g) so files in ./data belong to you and you can read/edit them without sudo. Default inside the image is 10000. |
HERMES_DASHBOARD=1 | Enables the web dashboard. |
HERMES_DASHBOARD_HOST=0.0.0.0 | Makes dashboard listen on all network interfaces in the container (published to host port via ports:). |
HERMES_DASHBOARD_BASIC_AUTH_USERNAME / _PASSWORD | Dashboard login credentials — required when binding to 0.0.0.0. |
HERMES_DASHBOARD_BASIC_AUTH_SECRET | Secret used to sign session tokens; keep consistent across restarts to avoid logout. |
Set through Hermes, stored in data/.env:
| Variable | Description |
|---|---|
TELEGRAM_BOT_TOKEN | Token for Hermes to control your Telegram bot (get it from @BotFather). |
TELEGRAM_ALLOWED_USERS | Blocks unauthorized users — only listed numeric Telegram user IDs can send commands. Separate multiple IDs with commas. |
About ports:
8642:8642— Main Hermes API/gateway port.9119:9119— Dashboard web port, accessible viahttp://<server-ip>:9119.
About shm_size: '2g' — Increases shared memory for the container, useful because Hermes uses a headless Chromium browser and heavy tasks internally (Chromium can crash with the default 64 MB).
About deploy.resources.limits — Limits the container to max 4GB RAM and 2 CPU cores. Docker Compose v2 applies these limits for regular docker compose up. If your Compose version ignores them, use mem_limit / cpus at service level instead.
Note: If you need to share a network (
hermes-net) with other containers, add:networks: - hermes-net networks: hermes-net: external: true name: hermes-net
File Ownership: HERMES_UID and HERMES_GID
Why this matters. By default the process inside the container runs as the hermes user with UID/GID 10000. Every file it writes into ./data (config, API keys, memory, logs) is therefore owned by UID 10000, often with strict permissions (600/700). Your normal host user (UID 1000) then cannot read or edit them, and you get Permission denied when you try cat ./data/config.yaml or edit files in the folder.
How it works. As described in the s6 section, the container starts as root, the init stage changes the hermes user to the UID/GID you set in HERMES_UID / HERMES_GID, fixes ownership, and then services run as that user. Hermes still does not run as root, but its files now belong to your host user.
Do not add
user: "1000:1000"to the compose file. The init stage needs to start as root to apply the UID/GID change; forcinguser:skips that step and usually causes permission errors.
New installation. If you created data/ yourself with mkdir -p data (as above), it is already owned by your user. Just set HERMES_UID and HERMES_GID in docker-compose.yml before the first docker compose up -d. No extra step is needed.
Existing installation (the chown step). If Hermes has already run without these variables, the existing files in ./data are still owned by UID 10000. Changing the variables does not fix the old files automatically, so change their owner once:
cd ~/hermes
docker compose down                       # stop first to avoid writing files while changing ownership
sudo chown -R 1000:1000 ./data            # use your own values from `id -u` / `id -g`
# add/confirm HERMES_UID=1000 and HERMES_GID=1000 in docker-compose.yml
docker compose up -d
docker compose logs -f hermes             # look for a line like "Changing hermes UID to 1000"
Verify the result:
docker exec hermes id                     # expected: uid=1000(hermes) gid=1000(hermes)
ls -ln ./data                             # owner and group should be 1000 1000
Impact on Hermes. None in normal use. All data, config and memory are preserved; only the owner of the files changes. Hermes keeps running as a non-root user inside the container.
Rollback. If something goes wrong, stop the container, restore the old owner and remove the two variables:
docker compose down
sudo chown -R 10000:10000 ./data
# remove HERMES_UID / HERMES_GID from docker-compose.yml
docker compose up -d
Avoid
chmod -R 777 ./data. It “works”, butdata/contains tokens and API keys, so it should not be readable by every user on the host.
Start Hermes
cd ~/hermes
docker compose up -d
docker compose logs -f hermes
On the first start Hermes creates its own files inside ./data, including data/.env and data/config.yaml. Telegram is not working yet at this point: the bot token has not been entered. A line like telegram is enabled but no profile ... provided a bot credential in the log is expected until you finish the next step.
Configure Telegram: bot token and allowed users
Have these two values ready:
- Bot token: create a bot with @BotFather and copy the token (format
123456789:AAxxxxxxxx...). - Allowed user IDs: your numeric Telegram user ID (not your @username), for example from @userinfobot. Multiple IDs are separated by commas.
You can enter them in either of two ways. Both end up in the same place: the values are written to data/.env (./data/.env on the host, /opt/data/.env in the container).
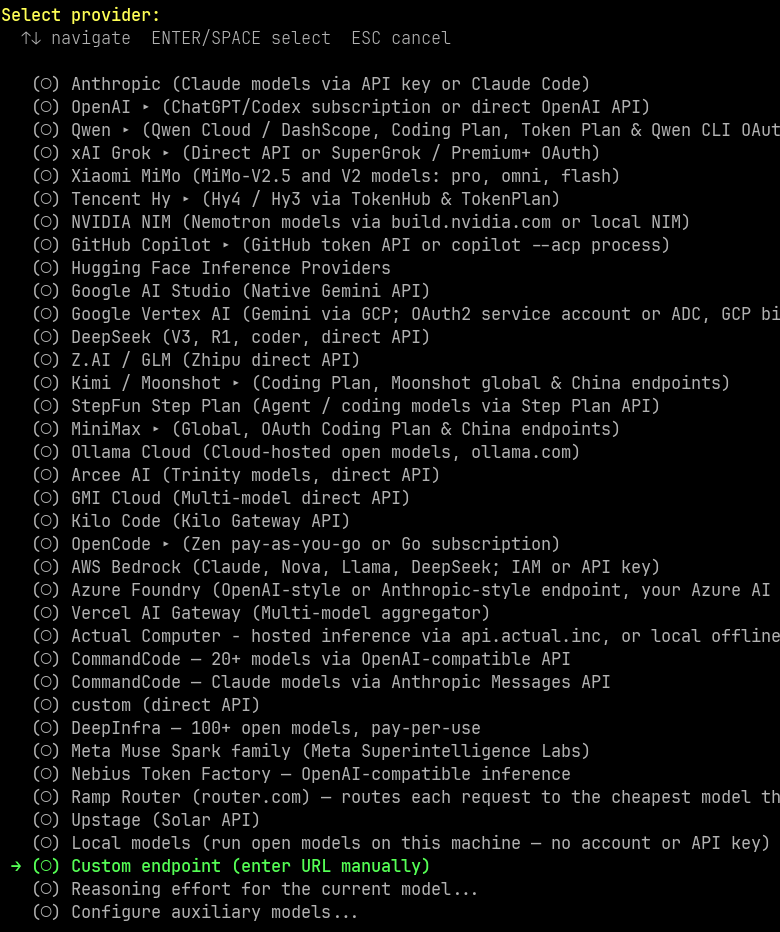
Option A: during the setup wizard
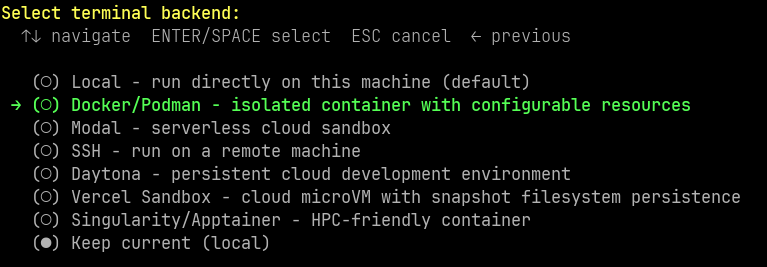
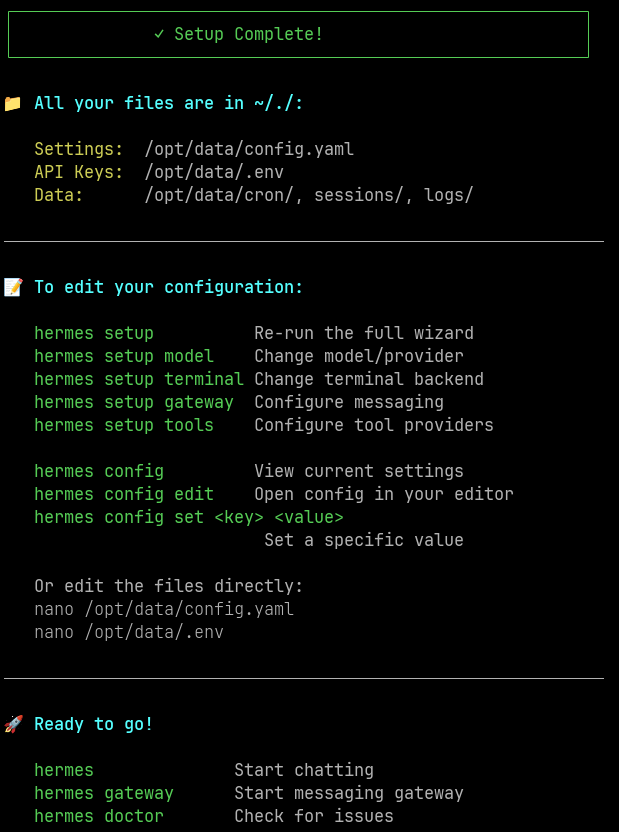
Open a shell in the container as the hermes user and run the wizard:
docker compose exec -u hermes -it hermes /bin/bash
hermes setup
Use
-u hermesso commands run as the unprivilegedhermesuser. A root shell (plaindocker compose exec ... bash) would create files owned by root in./dataand can cause permission errors when the gateway runs ashermes.
Pick your provider and the Telegram platform when asked, and paste the token and user ID(s).

Option B: set them later with hermes config set
Skip the Telegram part of the wizard (or set up later) and run, inside the container shell:
hermes config set TELEGRAM_BOT_TOKEN '123456789:AAxxxxxxxxxxxxxxxxxxxxxxxxxxxxxxxxx'
hermes config set TELEGRAM_ALLOWED_USERS '8945198970'
Or run the same commands directly from the host, from any directory, without opening a shell:
docker exec -u hermes hermes hermes config set TELEGRAM_BOT_TOKEN '123456789:AAxxxxxxxxxxxxxxxxxxxxxxxxxxxxxxxxx'
docker exec -u hermes hermes hermes config set TELEGRAM_ALLOWED_USERS '8945198970'
(-u hermes = user inside the container, first hermes = container name, second hermes = the CLI.)
For several allowed users: hermes config set TELEGRAM_ALLOWED_USERS '111111111,222222222'.
Verify and restart
Check that the values were written (token masked):
grep -n "TELEGRAM" ./data/.env | sed 's/=.*/=***/'
Restart the container and confirm the warning is gone:
docker compose restart hermes
docker compose logs --tail=30 hermes
Then send a message to your bot in Telegram.
Security tip: the token ends up in your shell history when typed on the command line. Delete the entry afterwards (
history -d <line-number>) or start the command with a space if your shell hasHISTCONTROL=ignorespace. Never put the token indocker-compose.ymlor the compose-level.envas well, to avoid two copies drifting apart.
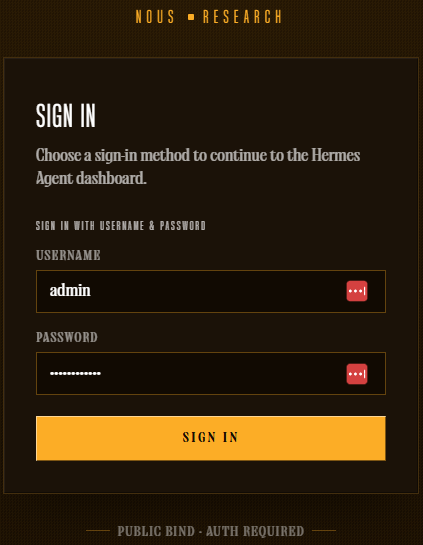
Access Dashboard
Open browser:
http://<server-ip>:9119
Login with HERMES_DASHBOARD_BASIC_AUTH_USERNAME / HERMES_DASHBOARD_BASIC_AUTH_PASSWORD from the compose-level .env.
Useful Commands
| Task | Command |
|---|---|
| View realtime logs | docker compose logs -f hermes |
| Restart container | docker compose restart hermes |
| Stop | docker compose down |
| Update to new image | docker compose pull && docker compose up -d |
Apply changes made in docker-compose.yml or the compose-level .env | docker compose up -d --force-recreate |
| Enter container shell | docker compose exec -u hermes -it hermes /bin/bash |
| Run a Hermes command without entering the shell (from any directory) | docker exec -u hermes hermes hermes <command> |
Set a Hermes variable (written to data/.env) | docker exec -u hermes hermes hermes config set KEY 'value' |
List Telegram variables in data/.env (masked) | grep -n TELEGRAM ./data/.env | sed 's/=.*/=***/' |
| Check which user Hermes runs as | docker exec hermes id |
Fix ownership of ./data | docker compose down && sudo chown -R $(id -u):$(id -g) ./data && docker compose up -d |
| Check generated config | cat ./data/config.yaml |
Note: docker restart hermes restarts the container but does not pick up changes in docker-compose.yml or the compose-level .env. Use docker compose up -d --force-recreate for that. Changes made with hermes config set (stored in data/.env) only need a restart.
Additional Security Recommendations
- If your server has a public IP, restrict port
9119/8642in firewall to your IP only, instead of opening to the entire internet. You can also publish them on localhost only ("127.0.0.1:9119:9119") and reach them through a reverse proxy or VPN. - Consider placing Hermes behind a reverse proxy (Nginx/Caddy) with HTTPS if accessing dashboard remotely frequently.
- Change dashboard password periodically; don’t reuse passwords from other services.
- Backup
./datadirectory regularly as it containsconfig.yaml,.env(all your secrets) and Hermes state data. Treat backups as sensitive.
Troubleshooting
Telegram bot does not reply; log shows telegram is enabled but no profile (default or secondary) provided a bot credential
→ The gateway cannot find the bot token. Make sure TELEGRAM_BOT_TOKEN exists in data/.env (not only in the compose-level .env):
grep -n "TELEGRAM" ./data/.env | sed 's/=.*/=***/'
If missing, set it with hermes config set (see Configure Telegram) and restart.
Telegram bot connects but ignores your messages
→ TELEGRAM_ALLOWED_USERS is empty or wrong. It must contain your numeric user ID, not your username.
Log shows Conflict: terminated by other getUpdates request
→ Another instance (an old container, another server) is using the same bot token. Stop it (docker ps -a).
Still seeing “Refusing to bind dashboard to 0.0.0.0”
→ Check that the compose-level .env has all three HERMES_DASHBOARD_BASIC_AUTH_USERNAME/PASSWORD/SECRET variables, and the container is reading the correct .env file (relative path must match the directory where you run docker compose up).
Permission denied when reading ./data on the host, or Hermes cannot write to /opt/data
→ UID/GID mismatch. Check ls -ln ./data and docker exec hermes id: both should show the same UID/GID as id -u / id -g. If not, set HERMES_UID / HERMES_GID in docker-compose.yml and run the chown step in File Ownership above (docker compose down first).
A value changed with hermes config set seems ignored
→ The same variable probably also exists in the compose-level .env / docker-compose.yml with a different value. Keep each variable in one place only.
Container won’t start / exits immediately
→ Check logs: docker compose logs hermes. Usually due to missing required variables or invalid token format.
Notes
- Always mount the volume outside the container from the very first run command (
./data:/opt/datawith Compose,~/.hermes:/opt/datawithdocker run) — skipping this step makes all configuration/memory disappear when the container is deleted, with no way to recover it. - Do not overwrite
data/.envas a whole file (for example by copying your compose-level.envover it, or by bind-mounting./.envonto/opt/data/.env). It holds all of Hermes’ own secrets and is rewritten by Hermes when you runsetup/config set. - On a VPS with the provider’s browser-based console, typing long
docker runcommands (with many-e KEY=valuevariables) directly through it is risky — the:,@,=characters are easily mis-transmitted, silently corrupting tokens/API keys. Always SSH in properly to run commands. - Combine with Tailscale (1.5).
Hermes Doctor
2.4. Hermes Doctor — Verify Before You Trust
The central diagnostic command
hermes doctor
It runs a comprehensive check: system dependencies (Python, Node, ffmpeg, ripgrep), model provider configuration, the important files inside ~/.hermes/, and on Windows/browser-tool environments it also auto-detects missing auxiliary components (such as Chromium for agent-browser) and prints the fix command for you.
Not a run-once-and-done tool
This is a tool you should come back to many times over the server’s lifetime:
- Right after the first install (2.1 or 2.3).
- After adding a new model provider — always rerun it to get a clean pass before connecting any chat platform, because debugging provider errors through a Telegram/Discord interface is far more annoying than debugging directly in a terminal.
- When the service does not start correctly and the systemd logs are not clear enough — run it manually under the exact operating user to see the error more clearly:
sudo -iu hermes hermes doctor
Notes
- Warnings about unconfigured API keys are normal at the fresh-install stage — not an error to fix immediately, just a reminder to finish the setup.
- After every
hermes update(2.5), rerundoctoras a confirmation that the new version starts cleanly and the gateway configuration still works — do not consider an update successful just because the command finished without errors. - When debugging through systemd, always try running it manually under the service’s exact user first — the manual logs are almost always clearer than
systemctl status.
Updates
2.5. Updates — Upgrading to a New Version
For a direct install
Switch to the correct operating user before updating, then confirm with doctor and a test gateway start:
sudo -iu hermes
hermes update
hermes doctor
hermes gateway start
This final confirmation step matters — it ensures the new version starts cleanly and the existing gateway configuration still works, not merely that the update command finished without errors.
For Docker
Upgrade by changing the image tag, without touching anything inside the running container:
docker pull nousresearch/hermes-agent
docker stop hermes && docker rm hermes
docker run -d --name hermes -v ~/.hermes:/opt/data ... nousresearch/hermes-agent
Since all state lives on the volume, “updating” is really replacing the old container entirely with a new one running the new image — rollback is just as simple as rerunning with the old version tag.
Notes
- Always take a manual backup (1.6) before updating, whichever method you use — the data in
~/.hermesis not automatically protected just because you are “only updating the software”. - Read the changelog/release notes before updating on a production machine, especially if you are running complex MCP or custom plugin configurations — some behavior changes (like the dashboard authentication rule mentioned in 2.3) can directly affect how you have things configured.
- With Docker, keep the old image tag around (do not delete it immediately) until you have confirmed the new version runs stably — this allows an instant rollback if you find a problem.
Systemd Service
2.6. Systemd Service — Making It a Real Background Service
Installing the service (applies to the direct install only — Docker uses --restart unless-stopped in place of this)
hermes gateway install          # Linux, systemd user service
sudo hermes gateway install --system   # Linux, system-wide, starts at boot even without a login
The service restarts itself on crash and starts automatically when the machine reboots.
Everyday management commands
hermes gateway start
hermes gateway status
hermes gateway logs --follow
Why enable-linger is needed (already mentioned in 1.2)
With a systemd user service (not using --system), the service only lives while there is a user session — without linger, the service stops when you disconnect SSH:
sudo loginctl enable-linger hermes
After this step, the service survives both SSH disconnects and server reboots, restarting itself through the systemd user instance.
When systemd cannot be trusted
On WSL2, systemd support is unstable — many installs do not enable it by default, and even when enabled, the service may not survive a WSL restart or Windows shutting down on idle. In that case, running in the foreground directly or via tmux/nohup is the more practical solution:
tmux new -s hermes 'hermes gateway run'
# reattach later: tmux attach -t hermes
Notes
- On a real Linux VPS (not WSL), always prefer systemd over tmux/nohup — systemd restarts on crash, tmux does not.
- After installing new tools (Homebrew, nvm, cargo…) on a machine that already has the gateway service, remember to rerun
hermes gateway installto capture the PATH again — missing PATH entries are the most common reason auxiliary tools (voice, WhatsApp bridge) suddenly report “not found” even though you installed them correctly. - On a freshly installed VPS,
gateway startmay fail immediately ifgateway installhas not been run first — this is expected behavior, not a bug; always install the service before trying to start it.
Interfaces
4. Interfaces — Many Doors In, One Single Agent
This is the key difference worth stating up front: Hermes is not “a CLI with a few side interfaces” — it is one single agent core (same config, same API key, same skills, same memory) that you can reach from six different directions. A session that starts in the Terminal can continue in the TUI, the Desktop app, or the Web Dashboard — because they all read and write the same on-disk data layout (~/.hermes/); they are not separate products.
Quick pick — which interface for which job
| Interface | Use it when |
|---|---|
| Terminal (4.1) | One-off commands, scripting, quick debugging over SSH |
| TUI (4.2) | Long interactive work right in the terminal, with a visual status view |
| Desktop Application (4.3) | You want a real graphical app, not a command line |
| Web Dashboard (4.4) | Managing remotely from a browser, or on your phone |
| IDE via ACP (4.5) | Coding in Zed/JetBrains/Neovim, with the agent right inside the editor |
| OpenAI-Compatible API (4.6) | Calling Hermes as a model backend from another application or tool |
The “shared state” principle that runs through all six sections
This is the single thing worth stating carefully before going section by section: everything you set up in the Terminal (skills, MCP servers, model configuration) is already there when you open the Desktop app; everything done in the Desktop app shows up the moment you return to the CLI. There is no such concept as “syncing” between interfaces — because they were never separate editions to begin with; they are different windows onto the same agent.
Terminal
4.1. Terminal — The Original Interface, for One-Off Commands
Role
This is where every journey with Hermes begins — installation, the setup wizard, and all administrative commands (hermes doctor, hermes update, hermes config show…) run through the terminal. For short tasks that do not need a long interactive state, typing the command straight in and getting the result is the fastest route.
When to stay in the Terminal and not move up to the TUI
- Run a single CLI command and exit (check configuration, view logs, manage skills/plugins).
- Run inside automation scripts or CI/CD.
- SSH quickly into a VPS to debug a specific issue.
Notes
- For administrative operations (update, doctor, backup), the Terminal is always the most reliable choice — it does not depend on whether a graphical interface is running.
- When debugging an error and the systemd log is not clear enough, going back to the Terminal and running the command directly under the exact operating user always yields clearer information.
TUI
4.2. TUI — An Interactive Interface Right Inside the Terminal
Role
The TUI (Terminal User Interface) is a more visual interface layer built right on top of the terminal — it still runs over SSH/console as usual, but with layout, widgets, and shortcuts instead of plain command lines. This is the environment that fits a long working session, where you need to watch the agent’s state visually while talking to it.
Extensible, not just out of the box
For deeper customization, Hermes exposes “extension seams” that let you build a wrapping CLI (a wrapper CLI) without touching the whole internal logic — add your own widgets, shortcuts, and custom slash commands — while still inheriting all of the TUI’s original behavior.
Notes
- The TUI is the natural choice when working over SSH but wanting an experience closer to a graphical application — nothing to install beyond the terminal connection you already have.
- If your team has specific needs (a private kanban board, custom monitoring panels), consider building a wrapper CLI through the extension hooks instead of forking the Hermes source directly — easier to maintain when Hermes ships a new version.
Desktop Application
4.3. Desktop Application — The Native Graphical App
Role
Hermes Desktop is a native application for macOS, Windows, and Linux — a dedicated chat window that drives the Hermes Agent, instead of working through the command line. It is not a separate product: it runs on the same agent core, with the same sessions, skills, and memory as the CLI and the gateway.
Two connection modes
- Self-managed local backend — the app starts and controls an agent running right on the machine where the app is used.
- Connecting to a remote backend — point the app at a Hermes running on a VPS/home server (the exact model described in chapter 1), over a Tailscale IP or OAuth Nous Portal for a public connection.
Notes
- If you have already built the VPS per chapters 1–2, use the Desktop app in “remote gateway” mode pointing at that backend — immediately reuse the always-on infrastructure you already have, with no need to run a parallel local agent.
- Because state is shared with every other interface, a session that starts on your phone (via gateway messaging) can be fully “seen” and continued from the Desktop app — no manual syncing of any kind.
Web Dashboard
4.4. Web Dashboard — Managing from the Browser
Role
The dashboard runs on the web, letting you manage Hermes from any browser — including a phone — without installing a dedicated app. This is also the interface of the admin ports (9119) mentioned in 1.4/2.3.
Security is a hard requirement, not an option
This is the most important point to restate in this section: if the dashboard is bound outside loopback with no authentication provider registered, Hermes refuses to start rather than silently running unprotected. The safe way to access it, exactly as presented in 1.5, is to keep the dashboard on loopback and reach it over an SSH tunnel or Tailscale, or to enable one of the authentication providers (Basic Auth for trusted networks, OAuth/OIDC for broader access).
Notes
- Do not expose the dashboard to
0.0.0.0even when authentication is in place — combining a Tailscale/SSH tunnel with authentication is a two-layer defense; either one alone is not enough. - On a phone, the dashboard in the browser (combined with Tailscale) is usually the most compact way to check the agent’s status quickly without installing another app.
IDE via ACP
4.5. IDE via ACP — Direct Integration into the Code Editor
What ACP is, and why it matters
The Agent Client Protocol (ACP) is an open standard initiated by Zed, co-developed with JetBrains, with participation from Anthropic, OpenAI, Google, and GitHub — playing the same role as the Language Server Protocol (LSP), but for AI agents instead of programming languages. An agent that supports ACP runs in any editor that supports ACP, with no per-editor integration needed.
How to start Hermes in ACP mode
hermes acp
This command starts Hermes as an ACP stdio server — the editor (Zed, JetBrains, Neovim…) spawns Hermes as a subprocess and talks to it over JSON-RPC 2.0 on stdin/stdout.
Editor-side configuration (Zed example)
{
  "agent_servers": {
    "Hermes": {
      "command": "hermes",
      "args": ["acp"]
    }
  }
}
Synergy with MCP
ACP is designed to be MCP-friendly — the editor can pass MCP server configuration straight through to the agent, and since Hermes already knows how to use MCP (11.1), combining the two standards flows seamlessly, with no dedicated translation layer.
Notes
- ACP does not replace the CLI or the gateway — it is a third parallel interface mode; you pick whichever fits the working context of the moment, with no need to “switch over” to ACP entirely.
- Because Hermes is already registered in the ACP Registry, the agent shows up ready in the agent picker of supporting editors, with no extra configuration beyond installing Hermes.
- For editors that use Zed-like JSON configuration (JetBrains, Neovim plugins such as CodeCompanion.nvim), the configuration template is nearly identical — only the location of the settings file differs.
OpenAI-Compatible API
4.6. OpenAI-Compatible API — Calling Hermes as a Model Backend
Role
Hermes can run a local HTTP server following the OpenAI-compatible standard, letting third-party applications and tools (which only know how to call an OpenAI-style API) connect to Hermes as if it were an ordinary model endpoint.
A practical use — the Subscription Proxy
One noteworthy use: this server can forward requests to an upstream provider already authenticated via OAuth (such as Nous Portal or xAI) — the external application only needs to point at the proxy with any bearer token, while the proxy attaches the real OAuth credentials when sending. This lets you use an existing subscription (instead of a usage-based API key) with tools that only support a direct API key.
Notes
- This is a useful doorway when you want to use Hermes (or the model behind it) from tools that do not support MCP/ACP but do support an OpenAI-style endpoint — extending the integration surface beyond the Hermes-native ecosystem.
- Exactly per the firewall principle in 1.4/2.3: only open this API port when a client truly needs it, and keep it inside your Tailscale network rather than exposing it on
0.0.0.0unless public internet access is truly required. - For managing multiple rotating keys for the same provider (to avoid rate limits), Hermes has its own credential pool mechanism — worth a look if this API server will serve a high call volume.
Gateway
5. Gateway — One Agent, Twenty-Plus Entry Points
This is the foundation for the entire “living with an agent” experience described in chapter 19: the gateway is a single background process, connecting in parallel to every configured chat platform — not multiple separate bots running independently. Starting 2026 with 7 platforms, that number has grown to 20+ in just over a year — but the core architecture has not changed: each platform adapter normalizes its platform’s own message format, handles media and authentication, and then hands everything over to the same AIAgent for processing.
The foundational principle: shared state, but per-user sessions
All platforms share MEMORY.md, USER.md, and the SQLite session store — switch platforms mid-task and the new session automatically restores the relevant context via situational memory search. But this is the easy-to-misunderstand point: by default Hermes creates sessions per user ID, not per channel — meaning if Alice and Bob both message in the #research channel on Discord, Hermes treats them as two separate conversations even though they look at the same channel, exactly by design to protect privacy and isolate context.
Per-platform circuit breakers — one broken adapter does not bring down the whole gateway
Each platform has its own circuit breaker plus the /platform command to check — if Telegram gets rate-limited, the Slack token expires, or the WeCom webhook errors out, the other platforms keep working normally, unaffected.
The setup wizard — no need to configure each platform by hand
hermes setup
The wizard lists which platforms are already configured and which are not, and walks you through the correct OAuth/paste-token flow for each type — paste the bot token from BotFather (Telegram) or the Discord developer page, scan a QR code (WhatsApp), link a device (Signal). Only select the platforms you actually need — the rest stay dormant, consuming no resources.
Discord
5.1. Discord — A Full Gateway Bot, Not a Plain Webhook
Not a stateless “respond to webhook” bot
This is the important point to understand: Hermes on Discord runs through the full messaging gateway, not a stateless webhook responder — every incoming message goes through Hermes’s complete session/routing pipeline.
Two separate transports — you need both to work correctly
Discord REST and the Gateway WebSocket are two different transports — REST returning HTTP 200 success (even when calling fetch_user()) does not prove that the bot is still receiving events through the Gateway WebSocket. If the bot is online but not responding to messages, the cause is almost certainly that Message Content Intent is disabled in the Developer Portal.
Native slash commands, with a limit
Native Discord application commands are supported, capped at 100 commands per app — with many installed skills (each skill is a slash command, as described in 10.3), this is a practical constraint to keep in mind.
Notes
- If the bot is online but completely “silent”, check Message Content Intent first — this is the most common cause, not a Hermes configuration error.
- On a busy server where many people message in the same channel, remember that each person has their own session per user ID by default — if you need a shared conversation (many people, one context), consider using Slack instead (thread-based sessions, see 5.3).
- If the number of installed skills is approaching the 100 slash-command limit, disable skills you rarely use instead of trying to squeeze everything in — an oversized payload also causes errors independent of the command count.
Telegram
5.2. Telegram — The Most Popular Personal Platform
How to get the correct User ID
This is the most common configuration mistake mentioned in 6.1: the User ID is a number, not a username. The fastest way — message @userinfobot and it replies immediately with the exact User ID.
Reactions as a visual processing signal
The bot can add an emoji reaction as a visual response while processing — unlike Discord (where reactions accumulate), the Telegram Bot API replaces the entire reaction set in a single call, so the transition from 👀 to ✅/❌ happens instantly, with no intermediate state showing both at once.
Ephemeral system prompt per group/topic
You can assign a dedicated system prompt to a specific group or forum topic — this prompt is injected at runtime each turn and is not stored in the transcript history, so changes take effect immediately without a restart.
Notes
- Always use @userinfobot to get the correct User ID before configuring
TELEGRAM_ALLOWED_USERS— confusing the ID with the username is the common mistake that makes the allowlist not work. - If reactions do not appear in a group, check the bot’s reaction permission — the call fails silently, and messages still process normally with no clear error sign.
- For groups/forums with many different topics, take advantage of the per-topic ephemeral prompt — turn one Telegram bot into many different “roles” per topic without needing separate profiles (a different approach to multiple profiles in 19.4).
Slack
5.3. Slack — Sessions per Thread, Not per User
The core difference from Telegram/Discord
This is the most important thing about Slack in the Hermes ecosystem: Slack sessions are keyed by thread, not by user — meaning multiple people participating in the same thread share one conversation context, exactly opposite to the default “one session per person” behavior on the other platforms.
The “is thinking…” status — can be annoying
Slack displays an “is thinking…” status via the Assistant API while the agent is processing — some users find it annoying because it also temporarily locks the message composition box while it is displayed. Turn it off via configuration:
gateway:
  platforms:
    slack:
      typing_indicator: false
Notes
- If you need a group conversation that shares one context (for example, a team brainstorming with the agent together), choose Slack over Discord/Telegram — it is the only platform that supports this session style out of the box without special configuration.
- Turn off
typing_indicatorif the team finds the “is thinking…” status annoying — this only affects the display, not message sending or any other functionality. - For multi-OAuth workspaces (multiple Slack teams sharing one bot), note that the gateway tracks permissions separately per workspace — permissions on one workspace do not automatically apply to another.
5.4. WhatsApp — Two Integration Paths
Baileys bridge (default) vs. Business Cloud API
- Default bridge: the installer automatically downloads Node.js 22 to run the WhatsApp bridge right at install time — scan the QR code with your phone and you are done, no additional registration with Meta needed.
- WhatsApp Business Cloud API (added in v0.17.0): a second, webhook-style adapter that does not require “keeping alive” a background bridge — suitable when you need higher stability for business use cases.
The important limit: one phone number = one profile
This is a technical constraint to know before planning: each Hermes profile needs its own phone number/WhatsApp session — you cannot attach multiple profiles to different conversations on the same number, because the Baileys bridge uses a single authentication session per number.
Alternatives if you need “many roles” on the same number
- Use a single profile and switch personalities via
/personality(7.1) or different AGENTS.md files per context — the agent figures out which conversation it is in and adjusts. - For repetitive specialized tasks (for example, tracking a shopping list in a specific chat), use a dedicated monitoring cron job instead of trying to split it into an independent agent.
- If you truly need fully separate agents, use a different phone number for each profile.
Notes
- For personal/experimental use cases, the Baileys bridge (QR scan) is enough and the fastest way to get started.
- For business use cases that need high reliability (no worry about the bridge randomly disconnecting), consider the Business Cloud API even though registration is more complex.
- Before planning multiple profiles on WhatsApp, always remember the one-number-one-profile limit — avoid designing an architecture based on a false assumption.
5.5. Email — The Asynchronous Channel
Covered in detail in 17.1 — revisited from the gateway angle
Email is a platform adapter that operates on a completely different model from the instant chat channels: it uses standard IMAP/SMTP, polling the mailbox on a cycle instead of receiving real-time events over WebSocket like Telegram/Discord. Following the safe-default principle (6.1), senders not on the allowlist are ignored entirely — this behavior is deliberately different from the other chat platforms, because a mailbox usually contains lots of unrelated mail.
Its role in the overall gateway picture
Because it shares the same session store and memory as every other platform, an exchange that starts over email can just as well continue over Telegram or the CLI — the agent recalls the context thanks to situational memory search when switching platforms.
Notes
- Because of its asynchronous nature (cyclic polling, not real-time), email suits workflows that do not need instant replies (as covered in 17.1: email → ticket, rollup reports) rather than fast interactive conversation.
- Always use a dedicated inbox for the agent (repeated from 17.1) — this is a security principle that applies to the gateway as a whole, not just to email.
20+ Platforms
5.6. 20+ Platforms — The Full Landscape and How to Pick the Right Channel
The complete list
Besides the 5 platforms covered individually, Hermes also supports: Signal, Matrix, Mattermost, SMS, DingTalk, Feishu/Lark, WeCom (+ WeCom Callback), Weixin, BlueBubbles (iMessage), QQ Bot, Yuanbao (元宝), Home Assistant (covered in 11.5), Microsoft Teams (+ Teams Meetings, Graph Webhook), Google Chat, LINE, ntfy, SimpleX Chat, Buzz (Block’s Nostr-based workspace), Open WebUI, and generic Webhooks — plus the OpenAI-compatible API server (4.6) for any other frontend.
Why this list keeps growing without breaking the architecture
Recent platforms (Yuanbao, Google Chat) all use a shared generic platform-plugin hook that lets new adapters plug in without touching the core — this is why the platform count has grown fast (7 → 20+ in just over a year) without the system becoming complex or unstable.
How to pick the right platform — not “more is better”
| Need | Suitable platform |
|---|---|
| Personal, quick texting from the phone | Telegram, WhatsApp, Signal |
| Team, group conversation with shared context | Slack (thread-based sessions) |
| Community, public server | Discord |
| Enterprise, Microsoft ecosystem integration | Teams, Graph Webhook |
| Chinese market | DingTalk, Feishu, WeCom, Weixin, QQ, Yuanbao |
| Custom internal system integration | Generic Webhooks, API server (4.6) |
Notes
- Do not enable all platforms “just to be safe” — every additional platform enabled adds another surface to manage allowlist/pairing (6.1, 6.2) and another point to watch when an incident happens (even though circuit breakers isolate failures well, monitoring is still needed).
- For integrating a company-internal chat platform that has no ready-made adapter, use generic Webhooks or the OpenAI-compatible API server (4.6) instead of waiting for Nous Research to build a dedicated adapter — this is the always-available “escape hatch” for cases not in the official 20+ list.
- Before adding a new platform, think about what the real need is in the table above — choosing the right platform by its session characteristics (per user or per thread) matters more than choosing by familiarity alone.
Security
- Authorized Users
- DM / Code Pairing
- Validation of Dangerous Commands
- Protection of Sensitive Files
- Docker or SSH Isolation
- Blocking of Irreversible Commands
6. Security — A Multi-Layered Defense Ring
This is the most important chapter from a practical operating standpoint: Hermes is not a chatbot that just answers questions — it has the power to execute shell commands, read system files, and communicate over public chat channels. The official security documentation from Nous Research itself emphasizes the foundational principle: no single layer is sufficient on its own; it is the layers stacked together that create safety. Losing one layer does not mean losing all safety, but no layer should be treated as “done, no need to think further”.
The four attack classes this security model targets
Before going layer by layer, understand clearly what is being defended — four scenarios in which an automated shell agent can do harm:
- Self-running destructive commands (
rm -rf, dropping a database,git push --forceonto the wrong branch). - Executing commands planted via prompt injection — a malicious file or web page containing text that looks like instructions, which the agent reads and mistakes for a real command.
- Leaking secrets — reading API keys, SSH keys,
.envfiles, then accidentally sending them off. - Being exploited through gateway messaging — an attacker DMs the bot, the bot complies, and data from the server leaks out.
The six sub-sections below each address one or more of these scenarios — none of them exists “just for show”.
Authorized Users
6.1. Authorized Users — Who Is Allowed to Talk to the Agent
Safe by default: deny everyone
This is the root principle: by default, the gateway rejects every user who is not on the allowlist or has not yet paired via DM — the safe default for a bot with terminal access.
Per-platform allowlist configuration
TELEGRAM_ALLOWED_USERS=123456789,987654321
DISCORD_ALLOWED_USERS=123456789012345678
SIGNAL_ALLOWED_USERS=+155****4567
EMAIL_ALLOWED_USERS=trusted@example.com,colleague@work.com
# Or shared across all platforms:
GATEWAY_ALLOWED_USERS=123456789,987654321
What you must absolutely never do
# Do NOT set on a bot with terminal rights:
GATEWAY_ALLOW_ALL_USERS=true
This is explicitly described as a flag for test environments, not production — anyone who finds your bot can run commands on your server.
Notes
- Use the actual numeric user ID of the real user account, not the prefix of the bot token — this confusion is the most common mistake when first configuring Telegram.
- For email, the default is to ignore unidentified senders entirely, because a mailbox usually contains lots of unrelated mail — this behavior is deliberately different from the other chat platforms.
- Per-platform configuration sections can override the global default — meaning you can keep pairing on for Telegram while leaving WhatsApp completely silent to strangers.
DM / Code Pairing
6.2. DM / Code Pairing — Flexible Authorization Without Collecting IDs First
How it works
Instead of having to collect user IDs in advance, a stranger who DMs the bot receives a one-time pairing code, which the bot owner then approves via CLI:
# What the user sees: "🔐 Pairing code: XKGH5N7P"
hermes pairing list                          # view pending requests
hermes pairing approve telegram XKGH5N7P      # approve
hermes pairing revoke telegram 123456789      # revoke previously granted permission
hermes pairing clear-pending                  # delete all pending codes
Security properties of the pairing code
Pairing codes expire after 1 hour, are rate-limited on attempts, and are generated with cryptographic entropy — not a simple random string. Pairing state is stored persistently and survives gateway restarts.
A Docker-specific note
The official Docker image runs the gateway as a non-privileged user (hermes, uid 10000) via gosu, but docker exec runs as root by default — if you approve pairing through docker exec without specifying the correct user, the approval file is created by root with 0600 root:root permissions, which the gateway cannot read and silently ignores the approval. Always specify the correct user when exec-ing into the container:
docker exec -u hermes <container> hermes pairing approve telegram XKGH5N7P
Notes
- Pairing is the ideal choice for teams — no gateway restart needed when adding a new member; an approval takes effect immediately.
- Approve pairing from a private channel (the bot owner’s DM/CLI), not from the public bot itself — avoid an attacker using the bot itself to approve themselves.
- The Web Dashboard (4.4) also supports approving/revoking pairing without the CLI — useful for remote administrators who do not have convenient SSH access.
Validation of Dangerous Commands
6.3. Validation of Dangerous Commands — The Blocking Layer Before a Command Runs
Three approval modes
hermes config set approvals.mode manual   # Default: always ask before dangerous commands
hermes config set approvals.mode smart    # Recommended: a secondary LLM assesses risk, auto-approves low-risk commands
hermes config set approvals.mode off      # Fully off (equivalent to --yolo)
Hermes maintains a curated set of regex patterns for high-risk commands — recursive deletes, DROP TABLE, fork bombs, piping curl into bash, killing the gateway process — any pattern match requires user approval before the command runs.
YOLO mode — use it consciously
hermes --yolo          # enable at session start
/yolo                  # toggle mid-session
YOLO disables all dangerous-command safety checks for that session — two visual warning banners (a red line at session start, a warning fragment on the status bar) are always displayed when it is on, so no one forgets they are in this mode.
Input is normalized before matching
Before scanning patterns, Hermes normalizes the input — stripping ANSI escape codes, null bytes, normalizing Unicode to NFKC — to close the most obvious obfuscation paths (though in essence it is still pattern matching, not absolute semantic analysis).
Notes
smartis a good balance for daily use: it auto-approves low-risk operations and stops to ask on high-risk ones — do not turn approvals off “for speed”, because the denylist exists precisely because users keep finding new ways to accidentally wipe their home directory.- For slash commands that destroy session state (
/clear,/new,/reset,/undo), the CLI also asks for its own confirmation before executing — a protection layer separate from shell command approval. - Pattern-based detection can inherently be bypassed (obfuscation, splitting across multiple commands, writing to a file and then sourcing it) — treat this as the first defensive layer, not the last.
Protection of Sensitive Files
6.4. Protection of Sensitive Files — Protecting Sensitive Files and Secrets
Checks before overwriting
Before write_file or patch touches the disk, Hermes checks the destination path against a denylist and an optional sandbox. A blocked write returns an error immediately to the agent — there is no approval prompt and no way to override from the chat interface.
Environment variable filtering for MCP servers
By default, an MCP server receives only the environment variables explicitly declared in its own configuration; every other variable (API keys, tokens, passwords) is filtered out completely:
mcp_servers:
  github:
    command: "npx"
    args: ["-y", "@modelcontextprotocol/server-github"]
    env:
      GITHUB_PERSONAL_ACCESS_TOKEN: "ghp_..."   # only this variable is passed through
Redacting secrets in output
hermes config set security.redact_secrets true
When enabled, API keys/tokens are masked before they enter the conversation context. This setting is snapshotted at startup (a restart is required for it to take effect) — deliberately, so that a compromised model mid-session cannot turn this feature off on its own.
Notes
When connecting an Obsidian Vault, remember that OBSIDIAN_VAULT_PATH identifies the Vault but does not create a filesystem sandbox. See Obsidian for the Docker mount and permission boundary.
- Keep secrets in the right place: secrets always live in
~/.hermes/.envwith0600permissions, never in wide pass-through lists (env_passthrough,docker_forward_env). - Turn on
redact_secretsearly if the agent frequently interacts with output containing tokens (CI/CD logs, API responses) — this feature is off by default. - For secrets that need frequent rotation, consider pulling them directly from an external secret manager (Hermes supports Bitwarden Secrets Manager) instead of storing them statically in
.env.
Docker or SSH Isolation
6.5. Docker or SSH Isolation — The Real Isolation Boundary
Core principle: the container is the security boundary
This is the most important thing to understand: when terminal.backend is set to docker, singularity, modal, or daytona, the dangerous-command checks in 6.3 are skipped entirely — because the container itself is the replacement safety boundary. This is a deliberate trade-off: allow unlimited execution inside a disposable box, instead of controlling every command.
TERMINAL_ENV=docker
When container isolation is mandatory
For untrusted repositories or unfamiliar unverified code, use Docker or Daytona as the terminal backend — running the default local backend in front of untrusted content means operating outside the officially supported security model of Hermes.
Isolation at the operating system level (supplement, not replacement)
Even without a container backend, restricting the write permissions of the operating user (covered in 1.2) remains a separate layer: the result is that even if the agent “decides” to run rm -rf /, the kernel still refuses, because that user only has write rights inside its own data directory.
Notes
- If the agent must process content from uncontrolled sources (open web, incoming email, multi-user chat channels, unverified MCP servers), switching fully to a container backend is mandatory, not optional — running a local backend in this situation is outside the official security model.
- Do not confuse “a container that isolates the agent” with “a container that isolates the Hermes process itself” — the official Hermes Docker image (2.3) is about compact/safe deployment of the Hermes process itself;
terminal.backend: dockeris about isolating the command execution environment that the agent produces. Two separate layers, usable at the same time. - Make sure the container image used for the terminal backend is also locked down properly — isolation only works if the image itself does not come with holes or excessive privileges.
Blocking of Irreversible Commands
6.6. Blocking of Irreversible Commands — The Line That Cannot Be Crossed
Hardline blocklist — the lowest layer, no override flag
This is the final defensive layer, standing below even --yolo: a set of catastrophic commands — wiping the entire filesystem, fork bombs, writing directly to block devices — are refused unconditionally by Hermes, regardless of --yolo, approvals.mode: off, or any other approval configuration. There is no override flag for this layer.
rm -rf / and its obvious variants (including --no-preserve-root /)
Fork bomb: :(){ :|:& };:
Direct writes to block devices (raw disk writes)
The blocklist trips before the regular command-approval layer (6.3) ever sees the command — if the blocklist is hit, the tool call immediately returns an explanatory error to the agent, and nothing is executed.
Why it is designed with “no override flag”
This is a deliberate difference from regular approval modes: approval modes can be turned off (YOLO), but the hardline blocklist is a hard boundary — if a legitimate workflow truly needs to run one of these commands (for example, you are operating a wipe-and-reinstall pipeline), the solution is to run it outside the agent, not to find a way to switch it back on through Hermes.
A point to note: the blocklist is deliberately narrow
Worth stating plainly here: the blocklist only blocks the most obvious catastrophes (fork bombs, rm -rf /) — it cannot catch deliberate credential theft, sophisticated staged exfiltration, or lateral-movement commands that look like normal development work. This is why the layers 6.1–6.5 need to stand together, and you cannot rely on this blocklist alone.
Notes
- Do not mistake “having a hardline blocklist” for “being absolutely safe” — this is the last safety net for obvious catastrophes, not a solution for the whole risk surface (especially for sensitive tasks such as crypto wallet operations or financial transactions — where Hermes currently has no dedicated limiting mechanism).
- For slash commands that destroy session state (
/clear,/reset,/quit --delete), the CLI has its own confirmation prompt — this is a different mechanism, not part of the hardline blocklist, and can be turned off via configuration if desired. - If you ever hit the blocklist stopping an operation you believe is legitimate, do not try to “bypass” it — that is a signal to pull that operation out of the agent loop and run it manually yourself.
Context
7. Context — Shaping How the Agent Understands Your Context
This is the area most easily overlooked, yet it decides a great deal about response quality: Hermes does not rely only on the question you type in a single message — it automatically assembles a multi-layered “system prompt” at the start of every session, and the context files/configurations are precisely the raw material for those layers. The three sub-sections below correspond to three different context layers: the agent’s identity (SOUL.md), project rules (AGENTS.md and its family), and context specific to each communication channel.
Foundational principle: the system prompt is assembled in layers, and cached
Hermes’s system prompt is built with a three-layer architecture: Stable (identity, tool instructions, skills, environment hints), Context (the project’s context files), and the volatile part (memory, user profile). The whole thing is cached to avoid the expensive re-assembly on every turn — which is why changing a context file mid-session has no immediate effect; you have to wait for a new session or a rebuild (such as when context is compressed) for the change to apply.
AGENTS and SOUL
7.1. AGENTS and SOUL — Identity and Foundational Memory
SOUL.md — the agent’s “soul”, always in the first position
SOUL.md is the agent’s primary identity — it takes slot #1 in the system prompt, completely replacing the default identity text. It defines who the agent is, how it talks, and what it avoids. Hermes automatically creates a starter SOUL.md if one does not exist, so the user always has a real file to read and edit right away.
~/.hermes/SOUL.md
If the file is empty or cannot be loaded, the system falls back to the built-in default identity: a helpful, knowledgeable, and direct AI assistant.
Clear distinction between SOUL.md and AGENTS.md — do not mix them
This is the most important principle of this section: SOUL.md is for persistent personality, AGENTS.md is for per-project instructions. Stuffing coding conventions into SOUL.md or personal tone into AGENTS.md both distort each file’s role.
/personality — a temporary overlay, not a replacement for SOUL.md
/personality concise
/personality technical
/personality none    # back to the original SOUL.md
This is a per-session overlay that supplements or temporarily modifies the current behavior — the global SOUL.md remains the persistent default personality unless the overlay genuinely changes it substantially.
Notes
- Keep SOUL.md short and focused on persona/tone — it is scanned for prompt injection like every other context file, so do not stuff strange meta-instructions into it.
- For SOUL.md changes, always start a new session to apply them — a running session still uses the old prompt state.
- If you run multiple Profiles (a different chapter; each profile is its own Hermes home directory), each profile has an independent SOUL.md — do not expect one SOUL.md change to apply across every bot/profile you operate.
Project Rules
7.2. Project Rules — A Project’s Own Rules and Context
AGENTS.md — the main project context file
It tells the agent how the project is organized, which conventions to follow, and what special instructions exist. When the working directory is inside a git repository, Hermes loads a merged chain of AGENTS.md files: from the repository root first, then each intermediate directory down to the current working directory — the deeper the file, the more specific its instructions and the higher its priority.
Priority mechanism — only one kind is loaded per session
.hermes.md → AGENTS.override.md → AGENTS.md → CLAUDE.md → .cursorrules
First match wins — multiple kinds are never combined at the same time. Notably: if AGENTS.override.md exists next to AGENTS.md, the override is loaded instead of the committed file — handy for keeping a personal set of instructions (usually gitignored) separate from the team’s shared AGENTS.md, without editing the shared file.
Backward compatibility with Cursor
If the project already has .cursorrules or .cursor/rules/*.mdc and no higher-priority file, Hermes reads and applies them automatically — existing Cursor coding conventions work out of the box without being rewritten.
Security: prompt-injection scan before loading
Every context file is scanned for injection patterns before it is loaded (instructions to “ignore previous guidance”, attempts to read secrets, credential exfiltration…) — but this is only an additional protective layer, not a substitute for reviewing the AGENTS.md content yourself in repositories you did not write.
Notes
- Keep AGENTS.md concise — every character counts against the token budget, because it is included in every message in the session, not just the first one.
- In a monorepo with many packages, take advantage of the per-directory merge mechanism: put general rules at the root and per-package rules in the child AGENTS.md files — the child file overrides exactly the relevant parts.
- AGENTS.md files in subdirectories are not preloaded at session start — they are discovered “lazily” during tool calls and inserted into the tool call result; they are not present in the original system prompt.
- Always review the AGENTS.md content in repositories you did not write before starting a Hermes session there — the injection scanner is a defensive layer, not an absolute guarantee.
Channel-Specific Context
7.3. Channel-Specific Context — Per-Channel Context
Per-channel/thread overrides on gateway messaging
On platforms such as Discord and Slack, each channel or thread can have its own model and system prompt, declared in channel_overrides:
# ~/.hermes/gateway-config.yaml
platforms:
  discord:
    channel_overrides:
      "123456789":
        model: "anthropic/claude-opus-4"
        system_prompt: "You are supporting the #support channel; prioritize short, concise answers."
All three keys (model, system_prompt, and related fields) are optional — you can set just one of them, and the rest fall back to the global defaults automatically.
Lookup order — specific first, general after
Lookup goes by the exact channel/thread ID first, and only if not found does it climb up to the parent channel/forum — meaning threads in Discord automatically inherit the parent channel’s override without re-declaring it.
Priority order when there is a conflict
For the model: in-session /model override → channel_overrides → global configuration. A user typing /model in chat still beats the channel’s default configuration — the user’s immediate decision always gets the highest respect.
For system_prompt: this override replaces the global gateway prompt for that channel entirely — and importantly, it is not stored in history, only inserted per turn (ephemeral), so it does not bloat the cache like a regular context file would.
Notes
- Use channel overrides when one bot serves different purposes on different channels (e.g. #support needs brevity, #research needs a stronger model) — instead of running separate profiles/bots for each purpose.
- Since overrides are applied by specific channel/thread ID, remember to update the configuration when a channel is archived/recreated — a new ID will not automatically inherit the old override.
- Combine with
/modelto quickly test a channel override before committing it to the officialgateway-config.yaml— avoid repeatedly editing the config file and hot-reloading just to experiment.
Tools
8. Tools — The Agent’s Core Toolkit
If chapter 11 (Integrations) is about extending outward, then chapter 8 is about what Hermes has right out of the box, needing no extra configuration (beyond a few API keys). These are the seven foundational capabilities that every skill and every workflow in chapters 10, 16, and 17 builds on.
Toolsets — toggling by group, not one tool at a time
hermes tools # interactive menu, configured per platform
# ~/.hermes/config.yaml
toolsets:
  - web
  - file
  - terminal
Each platform (CLI, Telegram, Discord…) can have its own set of toolsets — for example, a public Telegram bot might only enable web + file, while a personal CLI enables the full terminal + browser. Within a running session, /tools gives a quick look at which tools are active. Note: changing toolsets mid-session breaks the provider’s prompt caching (the tool schemas live in the system prompt), forcing the next turn to resend the entire input token set — so change toolsets before starting a new session, not in the middle of one.
Terminal
8.1. Terminal — Executing Shell Commands
Seven backends to choose from
Local, Docker, SSH, Singularity, Modal, Daytona, and Vercel Sandbox. Daytona and Modal have “serverless persistence” — the environment sleeps when idle and wakes on demand, costing almost nothing between uses.
terminal:
  backend: docker
Whether shell state persists — depends on the backend
With Local and SSH, persistent_shell: true (the default) keeps a single bash process alive across many commands — cd, environment variables, and aliases all survive between calls. Docker works very differently: Hermes starts one long-lived container (docker run -d ... sleep infinity), and every terminal/file/execute_code command is routed through docker exec into that same container — a package pip installed once is still there on the next call, and a directory you cded into is preserved across /new, /reset, and even sub-agents spawned from delegate_task.
Two background-running modes
process(action="wait")   # wait for a background command to finish
process(action="poll")   # check progress without blocking
For interactive CLI tools that need a pseudo-terminal (Python REPL, Claude Code…), use pty=true.
Notes
- For untrusted content (unknown repos, unverified MCP servers), always switch to the Docker/Daytona backend — the container then becomes the security boundary, and since the dangerous-command checks in chapter 6.3 are bypassed, the container must genuinely be well isolated.
- PTY mode has
\rvs\nissues with apps built onprompt_toolkit— prefertmuxfor spawning interactive processes rather than using a direct PTY. - The Docker backend does not mount the host’s current working directory into the container by default — you must opt in explicitly via
docker_volumesif you want the agent to work directly on host files.
File Reading and Writing
8.2. File Reading and Writing — Structured File Operations
Four core tools
read_file, write_file, patch, search_files — agent-friendly replacements for cat/grep/sed, with clear structure instead of raw text output.
write_file vs patch
write_file overwrites the entire file content — use it when creating a new file or when you genuinely want to replace everything. patch only changes exactly the part that needs changing (targeted find-and-replace) — avoiding unintended loss of content. General rule: prefer patch when you only need to change a part of a file.
Fast searching over large codebases
search_files runs on ripgrep — pattern searching is far faster than plain grep on large projects, and file writes come with syntax linting so syntax errors are caught at write time.
Notes
- Before writing (
write_file/patch) to a sensitive file, the destination path is checked against the denylist (covered in chapter 6.4) — a blocked write returns an error immediately, with no way to override from the chat interface. - For large multi-file refactors, prefer
search_filesto determine the blast radius before you start editing — it avoids missing a location that needs changing. - If the agent reports “done editing” but the file content did not change as expected, check the file-mutation verification footer (when
display.file_mutation_verifieris on) — it is more trustworthy than the model’s closing summary of its reply.
Web Search
8.3. Web Search — Searching the Internet for Information
Many backends, auto-selected based on available API keys
Up to 8 providers are supported: Firecrawl, Tavily, Exa, Parallel, SearXNG (self-hosted, no key required)… If no backend has been configured, web.backend is auto-detected from the API keys you already have; and if you have never chosen one, the system has a free tier that requires no registration — requests rotate across 5 providers (Exa, Parallel, Tavily, Firecrawl, Keenable), automatically moving to the next backend when rate-limited. This is the last resort and always yields to a configured backend with a real key.
FIRECRAWL_API_KEY=fc-...
Firecrawl is the most complete backend
It is the only provider in the main group that supports search, scrape, and multi-page crawl in a single backend — which is why it is the default. With Firecrawl, web_search returns the page content, read and rendered as markdown, instead of just a short snippet like the other backends.
Queries support advanced search operators
site:, intitle:, filetype:, -term, "exact phrase" — these work with Firecrawl and most other backends.
Notes
- If you already have a Nous Portal subscription, enable the Tool Gateway to use web search through it — no separate API key to manage, and costs are billed against your subscription instead of per direct call.
- For data that must be accurate in cron workflows (chapter 17.4), always set a backend with a real key — do not let critical production jobs fall onto a free tier with no SLA guarantees.
- SearXNG is a good choice if privacy is an absolute priority (self-hosted, no rate limits), but it can only do search — you still need another backend for
web_extract.
Web Browsing
8.4. Web Browsing — Browser Automation
When you need a browser instead of web_search
web_search/web_extract is the fast, cheap choice for plain information retrieval. The browser tool should only be used when you need interaction — content that only appears after logging in, submitting a form, or a data table rendered dynamically via JavaScript.
The 11-tool browser control suite
browser_navigate, browser_snapshot, browser_click, browser_type,
browser_press, browser_scroll, browser_back, browser_close,
browser_console, browser_get_images, browser_vision
Standard flow: browser_navigate opens the page → browser_snapshot captures the page structure with element ref IDs (in the form @e5) → browser_click/browser_type act based on those ref IDs. browser_console is useful for catching silent JS errors or failed API calls that never surface in the UI.
The backend that runs the browser
Browserbase (cloud, with anti-bot, CAPTCHA solving, and residential proxies) is the popular managed choice; with Nous Portal, the cloud browser (Browser Use) comes built in via the Tool Gateway.
Notes
- Always try
web_search/web_extractfirst — much faster and cheaper; only switch to the browser once you have confirmed the content genuinely requires interaction. - Call
browser_closewhen you are done to free the session quota — skipping this step is a common cause of Browserbase quota draining faster than expected. browser_get_imagespairs well withvision_analyze(chapter 8.5) — first list the images on the page, then analyze only the specific images you care about, instead of analyzing everything indiscriminately.
Vision
8.5. Vision — Analyzing Images
Paste images directly into the CLI
Multimodal support — paste an image from the clipboard straight into a CLI session and ask the agent to analyze, describe, or act based on it with any vision-capable model.
Auxiliary router — no hard dependency on a single model
Vision does not necessarily use the session’s main chat model — Hermes routes vision through a separate auxiliary router, supporting OpenRouter, Nous Portal, Codex, native Anthropic, or a custom OpenAI-compatible endpoint. This lets you use a cheap/fast main model for conversation while routing vision to a dedicated image-strong model.
Automatic fallback when the main model errors
There is independent failover for auxiliary tasks (vision, compression, web extraction) — if the primary provider errors, it automatically switches to a configured backup provider without interrupting the session.
Notes
- For screenshots containing text (tables, scanned documents), vision is the direct tool — no separate OCR step is needed unless you require absolutely exact structured text extraction.
- Configure a fallback provider for vision if you use it in production workflows (cron reports with image analysis) — do not let an entire job fail because one provider is temporarily overloaded.
- Combining
browser_get_images+vision_analyzeis an effective pattern for auditing image-heavy web pages without manually downloading each image.
Image Generation
8.6. Image Generation — Creating Images from Text
11 models via FAL.ai
FLUX 2 Klein/Pro, GPT-Image 1.5/2, Nano Banana Pro, Ideogram V3, Recraft V4 Pro, Qwen, Z-Image Turbo, Krea V2 Medium/Large — chosen via hermes tools.
tools:
  image_generation:
    provider: fal
    use_gateway: true   # route through the Nous Portal subscription
Gateway takes priority when both are available
If the Tool Gateway is available and the tool is set to use_gateway: true, Hermes prefers the gateway even if you also have a direct API key — this affects billing: calls through the gateway are deducted from your Portal subscription, not from your separate API key balance. Keep this in mind when tracking costs across the two sources.
Notes
- You do not need your own FAL account if you already have Nous Portal — enable the gateway and it works immediately, in keeping with the Tool Gateway’s “no extra account” spirit.
- For consistent style needs (blog illustrations, chapter 16.5), pin a specific model instead of letting the default change — different FAL models produce clearly distinct image styles.
- Run
hermes portal infoat any time to confirm whether image generation is routing through the gateway or your own key, to avoid confusion when debugging invoices.
Speech Synthesis
8.7. Speech Synthesis — Converting Text to Speech
10 native TTS providers
Edge TTS (free), ElevenLabs, OpenAI TTS, MiniMax, Mistral Voxtral, Google Gemini, xAI, NeuTTS, KittenTTS, Piper — plus the ability to attach any local CLI TTS via a custom command provider.
Works across all messaging platforms
Not just in the CLI — voice replies and voice message transcription work on all connected messaging platforms (Telegram, Discord, WhatsApp…), with no per-channel configuration.
Tool Gateway for TTS
Nous Portal bundles TTS (via OpenAI) into the Tool Gateway, in the same group as web search and image generation — a single OAuth login is enough, with no separate ElevenLabs/OpenAI account needed for the basic level.
Notes
- Choose a provider to fit the need (detailed in chapter 16.6): ElevenLabs for the highest voice quality/cloning a voice, Piper/KittenTTS for private offline runs, OpenAI TTS via the gateway if you already have a Portal subscription.
- For sensitive content that must be converted to speech, prefer a local provider (Piper/KittenTTS) so the data never leaves the machine — consistent with the “keep the surface handling sensitive data as narrow as possible” principle mentioned in chapters 11.3 and 16.6.
- Test one real message through the exact messaging channel you plan to use before putting it into a production workflow — each platform has different display/audio-playback limits, so confirm directly rather than assume.
Memory
- 9.1. User Profile — A Profile of You as a Person
- 9.2. Work Conventions
- 9.3. Technical Environment
- 9.4. Inter-Session Reminders
- 9.5. Search in Past Conversations
- 9.6. Classification and Memory Management
9. Memory — Hermes’s Four Layers of Memory
This section goes deeper into the mechanism mentioned briefly in 20.1/20.2. The key point is this: Hermes does not have one memory system. It has four distinct layers, and each layer serves a different kind of information. Most confusion when using Hermes comes from treating all four as if they were the same thing.
Four layers, four roles
| Layer | Stored where | Role |
|---|---|---|
| USER.md | ~/.hermes/memories/USER.md | A profile of you as a person (9.1) |
| MEMORY.md | ~/.hermes/memories/MEMORY.md | Work conventions + technical environment (9.2, 9.3) |
| Nudge mechanism | integrated into the session flow | Prompts the agent to save things across sessions (9.4) |
| session_search | SQLite FTS5 ~/.hermes/state.db | Looks up old conversations when needed (9.5) |
The principle of deliberate limits
Both USER.md and MEMORY.md have hard size caps: MEMORY.md ~2,200 characters (~800 tokens), USER.md ~1,375 characters (~500 tokens) — around 1,300 tokens total for everything Hermes “remembers about you,” injected into every prompt of every session. This is not a random technical limit. It forces the agent to keep compressing and distilling, preventing the “infinite memory” failure mode where the agent becomes expensive, slow, and oddly fixated on some detail you mentioned months ago.
Frozen snapshot — the rule that runs through 9.1–9.3
Both files are loaded as a frozen snapshot at the start of the session. Changes written during a running session are saved to disk immediately, but they do not appear in the system prompt until the next session. This is a deliberate tradeoff to keep the model’s prefix cache stable and avoid API costs spiking every time memory changes mid-session.
Memory
9.1. User Profile — A Profile of You as a Person
What USER.md stores
Identity, preferences, communication style, and working habits of the user. This is clearly different from MEMORY.md, which is meant for notes about the agent’s environment and projects.
Example of real content
Preference: TypeScript over JavaScript. Keep communication concise, no long explanations.
Skill level: senior backend, no need to explain basic concepts.
Timezone: GMT+7. Does not work on weekends.
How saving gets triggered
No special command is required. You can just say it naturally: “Remember that I prefer TypeScript,” or let the agent infer it from repeated interaction patterns over time, such as consistently preferring short answers or repeatedly steering questions in the same direction.
Practical lessons
- Invest in “seeding” USER.md early with a short introduction session, such as your name, role, and usual tools, instead of letting it accumulate slowly over weeks. That matches the recommendation already mentioned in 20.1.
- Do not cram project or technical details in here. USER.md should describe who you are, not what you are currently working on. That belongs in 9.2/9.3.
- Because the limit is only ~500 tokens, prioritize durable traits like communication style and technical level over temporary details like being busy with project X this week. Short-lived details belong in the session, not in the long-term profile.
Memory
9.2. Work Conventions
The “conventions” part of MEMORY.md
This is one of the four main content types that belong in MEMORY.md: project conventions such as coding style, directory structure, and CI/CD tools, alongside environment facts, discovered workarounds, and lessons learned.
Good example content — concrete and immediately actionable
Project ~/code/api uses Go 1.22, sqlc for DB queries, chi router. Run tests with 'make test'. CI goes through GitHub Actions.
Project uses tabs, 120-character line limit, Google-style docstrings.
Compare that with a bad example that is too vague to be useful: “User has a project.” That gives no value in a future session.
How this differs from AGENTS.md (section 7.2)
This is an easy point to confuse, so it needs to be explicit. AGENTS.md is a file written in advance by the user or team, located inside the repo itself, and loaded based on working-directory context. MEMORY.md work conventions are learned and written by the agent itself through actual work. They are not in the repo and are not committed. They complement AGENTS.md rather than replacing it, and the rule is to avoid repeating content that is already present in context files so you do not waste tokens on duplication.
Practical lessons
- When you correct the agent about a convention, such as “Do not deploy directly to Vercel for this project, it must go through GitHub,” that is exactly the kind of content that should go into MEMORY.md as a correction. The agent can then apply it from the next session onward without being reminded again.
- For conventions tied to one specific project rather than everything you do, always include the project name or path in the entry. Otherwise MEMORY.md turns into a pile of mixed rules with no clear scope.
- If a process has more steps than a one-line note can hold, not just “use X” but an actual sequence of commands, conditions, and checks, that is a sign it should be promoted into a skill (sections 10.3/20.3) rather than crammed into MEMORY.md. Memory is for condensed facts. Skills are for procedures.
Memory
9.3. Technical Environment
The “environment facts” part of MEMORY.md
This is the most native kind of MEMORY.md content: information about the system, servers, and tools in use that the agent needs to know again each time, otherwise it has to rediscover them from scratch.
Real examples
This server runs Debian 12 with PostgreSQL 16.
User is on macOS 14 Sonoma, Homebrew, and has both Docker Desktop and Podman. Shell: zsh with oh-my-zsh. Editor: VS Code with Vim keybindings.
Staging server (10.0.1.50) requires SSH on port 2222, not 22. Key is at ~/.ssh/staging_ed25519.
That last example is a classic “lesson learned” entry: exactly the kind of fact that takes several turns to discover the first time, but only one line to remember forever.
The rule of grouping related facts into one entry
When you are getting close to the size limit, an efficient style is to combine multiple related facts into one dense entry, as in the macOS example above, which packs four separate facts into one line: operating system, package manager, container tool, and editor. That is much more space-efficient than four separate entries.
Practical lessons
- Prioritize storing “non-obvious discoveries” such as a nonstandard SSH port, an API quirk, or a limitation of a specific tool. Those are the most expensive facts to rediscover.
- Do not store things that are easy to look up again, such as “Python 3.12 supports nested f-strings.” Hermes can web search that at any time, so it is not worth spending space from the fixed ~800-token budget.
- In complex multi-project environments with many codebases, remember that MEMORY.md is shared across the whole profile. If one project has too many project-specific technical details, consider splitting it into a separate profile (section 19.4) instead of trying to cram everything into the same 2,200 characters.
Memory
9.4. Inter-Session Reminders
The “periodic nudge” mechanism — Hermes reminding itself to save
This is a feature listed directly in the official description of the closed learning loop: agent-curated memory comes with “periodic nudges” — periodic reminders that cause the agent to pause and check whether anything from the session just completed is worth saving, instead of remaining fully passive and waiting for the user to ask.
How this differs from explicit user requests (covered in 9.1/9.2)
You can proactively say “remember this for next time,” but the nudge mechanism works in the opposite direction. At appropriate moments in the session lifecycle, such as after a complex task or when the session is about to end, the agent evaluates on its own whether something should be written to MEMORY.md or USER.md, without you having to prompt it.
Relation to “Retrieve Past Decisions” (section 20.2)
This internal nudge is different from proactive lookup via session_search (9.5). The nudge is the agent taking a write action on its own, while session_search is a read action when needed. The two mechanisms support the improvement loop described in section 20: nudge helps ensure important things are not missed in the first place, while session_search is the safety net if something never made it into condensed memory.
Practical lessons
- Do not rely entirely on automatic nudges for facts that really matter. Combine them with explicit requests like “remember this for next time” at the end of important work sessions so nothing critical gets missed.
- If you notice MEMORY.md missing a detail you think the agent “should have remembered on its own,” treat that as a signal to be more explicit next time. Nudge does not guarantee it catches everything. It is an extra support layer, not a replacement for deliberate user instruction.
Memory
9.5. Search in Past Conversations
session_search — a layer distinct from condensed memory
This is the tool already mentioned in section 20.2, viewed more closely from the technical angle: every CLI and messaging session is stored in SQLite (~/.hermes/state.db) with an FTS5 full-text index. That lets the agent find specific details from conversations that happened weeks ago, even if those details were never promoted into condensed memory.
The key dividing line: Memory for facts, Session Search for full context
This is the most memorable one-line summary of section 9: Memory is for important facts that should always be present in context. Session search is for questions like “did we already discuss X last week?” where the agent needs to recover specific details from past conversations.
Returned results are raw data, not summaries
Unlike systems that rely on the LLM to summarize old conversations, as some other memory providers do, session_search returns the original messages from the database. No summarization, no shortening. The agent can scroll backward and forward in any matching session to recover the surrounding context in full.
Practical lessons
- When you need the agent to recall a specific technical decision discussed a long time ago, ask in a context-triggering way, such as “what did we decide for X before?” The agent will call
session_searchon its own instead of guessing or asking you to repeat it. - For conversations containing Vietnamese, Chinese, or Japanese, FTS5 has language-specific tokenizer extensions for CJK languages, which gives more accurate search than relying only on the default English-oriented tokenizer.
session_searchworks only locally against the SQLite database on the machine currently running Hermes. If you move to a new VPS without backing upstate.db, following the broader backup principle in section 1.6, that searchable history is gone even if MEMORY.md and USER.md survive through separate backups.
Memory
9.6. Classification and Memory Management
Decision table — what should be stored and what should not
This is the core classification logic the agent applies whenever it is deciding whether something is worth remembering:
| Question | If Yes |
|---|---|
| Is this a fact or convention that should always be remembered? | → store it in MEMORY.md |
| Is this a user preference or habit? | → store it in USER.md |
| Is it easy to look up again (web search, existing docs)? | → do not store it, ignore |
| Is it relevant only to this one session (temporary path, one-off debugging context)? | → do not store it, ignore |
Five categories that should be stored (per the official docs)
User preferences (“prefers TypeScript”) go to USER.md. Environment facts (“server runs Debian 12”) go to MEMORY.md. Corrections (“do not use sudo for Docker commands”) go to MEMORY.md. Project conventions (“use tabs, 120 characters per line”) go to MEMORY.md. And explicit user requests to remember something should also be stored.
Four categories that should be ignored
Information that is too obvious or too vague, facts that are easy to look up again, bulky raw data such as large code blocks, log files, or tables that are too big for memory, and context that only matters for the current session.
The memory tool model — only three actions, no read
memory(action="add", store="memory"|"user", content="...")
memory(action="replace", store=..., old_substring="...", new_content="...")
memory(action="remove", store=..., substring="...")
There is no read action because memory is already available in the system prompt, so no separate tool is needed to read it back. replace and remove locate the target entry by a unique substring match, not by ID or sequence number. If the substring matches more than one entry, the command fails instead of guessing and editing the wrong thing.
No automatic compression — errors force the agent to clean up
This is the most important design point in all of section 9: memory is not automatically compacted. When a write would exceed the limit, the memory tool returns an error instead of silently trimming content. The agent is forced to clean up, by merging or removing older entries, in that same turn before trying again. A practical threshold is to start consolidating related entries once memory usage exceeds 80%, which is shown in the system prompt header as a percentage. For example, three separate entries saying “project uses X” should be merged into one more comprehensive project entry before adding more.
Practical lessons
- Proactively tell the agent to “clean up memory” when you see capacity getting close to full. Do not wait for the agent to hit an error in the middle of an important task.
- Because
replaceandremovedepend on substring matching, write entries so they are meaningfully distinct from one another from the beginning. Otherwise you end up with several near-duplicate entries that later cause repeated “matched more than one” errors. - Do not run two agent processes against the same
HERMES_HOME. Memory writes are automatic and memory is reloaded into the system prompt at the start of each session, so two processes writing into one profile will accumulate entries that neither side fully intended. If you need multiple simultaneous agents, give each one its own profile (section 19.4). If you truly need shared memory between multiple agents, use an external memory provider such as Honcho, Mem0, or Supermemory instead of built-in memory. - If your needs go beyond the model of “one machine, one project at a time” — for example long-term parallel work across many projects, multi-user environments behind a shared gateway, or synchronized memory across several machines — the built-in two-file memory system starts to show its limits. That is when it makes sense to consider one of the available external memory providers, such as Honcho, Mem0, Supermemory, or Hindsight, running alongside built-in memory as a supplement rather than a replacement.
Skills
- Reusable Procedures
- Community Catalog
- Slash Commands
- Custom Skills
- Improvement During Use
- Auto-Archiving
Skills are reusable procedures that turn repetitive work into reliable assets.
If you have used Claude Code or other CLI agents, the concept of a “skill” will sound familiar. But the way Hermes implements it has one core difference: a skill is not just a static document you write up front — it is something the agent creates, edits, and improves on its own while it works. That is exactly the foundation of Nous Research’s “the agent that grows with you” promise.
The problem Skills solve
When you hand a complex task to an AI agent — deploying to Kubernetes, reviewing PRs against team standards, writing the weekly financial report — the traditional approach is to stuff all the instructions into the system prompt or repeat them in every chat. That is both token-expensive and “learns” nothing across sessions. Skills solve this with a progressive disclosure mechanism: the agent sees only the name + short description of every available skill (~3k tokens for the entire list), and loads a skill’s full content into context only when it is truly needed.
Three sources of skills in practice
- Bundled — shipped with Hermes at install time, living in
~/.hermes/skills/. - Community — installed from Skills Hub (skills.sh, GitHub taps such as
openai/skills,anthropics/skills, or a direct URL). - Self-made — written by you, generated by the agent itself via
skill_manage, or, even faster, turned from any document or process into a skill with the/learncommand — no hand-writing required.
Practical usage
/plan redesign the auth flow of the system
/github-pr-workflow /test-driven-development fix issue #123 and open a PR
Each skill automatically becomes a slash command. You can stack up to 5 skills in a single command, or wrap them into a bundle (hermes bundles create backend-dev --skill ... --skill ...) to get one short command for a whole multi-step workflow — usable across CLI, Telegram, Discord, Slack, and the dashboard.
The biggest difference: a skill does not stand still. After each complex session, the agent evaluates “what I just learned” and can write/patch skills itself so the next run is faster — with an approval gate (skills.write_approval) if you want tight control before those changes take effect.
This chapter of the Hermes Agent handbook goes deeper into each aspect: how skills are reused, the community catalog, the slash command mechanism, how to create custom skills, the self-improvement loop, and the storage/sync mechanism.
Reusable Procedures
Reusable Procedures can be understood as turning procedures into reusable assets. This is the foundation layer of the entire Skills system: each skill is, at its core, a packaged procedure — the thing you would normally have to re-explain to the agent (or to a new colleague) every time you need it done.
The structure of a practical skill
A SKILL.md is not free-form text — it follows a standard template so the agent can read it and act consistently. Here is a skill that produces a weekly sales report:
---
name: weekly-sales-report
description: Compiles the weekly revenue report from CRM and sends it via Slack
version: 1.0.0
---

# Weekly Sales Report

## When to Use
Every Monday morning, or whenever asked to "run the sales report".

## Procedure
1. Pull last week's order data from CRM (via the MCP connector)
2. Compute total revenue, compare with the previous week and the same week last month
3. List the top 5 largest deals and the deals at risk of slipping
4. Build a table + chart and post it to the #sales-weekly channel on Slack

## Pitfalls
- CRM data has a sync delay of ~2h on Monday mornings — run it after 9
- Completed/cancelled orders are still counted unless you filter the "refunded" status

## Verification
Total revenue in the report matches the figure shown on the original CRM dashboard
The four parts When to Use / Procedure / Pitfalls / Verification are not arbitrary — this is exactly the formula for a procedure that is reliable when repeated: know when to use it, know what to do, know what tends to go wrong, and know how to confirm it was done right.
Why “reusable” and not just “documented”
The difference from simply writing a procedure into a wiki: a skill is loaded conditionally. You can flag a skill so it only shows up when it fits the context — for example, only visible when a specific toolset (like a CRM connection) is available, or only visible as a fallback when the primary tool is missing. This keeps the agent from being “overwhelmed” by hundreds of irrelevant skills, and seeing exactly the right one in the right situation.
Practical application — combining several procedures into one flow
When a task always needs several procedures together (pull data → analyze → draft report → send notification), you don’t have to invoke each skill one by one. Group them into a bundle:
hermes bundles create monday-ritual \
  --skill weekly-sales-report \
  --skill pipeline-health-check \
  --skill slack-digest
From then on, /monday-ritual loads all three procedures at once and the agent gets the full context in a single command — “Monday morning, just type one line” in the truest sense.
Notes
- Write a skill the way you would write a runbook for a new colleague — if a newcomer can read it and follow along, the agent can follow it too.
- Use
patchinstead ofeditwhen updating an existing skill (both you and the agent) —patchsends only the changed parts, which saves far more tokens than resending the whole file. - The more a procedure gets repeated, the sooner it should be split into a skill, instead of being crammed into the system prompt or repeated in every chat — that is the investment that “compounds interest” over time.
Community Catalog
The Community Catalog can be understood as a community skill repository. If Reusable Procedures was about you packaging your own procedures, then Community Catalog is about not having to rewrite what others already did well. Hermes ships with an ecosystem of skill sources you can browse, install, and use right away — collectively called the Skills Hub.
Practical sources
Not one single centralized catalog, but several distinct sources, each fitting a different situation:
hermes skills search kubernetes                   # search across all sources
hermes skills search react --source skills-sh      # Vercel's public catalog
hermes skills search https://mintlify.com/docs --source well-known  # skills published by the site itself
hermes skills install openai/skills/k8s             # install directly from a GitHub tap
Example: your team uses Mintlify to write product docs — instead of teaching the agent how to operate Mintlify from scratch, you query the well-known endpoint that Mintlify itself publishes (/.well-known/skills/index.json) and install the skill they already wrote for exactly that.
Before installing — always preview
hermes skills inspect openai/skills/k8s
This shows you the skill’s content, the original repo, weekly install counts, and the upstream security audit status — before you decide to bring it into a system that is actually running.
Security is not optional, it is the default
Every skill installed from the hub passes through a scanner checking for data leaks, prompt injection, destructive commands, and more. Trust levels are clearly tiered:
| Level | Source | Policy |
|---|---|---|
builtin | Shipped inside Hermes | Always trusted |
official | Official skills in the repo | Trusted by default, no warnings |
trusted | openai/skills, anthropics/skills, NVIDIA/skills… | More relaxed policy |
community | skills.sh, well-known, any GitHub tap | Non-dangerous detections can be force-installed with --force, but “dangerous” detections are always blocked |
This is a point worth emphasizing: --force cannot override a “dangerous” level warning — it only overrides the ordinary cautionary warnings that you have reviewed yourself.
Tracking upstream updates
A community skill is not install-once-and-forget — the original author may fix, patch, or extend it:
hermes skills check          # which skills have new updates
hermes skills update         # update those skills
If you have already edited a hub-installed skill yourself, Hermes detects it via a content hash and automatically skips it without overwriting — unless you explicitly add --force.
When you need to share internally with the team
You don’t have to go public. You can create your own “tap” — a private GitHub repo containing SKILL.md files — and have colleagues subscribe:
hermes skills tap add my-org/hermes-skills
hermes skills install my-org/hermes-skills/deploy-runbook
Notes
- Always
inspectbeforeinstall, especially forcommunitysource skills — don’t just trust a name that sounds familiar. --forcebeing blocked at “dangerous” warnings is a deliberate safety boundary — if a skill is blocked at that level, find a different skill instead of trying to squeeze past it.- For company-specific workflows (internal CRM connections, house PR standards), publishing your own tap is usually more worthwhile than hunting for a similar public skill and editing it afterwards.
Slash Commands
Slash Commands are used to invoke skills with a single line. If Reusable Procedures and Community Catalog were about having skills, then Slash Commands is about calling a skill fast. Every skill once installed — whether self-written, installed from the hub, or self-created by the agent — automatically becomes a slash command. This is the unified interface layer that means you never need to remember “what to say for the agent to use a given skill”.
Basic usage
/github-pr-workflow open a PR for the auth refactor
/axolotl help me fine-tune Llama 3 on this dataset
Type the skill name plus your request — the agent loads exactly that skill and works through what follows the command. If you type only the skill name without a request, the agent simply asks what you need:
/excalidraw
→ "What diagram do you want to draw? Flowchart, sequence diagram, or mindmap?"
Stacking several skills in one command
This is the battle-tested part that gets overlooked: you don’t have to call skills one by one in sequence. You can chain up to 5 skills right at the start of the command:
/ocr-and-documents /translate-vi-en extract the data tables from this scanned file, then translate them into English
Hermes stops recognizing skills as soon as it hits the first token that is not a valid slash command — so if your request contains a file path starting with / (e.g. /tmp/scan.pdf), it is not mistaken for another skill and is correctly understood as a parameter:
/ocr-and-documents /tmp/scan.pdf extract the data tables
→ loads only 1 skill (ocr-and-documents); the rest is instruction
When you use the same skill combination far too often
Chaining 3–4 skills every time you type is still clunky. The solution is a bundle — packing several skills under a single dedicated slash command:
/release-prep # actually runs: changelog-writer + version-bump + github-pr-workflow
One thing to note: if you name a bundle the same as an existing skill, the bundle always wins when that slash command is invoked — because naming it the same is your deliberate choice to use the bundle; this is intended behavior, not a bug.
Uniform behavior across every platform
The same /skill-name syntax behaves exactly the same whether you are typing in the CLI, TUI, dashboard, or messaging via Telegram/Discord/Slack/WhatsApp/Signal. There is no “lite” version for messaging — the skill-invocation experience is absolutely consistent, because command dispatch lives in one central layer shared by every interface.
Notes
- If you catch yourself typing the same 2–3 slash commands every day, that is a clear signal to move them into a bundle — don’t wait until it becomes annoying.
- When passing a parameter that starts with
/(file paths, URLs…), place it after the spoken request, or double-check that the agent understood your intent — because the parser stops at the first invalid/token, so putting a path right at the start can sometimes confuse the reading order. - Name bundles carefully if your team already has a skill with the same name — bundle priority is the default behavior, and there is no warning halfway through.
Custom Skills
Custom Skills are for creating your own skills from your own documentation and procedures. If Community Catalog was “reusing what others did”, then Custom Skills is “turning what you know into a skill without sitting down to write SKILL.md by hand”. The central tool here is the /learn command.
Basic usage
/learn is an open command — point it at anything describable and the agent will gather the material itself using its existing tools, then write it up as a skill following the house standard (description ≤ 60 characters, standard section order, no invented commands that don’t exist):
# An SDK or an internal docs folder — the agent reads it with read_file / search_files
/learn the REST client in ~/projects/acme-sdk, focus on auth + pagination

# An online docs page — the agent fetches it itself
/learn https://docs.stripe.com/api/webhooks

# The procedure you just walked the agent through in this very conversation
/learn how I just deployed the staging server

# Loose notes or a procedure described in words
/learn the expense approval process: open the portal, choose New > Expense, attach the invoice, submit
The nice part: /learn does not require you to structure the content first — describe it however feels natural, and the agent normalizes it into a properly templated SKILL.md.
With large sources — don’t cram into one file, build a library
This is the part worth discussing in depth: if you /learn a book, a stack of papers, or a whole large docs folder, the agent does not compress everything into a single file (details would be lost), nor does it skim through a shallow summary. Instead, it builds a knowledge-base skill: a lean SKILL.md containing the core mental model + a table of contents, while the details of each chapter/topic live in separate files under references/.
For example, /learn ~/books/designing-data-intensive-applications.pdf produces a structure like:
skills/ddia/
├── SKILL.md                    # core mental model + index
└── references/
    ├── ch01-reliability.md
    ├── ch05-replication.md
    └── ch07-transactions.md
The practical benefit: the references/ files cost zero tokens until a question actually needs them — the agent only loads a file when a question touches exactly that topic, so query cost scales with the answer, not with the size of the source.
One important point for copyright/quality compliance: this process synthesizes into a conceptual framework, definitions, and decision rules — it does not copy any passage verbatim from the original source.
Learning more on the same topic — no duplicates created
If you /learn new material about a topic that already has a skill, Hermes merges it into the existing skill instead of creating a new copy — so you can gradually thicken a knowledge-base skill over many runs, like nurturing a living notebook.
Project-specific custom skills
For a repo shared by the team, you can place skills directly in that repo’s .hermes/skills/ — they only activate while working inside that project. But since a skill is action-guiding documentation, Hermes does not automatically trust skills from a freshly cloned repo — you have to act explicitly:
hermes skills trust        # trust the current repo
hermes skills untrust      # revoke
On every git pull, the skill content in the repo is security-scanned again — if dangerous signs are detected (injected prompt-injection commands, credential-exfiltration commands…), that skill is immediately quarantined from the index, without waiting for you to notice.
Notes
- Don’t be afraid to
/learnlarge sources — the knowledge-base skill mechanism is designed exactly for that; there is no “too big to load” problem. - For internal documentation that changes often (API docs, company playbooks), re-run
/learnon a schedule so the skill updates itself, instead of letting it quietly go stale. - For project-local skills coming from someone else’s cloned repo — always inspect the content before
hermes skills trust, because that is the only defensive mechanism against a repo that may carry a malicious skill.
Improvement During Use
Improvement During Use can be understood as skills improving themselves while the agent works. This is the part that most distinguishes Hermes from the “write once, use forever” skill model: the agent can edit its own skills after working, through the skill_manage tool. This is exactly the “procedural memory” — the place where experience from a work session does not vanish when the conversation ends.
When the agent writes a skill on its own
Not always — three specific situations trigger it:
- When the agent has just discovered a multi-step procedure worth repeating later
- When it hit an error, went down a dead end, and finally found the right way
- When you correct the way it was doing something
A real example: you ask the agent to connect to an unfamiliar internal API, it fumbles a few times (wrong auth header, wrong payload format), and finally finds the right approach. Instead of that knowledge dying with the conversation, the agent saves it as a skill — next time it meets a similar job, it goes straight to the right way without repeating the trial-and-error steps.
Operations the agent can perform on its own
| Action | Used when |
|---|---|
create | Writing a completely new skill |
patch | Small, intentional fixes (preferred — saves tokens since only the changed part is sent) |
edit | Rewriting the entire structure |
write_file | Adding/updating auxiliary files (references, scripts…) |
delete | Removing a skill that is no longer used |
Controlling the degree of automation — the write-approval gate
By default, the agent is free to write skills without asking you. In environments that need more caution — small models that easily misjudge what they have “learned”, or high-security environments — you can enable the approval gate:
skills:
  write_approval: true
When enabled, every skill change (including those from the background review that runs after each session) is staged instead of applied immediately:
/skills pending              # list the changes awaiting approval
/skills diff <id>            # inspect a change in detail (diff form)
/skills approve <id>         # agree to apply it
/skills reject <id>          # refuse and discard it
Notable point: pending changes survive restarts — they are stored in ~/.hermes/pending/skills/ and are not lost when you shut Hermes down and start it again.
Skills and Memory cooperate, without overlapping
These two mechanisms split the work clearly: memory stores the small facts that must always be present in context (e.g. “the user likes reports as tables, not prose”), while skills store long procedures that only need to be loaded when relevant. This separation keeps context from ballooning with details that are only needed once in a while.
Notes
- In production environments or when using small models, enable
write_approval: truefrom the start — free skill writing sounds nice, but a wrong skill that the agent creates and then confidently reuses can spread its error much further than a single wrong answer. - Run
/skills pendingperiodically to re-check what the agent “thinks” it has learned — this is also an indirect way to understand how the agent is modeling your work on its own. - Prefer letting the agent use
patchovereditwhenever possible — it saves tokens, and small diffs are far easier to review when the approval gate is on.
Auto-Archiving
Auto-Archiving — synchronizing, tracing, and safely restoring skills. This is the “silent infrastructure” layer behind everything covered in Reusable Procedures, Community Catalog, Slash Commands, Custom Skills and Improvement During Use: when skills come from many sources (bundled, hub, self-made, agent-written) and change continuously, Hermes needs a mechanism to track who changed what, when, and how to restore things if needed — without silently overwriting your work.
Syncing bundled skills — never overwriting your edits
On every fresh install or hermes update run, Hermes copies the bundled skills from the repo into ~/.hermes/skills/, while recording the original hash of each skill in a .bundled_manifest file. On the next sync, it compares the current hash of your copy with the stored original hash:
- Unchanged → safe to pull the new update, and the new hash is recorded
- Changed (you edited it) → treated as user-modified and skipped forever — never overwritten automatically
This is the point worth emphasizing: this mechanism prioritizes preserving your changes over always having the latest version — a deliberate design choice.
When you want to go back to the original
One situation is easy to hit: you edit a bundled skill, then want to throw it all away and return to the original — but if you just copy-paste by hand from the repo folder, the manifest still holds the old hash, so the next sync will still treat it as “user-modified” and skip it. The solution is to use the reset command instead of copying by hand:
hermes skills reset google-workspace              # remove from the manifest, keep the current copy, re-baseline from here
hermes skills reset google-workspace --restore     # delete the edited copy, take the exact original back from the repo
Keeping provenance traces for hub-installed skills
For every skill installed from the Skills Hub, Hermes records a full trace in skills/.hub/lock.json: source URL, exact content hash, scanner version used, scan results, install time, and fresh-or-cached status. This is not just a technical log — it is audit evidence: if a skill is later found to have a problem, you can look up exactly where it came from and what checks it passed.
In parallel, .hub/audit.log and .hub/quarantine/ retain the scan history and the skills quarantined for dangerous detections — not silently deleted, but kept for review.
Tracking upstream updates over time
hermes skills check       # which skills have a newer version at the source
hermes skills update      # update (only the skills you have not modified)
This mechanism uses the stored source identifier to go compare hashes on its own — you don’t need to remember which skills you installed from where.
Notes
- Never restore a bundled skill by copy-pasting by hand from the repo folder — always use
hermes skills reset --restore, otherwise the manifest will drift out of sync and cause confusion at the next sync. - If you run Hermes for multiple profiles (e.g. one for work, one for personal use), remember that each profile has its own
.bundled_manifest— resetting in one profile does not affect the others. - When you need to prove that a production-running skill passed security checks,
skills/.hub/lock.jsonis the first place to look — treat it as part of your periodic audit routine, not just a log file left sitting there.
Integrations
11. Integrations — Connecting Hermes to the Outside World
Integrations — connecting Hermes to the outside world. If Skills (chapter 10) is “what the agent knows how to do”, then Integrations is “where the agent can reach”. This is the part that decides whether Hermes is truly useful in your day-to-day work or just an isolated chatbot — because no matter how smart an agent is, it is useless if it cannot read a ticket on Jira, cannot see the state of your home’s sensors, or cannot open a PR on GitHub.
The most notable design philosophy
Hermes does not try to cram every integration into the core to “ship one full-feature release”. Instead, it opens up several different extension surfaces, each suited to a different kind of need:
| What you need | Which mechanism to use |
|---|---|
| Connect to a service that already has an MCP server (Postgres, Linear, Figma…) | MCP — no code, configuration only |
| An internal system with no MCP and no Python SDK | A custom plugin — full control, runs locally |
| Just need to call an existing CLI (TTS, STT…) | Config-driven shell command — no Python needed |
| Want to log/block/monitor agent behavior | Hooks (gateway, plugin, or shell) |
| Want Hermes to live in Telegram, Slack, Home Assistant… | Gateway platform |
The cross-cutting principle that the official documentation itself keeps repeating: “connect exactly what you need, with the smallest useful surface” — not “connect everything just in case”. For financial data, customer data, or any operation that could be destructive, the recommendation is always to keep the tool scope as narrow as possible (filter with tools.include, picking only the few tools you need instead of opening up the entire server).
Security is the default, not an add-on
The point repeated across every integration type in the official documentation:
- MCP OAuth: Hermes handles PKCE and token refresh on its own, and does not store raw credentials casually.
- Plugins: opt-in by default — installing one does not mean it runs; you must actively add it to
plugins.enabled. - Home Assistant: by default no events are forwarded until you explicitly declare which domains/entities to watch — so the agent is not “drowned” in noise or accidentally granted overly broad access.
- Obsidian: the Vault mount and
OBSIDIAN_VAULT_PATHare separate configuration concerns, and the path variable does not create a filesystem sandbox. - Certain dangerous domains (shell execution, arbitrary scripts) are hard-locked by default in the Home Assistant integration, regardless of what you configure.
This is not a trivial detail — it is deliberate design: every new integration starts in a disabled/narrow state, and you must actively expand it, rather than the other way around.
An interesting point worth highlighting
GitHub — a name you would expect to appear first in any list of MCP servers — was deliberately excluded from the official MCP catalog, for a legitimate technical reason (GitHub’s hosted MCP requires each client to bring its own OAuth app). Instead, Hermes chose the more pragmatic solution: a set of skills that drive the gh CLI directly. This is a good example of the argument “just because an open standard exists does not mean you should use it — pick whichever approach is genuinely stronger for that use case”.
The structure of the 6 upcoming sub-sections
From here, 11.1–11.7 will go deep into each specific type of connection: the most open and important platform (MCP), one noteworthy special case (GitHub), structured data connections (Databases), a filesystem-based knowledge integration (Obsidian), the SaaS ecosystem via OAuth (SaaS Tools), a complete real-world two-way integration (Home Assistant), and the deepest extension layer for when everything above is not enough (Custom Plugins).
MCP Servers
11.1. MCP Servers — The Open Tool-Connection Platform
MCP Servers — the open tool-connection platform. If you have to pick one integration to understand deeply first, pick this one. MCP (Model Context Protocol) is the open standard that lets Hermes connect to any tool server that implements the protocol — filesystem, databases, browser stacks, internal company APIs, or ready-made community services — without writing a single line of native tool code in the Hermes core.
Basic configuration
MCP servers are declared in ~/.hermes/config.yaml under the mcp_servers key:
mcp_servers:
  filesystem:
    command: "npx"
    args: ["-y", "@modelcontextprotocol/server-filesystem", "/home/user/project"]

  github:
    command: "npx"
    args: ["-y", "@modelcontextprotocol/server-github"]
    env:
      GITHUB_PERSONAL_ACCESS_TOKEN: "***"
    tools:
      include: [list_issues, create_issue, update_issue, search_code]
    prompts: false
    resources: false
After configuring, run /reload-mcp in a chat session to reload all servers without restarting Hermes.
Two transport types
- stdio — the server runs as a local subprocess and communicates over stdin/stdout (like the
filesystemexample above). Suitable for tools running on your machine. - HTTP/StreamableHTTP — a remote server that Hermes connects to directly. This is the common type for hosted SaaS (Linear, Sentry, Atlassian, Asana, Figma, Stripe…).
For HTTP servers that require OAuth 2.1 (most hosted MCPs today), you only need to set auth: oauth — Hermes takes care of all the hard parts itself: discovery, PKCE, token exchange, refresh, and even step-up auth when the server asks for additional verification mid-session.
How the agent calls tools — clear namespaces
Every tool from an MCP server is named following the mcp__<server>__<tool> pattern to avoid collisions:
tool "read_file" from server "filesystem" → mcp__filesystem__read_file
You do not need to remember these internal names — the agent calls them transparently. But when you are reading logs/transcripts to debug, knowing this naming rule helps you trace which tool from which server is actually running.
The real-world problem: too many tools make the agent less accurate
This is the point most worth discussing in detail. When you attach several MCP servers at once, the agent has to “see” the full schema of every tool from the start — which burns context and reduces tool-selection accuracy, because too many options create noise.
The solution is Tool Search — a bridging mechanism (tool_search / tool_describe / tool_call) that defers loading detailed schemas until the model actually needs the tool:
- Anthropic’s evaluation showed accuracy improving from 49% to 74% on Claude Opus 4 when working with large tool catalogs.
- With small toolsets (few servers, every tool used every turn), Tool Search usually does not bring significant benefits — the bridge only adds unnecessary overhead.
- Hermes’s core tools (terminal, read_file, web_search, send_message…) are never deferred — because they are almost always needed.
Field-tested lessons
- Always filter with
tools.includewhen connecting a new MCP server, especially one that touches sensitive data — do not open up the server’s entire toolset just because it is convenient. The example above enables only 4 of the GitHub server’s many tools, with no delete or merge rights. - If you notice the agent picking the wrong tool, or responses getting noticeably slower after attaching a few MCP servers, that is a sign to check whether Tool Search is enabled at the right threshold (15+ tools attached at once is the point where this mechanism’s benefits start to show clearly).
- Start with a “safe” server first — e.g., a filesystem restricted to one project directory — before expanding to servers with write/delete rights on a real system.
- After changing
mcp_serversin the config, remember to run/reload-mcp— skipping this step is the most common cause of “I already configured it but the agent still cannot see the new tools”.
GitHub
11.2. GitHub — A Deliberate Exception
GitHub — a deliberate exception. This is the most instructive example in the entire Integrations area: sometimes the best solution is not the most popular open standard.
Why GitHub is not in the MCP catalog
The official documentation says it plainly: GitHub was deliberately excluded from Hermes’s official MCP catalog. The specific technical reason — GitHub’s hosted MCP requires each client to bring its own OAuth app, while the dynamic client registration that most other MCP servers accept is rejected by GitHub. In other words, the “plug and play” open-standard integration that Hermes uses for Linear, Figma, Stripe… does not apply smoothly to GitHub.
The alternative — stronger, not weaker
Instead of forcing GitHub into the MCP mold, Hermes chose the pragmatic route: a set of github/* skills that drive the gh CLI directly — GitHub’s official command-line tool. This approach is actually more capable than an ordinary MCP server, because the gh CLI already covers nearly every GitHub operation: reviewing PRs, commenting, merging, managing issues, tracking Actions…
On Desktop, if you have not logged in to gh yet, Hermes detects this and immediately suggests the github-auth skill to set it up, so you do not have to figure out the authentication yourself.
Field-tested lessons
- Do not assume “MCP is always the right choice” — for major platforms with a strong official CLI (GitHub, GitLab, AWS…), a skill that drives the CLI directly can be more complete and more stable than a community MCP server.
- If you build a similar internal integration (a company system that already has its own CLI), consider following exactly this model: write a skill that calls the CLI instead of building a dedicated MCP server just to “follow the standard”.
- When debugging the agent’s GitHub operations and you see odd behavior, remember the path goes through the real
ghCLI — so errors (permissions, rate limits…) usually reflect the actual state of yourghauthentication on your machine. Check withgh auth statusfirst.
Databases
11.3. Databases — Controlled Data Connections
Databases — controlled data connections. Hermes does not ship a hard-coded “database” tool in the core — and this is a point worth emphasizing: the approach is always through MCP, with the principle of minimizing access rights right at configuration time.
Basic configuration
mcp_servers:
  fs:
    command: "npx"
    args: ["-y", "@modelcontextprotocol/server-filesystem", "/home/user/project"]
  postgres:
    command: "uvx"
    args: ["postgres-mcp-server"]
    env:
      DATABASE_URL: "postgresql://readonly_user:***@host/db"
    tools:
      include: [query, list_tables, describe_table]
The tool filtering principle here has a clear precedence mechanism: if you set only include, only those tools are registered; if you set only exclude, every tool except the listed ones is allowed; if you set both, include always wins — meaning a tool that appears in both include and exclude is still allowed. So it is best to use only one of the two, to avoid confusing logic.
Why you should use a read-only user
This is a recommendation repeated throughout the MCP documentation: for every database connection, create a dedicated, limited-privilege DB user/credential (read-only if possible) instead of sharing admin credentials — because once the agent has a query tool with write rights, a single wrong command (due to the model misunderstanding the intent) can cause real damage on production data.
Repo-local, bounded scope
For tasks where the agent only needs to “understand” a specific project — reading the schema, reviewing DB-related code — the recommended usage is to attach an MCP filesystem/git restricted to one specific project directory, so the agent reasons within a bounded workspace instead of having system-wide access.
Field-tested lessons
- There is no “default database MCP” — you must pick a server that fits the DB you are using (Postgres, MySQL, MongoDB…) and configure it manually; there is no one-click catalog like with popular SaaS.
- Always explicitly
excludedestructive operations (drop, truncate, bulk delete) — do not just rely on the model “not being foolish enough to do that”. - Set sensible
timeoutandconnect_timeoutvalues for your DB MCP server — slow queries on large tables can hang the entire turn if they are not bounded.
Obsidian
11.4. Obsidian — Managing a Vault from Hermes
Hermes can manage an Obsidian Vault through the Obsidian skill. When Hermes runs in Docker, configure two separate things:
- A Docker volume mount — gives the container access to the Markdown files in the Vault on the host.
OBSIDIAN_VAULT_PATH— tells Hermes the exact location of the Vault inside the container.
Setting only the environment variable does not give the container access to the real Vault. Mounting the directory without setting the matching container path can make Hermes look in the wrong place.
Docker configuration
Choose a host path and a container path, then use the same container path in both the volume mount and OBSIDIAN_VAULT_PATH:
services:
  hermes:
    volumes:
      - /absolute/path/to/your/vault:/opt/obsidian-vault
    environment:
      - OBSIDIAN_VAULT_PATH=/opt/obsidian-vault
With the official Docker Compose setup, add the Vault mount to the existing volumes: list rather than replacing the ./data:/opt/data mount. Keep the host-side path limited to the Vault, not to a parent directory containing unrelated personal files.
After changing docker-compose.yml or a Compose-level .env, recreate the container:
docker compose up -d --force-recreate
Verify access from Hermes
Verify the path from the same environment that Hermes uses. In the Hermes chat interface, send:
I want you to manage my Obsidian vault using the Obsidian skill.

1. Resolve the `OBSIDIAN_VAULT_PATH` environment variable to its actual absolute path. Do not return the literal string `$OBSIDIAN_VAULT_PATH`.
2. Confirm that the directory exists and is accessible from your current execution environment.
3. List 10 existing Markdown files from the vault, including their relative paths.
4. Do not create, modify, or delete any files yet.
5. If you cannot access the vault, explain exactly which check failed. Do not guess the path or claim access succeeded without verifying it.
Pass condition: Hermes returns the correct path and lists Markdown files that you recognize from the Vault. Do not ask Hermes to write anything until this read-only check succeeds.
Common failures
| Symptom | Possible cause | Fix |
|---|---|---|
| The variable is empty | The variable was not passed into the container or active Hermes process | Check Compose configuration and the active profile/process, then restart or recreate the appropriate service. |
| The variable is set but the Vault does not exist | The path inside the container does not match the volume mount | Compare the right-hand side of the volume mapping with OBSIDIAN_VAULT_PATH. |
| Hermes uses a default Vault | The variable was not loaded into the profile or process currently running Hermes | Confirm the active profile and restart the relevant process. |
| Hermes can read but cannot write | The container user does not have filesystem permission | Check the host directory ownership and permissions, including the container’s UID/GID. |
Filesystem boundaries
OBSIDIAN_VAULT_PATH only tells Hermes where the Vault is. It does not restrict Hermes from accessing other filesystem paths. If Hermes should only be able to work inside one directory, enforce that boundary at the operating-system or container level by mounting only the required directory and applying appropriate permissions.
See the official Hermes Obsidian integration guide and the official environment variable reference.
SaaS Tools
11.5. SaaS Tools — The Ready-made OAuth Ecosystem
SaaS Tools — the ready-made OAuth ecosystem. This is the smoothest experience in all of Integrations, thanks to Hermes’s built-in MCP Catalog.
One-click install, no YAML to write
hermes mcp install linear      # from the built-in catalog
hermes mcp add stripe --url https://mcp.stripe.com --auth oauth   # server not in the catalog
The catalog contains entries curated by Nous (located in the optional-mcps/ directory of the official repository — there is no community self-submission tier; every catalog entry goes through PR review). Typical names: Linear, Sentry, Atlassian, Asana, Figma, Stripe, Notion, Vercel, Supabase…
The real installation flow
- Type
hermes mcp install linear→ Hermes checks the required authentication type (remote OAuth → automatically opens the browser and handles PKCE). - After authentication completes, Hermes probes the server to list all its tools, then shows a tool-selection checklist:
Select tools for 'linear' (SPACE toggle, ENTER confirm)
[x] find_issues       Find issues matching a query
[x] get_issue          Get a single issue
[x] create_issue       Create a new issue
[ ] delete_workspace   Delete a Linear workspace
Only the ticked tools go into mcp_servers.linear.tools.include — meaning you decide at install time, not in a later review. delete_workspace is not ticked by default — a clear example of the “narrow rights by default” principle.
How OAuth 2.1 works under the hood
For servers using the OAuth 2.1 standard (Linear, Sentry, Atlassian, Figma, Stripe…), Hermes handles everything automatically: metadata discovery, client identification (via Client ID Metadata Document — the new mechanism replacing Dynamic Client Registration per the MCP 2026-07-28 spec), token exchange, and refresh on expiry. Tokens are stored at ~/.hermes/mcp-tokens/<server>.json with restricted file permissions (0o600) and are silently reused until a refresh fails, at which point you log in again.
When Hermes runs on a remote server (not the same machine as your browser), there are 2 ways to complete OAuth: manually paste the redirect URL into the prompt, or SSH port-forward a local listener to the machine that has a browser.
Field-tested lessons
- When installing a new SaaS server, always stop at the tool checklist step — do not tick “select all for speed”. Unticking
delete_*andrevoke_*from the start is much cheaper than cleaning up the consequences later. - Some providers (such as Stripe, according to community reports) tend to revoke OAuth sessions periodically — if you hit repeated “not connected” errors, consider switching to a restricted API key instead of OAuth for higher stability on long-running background workloads.
- For static API keys (not OAuth), Hermes stores them in
~/.hermes/.env— remember to back up/restore this exact file when moving environments, not justconfig.yaml.
Home Assistant
11.6. Home Assistant — A Genuinely Two-way Integration
Home Assistant — a genuinely two-way integration. This is a rare example in the Hermes documentation that has both tools and events on the same platform — not only does the agent call outward, the smart home also actively “calls in” to the agent.
Activated with a single token
# ~/.hermes/.env
HASS_TOKEN=your-long-lived-access-token
HASS_URL=http://192.168.1.100:8123    # optional, defaults to homeassistant.local:8123
Just HASS_TOKEN activates both modes at once: the homeassistant toolset lets the agent control devices, and the platform gateway makes Home Assistant appear as a chat channel alongside Telegram, Discord…
Tool mode — direct query/command
4 tools available:
| Tool | Function |
|---|---|
ha_list_entities | List entities, filter by domain (light, climate, sensor…) or area (living room, kitchen…) |
ha_get_state | Inspect the detailed state of one entity (brightness, temperature, sensor value…) |
ha_list_services | List available services for control |
ha_call_service | Perform an action — this is the real “turn the light on/off” tool |
Practical example: “Turn off the living room lights” → the agent finds the right entity_id via ha_list_entities, then calls ha_call_service — you do not need to know the technical entity names in advance.
Event mode — real-time reactions
The gateway adapter subscribes to the WebSocket state_changed. The key point to emphasize: by default no events are forwarded — you must explicitly declare at least one of watch_domains, watch_entities, or watch_all, otherwise the system logs a warning and silently ignores every change:
platforms:
  homeassistant:
    enabled: true
    extra:
      watch_domains: [climate, binary_sensor, alarm_control_panel, light]
      watch_entities: [sensor.front_door_battery]
      ignore_entities: [sensor.uptime, sensor.cpu_usage, sensor.memory_usage]
      cooldown_seconds: 30
The agent’s responses come back to HA as persistent notifications (persistent_notification.create) — shown in the HA interface like regular notifications.
Built-in safety rails
A group of dangerous domains is hard-blocked by default to prevent arbitrary code execution via the smart-home path: shell_command, command_line, python_script, pyscript, hassio, rest_command. All other services are available.
Field-tested lessons
- Start with a narrow
watch_domainslist (climate, binary_sensor, alarm_control_panel is the recommended starting set) — expand gradually as you see the need, instead of turning onwatch_allfrom the start and getting flooded with notifications. - Use
ignore_entitiesfor “noisy” sensors (uptime, CPU, memory) — otherwise every time these values change, it triggers an unnecessary agent call. - Keep dangerous or security-sensitive actions (locking doors, alarms) behind a confirmation step until you genuinely trust the stability of your setup — this is an official recommendation, not just personal caution.
Custom Plugins
11.7. Custom Plugins — The Deepest Extension Layer
Custom Plugins — the deepest extension layer. When MCP and the ready-made channels are not enough — you need a completely custom tool, want to intervene in the agent loop, or want to add a whole new gateway platform — this is the layer that makes it possible without forking Hermes.
Minimal structure
~/.hermes/plugins/hello-world/
├── plugin.yaml       # manifest: name, description
└── __init__.py       # register(ctx) — wires schema to handler
def register(ctx):
    ctx.register_tool(
        name="hello_world",
        description="Respond to greetings",
        handler=hello_world_handler,
        schema={...}
    )
    ctx.register_hook("post_tool_call", log_every_call)
The four main APIs of PluginContext: register_tool (add a tool for the model to call), register_command (add a slash command shared by CLI + gateway), register_cli_command (add a hermes <plugin> ... subcommand), register_hook (run code at lifecycle points: before/after tool calls, before/after LLM calls, session start/end).
Opt-in safety by principle
This is the most important point to emphasize: a plugin does not run just because it is installed. Discovery finds it (it appears in hermes plugins list), but you must actively add it to plugins.enabled:
plugins:
  enabled:
    - hello-world
    - disk-cleanup
  disabled:          # deny-list — always wins on name conflict with enabled
    - noisy-plugin
When installing from GitHub, Hermes asks straight up “Enable ‘name’ now? [y/N]” — the default is no, forcing an explicit confirmation:
hermes plugins install owner/repo              # asks before enabling
hermes plugins install owner/repo --enable     # install + enable, for scripts
hermes plugins install owner/repo --ref <full-sha>  # pin to one exact commit, reproducible
Verify before trusting
hermes plugins doctor owner/repo --ci
This command re-runs the entire discovery pipeline, manifest parsing, and hook/tool registration exactly as real Hermes does — reporting wrong hook names, callbacks missing **kwargs, or mismatches between declaration and actual registration. Important note: this is not a sandbox — plugin code still runs in-process with the current user’s rights and can spawn subprocesses — so only run Doctor (and enable plugins) for code you trust enough.
Not every extension needs Python
The documentation emphasizes an easily missed point: some extension surfaces deliberately use shell commands via config instead of Python — TTS, STT, shell hooks. Any existing CLI “becomes a plugin” with just a YAML declaration, no code to write:
hooks:
  - event: post_tool_call
    command: "notify-send 'Tool: {tool_name} done'"
    when:
      tools: [terminal, patch, write_file]
Field-tested lessons
- For simple needs (notifications, logging, calling a webhook when a tool finishes), always try a shell hook in config.yaml first — much faster than writing a full Python plugin.
- When installing third-party plugins for production, always pin with
--ref <full SHA>instead of branch/tag — to avoid the situation where plugin code changes silently after agit pullyou were not aware of. - Run
hermes plugins doctor --cias a mandatory step in your review process before enabling any community plugin — do not just read the code with your eyes and trust it.
Automation
- Scheduled Tasks
- Crons with Skills
- Webhooks
- Scripts without LLM
- Multiplatform Delivery
- Alerts Only If Necessary
12. Automation — Turning the Agent into a Self-Running System
This chapter pulls together the foundational mechanism that has been appearing scattered across earlier chapters (17.4 KPI Reports, 18 Monitoring, 19.6 Results Delivered) into a complete picture of how Hermes runs itself without anyone pressing a button. If the earlier chapters are concrete applications, chapter 12 is the technical machinery behind all of them — the cron scheduler, webhook triggers, and the design rules that keep an automated system from becoming a source of noise or cost.
Two ways a task gets triggered: by time or by event
| Mechanism | Fires when | Used for |
|---|---|---|
| Cron (12.1, 12.2) | The set schedule arrives | Periodic reports, health checks, weekly rollups |
| Webhook (12.3) | An external event happens | New PRs, new issues, incoming messages, status changes |
As already said in chapter 17: cron “flips the model” — instead of a human starting things, the agent wakes up on schedule, does the work, then goes back to sleep. Webhooks go the opposite way — the agent waits, and only reacts when the outside world reports that something happened.
Three design principles that run through the whole chapter
- Each run is a completely fresh session — no conversation is inherited, so the prompt must carry its own context (12.1).
- Not everything needs an LLM — deterministic scripts are cheaper, faster, and more reliable for the mechanical parts (12.4).
- Silence is a feature, not a bug — a good automation system must know when to say nothing (12.6).
Scheduled Tasks
12.1. Scheduled Tasks — Running Jobs on a Schedule
Syntax for creating a cron job
hermes cron create "0 9 * * 1" "Compile the weekly report" --deliver telegram
/cron add "every 2h" "Check server status"
Both standard cron syntax (0 9 * * 1) and natural language (every 2h, hourly) are supported — no need to memorize traditional cron syntax if you are not used to it.
Managing a job’s lifecycle
hermes cron list
hermes cron pause <job_id>
hermes cron resume <job_id>
hermes cron edit <job_id>
hermes cron delete <job_id>
Jobs fully support pause/resume/edit — no need to delete and recreate them for every small adjustment.
The most important principle: isolated sessions, no conversation memory
Every cron run is a completely fresh session that does not inherit the previous conversation — this is the core difference from a normal interactive chat. A job’s prompt must be self-contained (“what to do”, “by which criteria”, “in what format”) — you cannot write “do it like yesterday”, because the agent has no memory of “yesterday” in the context of a cron session.
Validation before real runs
Hermes validates a job’s configuration before executing it: if an API key is missing, a required skill is missing, or the delivery target is wrong, the job moves to a blocked_config state and sends exactly one warning — not repeated on every tick, avoiding spam while still making sure you know there is a problem.
Notes
- Always run once manually (manual trigger or dry-run) before letting a job run fully automatically — avoid discovering formatting/logic errors only after days of quietly running wrong.
- Periodically run
hermes cron listto check forblocked_configstates — because the warning is only sent once, it is easy to miss if you do not proactively review. - For important jobs, write the prompt in full detail as if instructing someone who knows nothing about the prior context — because that is, in essence, exactly the situation.
Crons with Skills
12.2. Crons with Skills — Attaching Skills to Cron Jobs
Attaching a skill to each job
hermes cron create "0 9 * * 1" \
  "Compile weekly KPIs from CRM and Sheets" \
  --skill google-workspace \
  --name "Weekly KPI digest"
This is the direct connection between chapter 12 and chapter 10 (Skills): a cron job does not just run a bare prompt — it can carry exactly the right toolkit/procedure it needs (Google Workspace, GitHub, a self-made skill created with /learn) to do that specific job properly.
Why this is a stronger pattern than plain cron
Cron + skill means you no longer have to stuff the entire procedure’s instructions into the job’s prompt every time — the complex procedure (already packaged in 10.1) is separated from the schedule, and the job only needs to reference the right skill and state the specific requirement for that run.
Combining --script for the raw data part
hermes cron create "every 1h" \
  "Compare the new snapshot with the previous one, alert if the change is significant" \
  --script watch_site.py
The script runs before each pass and provides context (already fetched/diffed) to the agent — the agent only does the reasoning, without having to redo the entire data-fetching work every time.
Notes
- For jobs that operate external SaaS/APIs, always attach the right skill instead of hoping the agent remembers how to use the tools correctly — a skill guarantees consistency across hundreds of automated runs, unlike an interactive conversation where you can fix mistakes on the spot.
- Split out a separate skill for each type of recurring job (KPI reports, site watching, news rollups) instead of lumping everything into one “do-it-all” skill — easier to maintain and debug when a specific job type has a problem.
- If a cron procedure keeps getting more complex over time, that is a good signal to upgrade from a plain prompt to a well-structured skill (When to Use / Procedure / Pitfalls / Verification, as described in 10.1).
Webhooks
12.3. Webhooks — Event-Driven Triggers
Subscribing to external events
hermes webhook subscribe github --event pull_request
hermes webhook subscribe github --event issues
Unlike cron (which proactively follows a schedule), webhooks let the agent react — when a new PR, new issue, or any event from an external system (GitHub, a custom service) happens, Hermes receives the signal and processes it immediately, without waiting for the next periodic check.
Combined with Development (chapter 15) and Monitoring (chapter 18)
This is exactly the mechanism behind automatically reviewing a PR the moment it is opened (15.6) or automatically answering a new issue the moment it is created, instead of having to wait for a periodic cron job to scan around and discover it.
Cron vs webhook — choosing the right tool for the right need
| Criterion | Cron | Webhook |
|---|---|---|
| Reaction latency | On the set cycle (minutes to hours) | Near-instant |
| Best for | Work that needs periodic rollups and is not urgent | Work that must react as soon as an event happens |
| Cost | Runs on schedule whether or not anything new happened (unless a pre-filtering script is used) | Only runs when there is actually an event |
Notes
- For important events that need a fast reaction (a PR that urgently needs review, an issue reporting a production bug), prefer webhooks over waiting for the next periodic cron job to scan around.
- For rollup/report work that does not need an immediate reaction (weekly reports, news digests), cron remains the simpler and more predictable choice than webhooks.
- Both can be combined for the same purpose: webhooks handle the fast reaction to important events, while cron acts as a periodic safety-net sweep to catch the cases a webhook may have missed (temporary connection loss, rate limits).
Scripts without LLM
12.4. Scripts without LLM — Scripts That Do Not Need a Language Model
--no-agent — running a pure script, at zero token cost
hermes cron create "*/15 * * * *" \
  "System health check" \
  --no-agent --script health.sh
For work that only needs deterministic computation (checking an HTTP status, measuring disk usage, grepping for a known error pattern), use script-only mode: the script runs directly, its output is sent as-is, and no LLM call is needed at all — faster, cheaper, and more reliable for the kind of work that does not require reasoning.
The “boring stack” principle — scripts do the mechanical work, the LLM does the reasoning
This is the architectural philosophy described in detail in chapter 18: start deterministic (scripts fetch/diff/compute), and only add LLM synthesis after you have confirmed there is real value that actually needs reasoning. For simple dashboard numbers, clear threshold alerts, or checks against known error patterns — an LLM brings nothing extra over a plain if/else script, just added cost and latency.
When an LLM is still needed even with a script in place
This does not mean throwing the LLM away entirely — it means separating the roles properly: the script handles the mechanical parts (fetching, diffing, computing), and the agent only joins at the step that needs qualitative judgment (“is this change noteworthy?”, “how should this content be rewritten to be easier to understand?”). This is exactly how --script (not --no-agent) is used, as described in 12.2 and 18.
Notes
- For every purely health-check/threshold job (server status, disk usage, a price crossing a specific percentage threshold), default to
--no-agentfirst, and only move to an agent-based job when natural-language interpretation is truly needed. - For financial data or figures that need absolute precision, always separate the computation into a deterministic script (the same principle described in 17.4) — do not let an LLM round or infer important numbers on its own.
- Track token costs across jobs — if a
--no-agentjob can fully replace an LLM-based job with unchanged results, switch right away to save long-term operating costs.
Multiplatform Delivery
12.5. Multiplatform Delivery — Delivering Results to Multiple Platforms
One job, many destinations at once
hermes cron create "0 9 * * 1" "Weekly report" --deliver telegram,discord,slack
As already said in 18.6, a single job can deliver its result to multiple platforms at once using a comma-separated list — useful when you need both a team channel (Discord) and a personal alert (Telegram) for the same event, or a local file for storage in parallel with a real-time notification.
Available delivery targets
Telegram, Discord, Slack, Signal, or a local file — the same set of platforms the gateway supports (chapter 5), keeping things consistent between where you interact daily and where automated reports land.
Per-platform permission requirements — the most common silent source of errors
Each platform needs the right permissions to receive messages (for example, a Discord bot needs permission to send messages in the exact target channel) — missing permissions cause delivery to fail silently, with no obvious error shown even though the job “reports success” at the agent level.
Notes
- For important jobs that distribute to multiple channels, check the send permissions on each target platform before activating the job for the first time — do not wait until you notice a channel received nothing and then have to debug backwards.
- Name jobs clearly (
--name) when many kinds of alerts land in the same channel — it helps distinguish the origin when several jobs send to the same place. - For the “local file” target, consider using it for reports that need long-term storage/audit, in parallel with a chat channel for instant notification — there is no need to choose one or the other.
Alerts Only If Necessary
12.6. Alerts Only If Necessary — Alerting Only When It Really Matters
The [SILENT] mechanism — the heart of sustainable automation
This is the most important principle closing out the entire Automation chapter, and it has appeared throughout 17.4 and 18: if there is nothing new or noteworthy, the agent replies with exactly the [SILENT] marker and nothing is sent — avoiding turning the alert channel into noise that gradually gets ignored.
Writing the prompt correctly to avoid the common mistake
Always write it clearly in the form “reply [SILENT] only if nothing changed” — avoid letting this marker get buried inside a long explanatory passage, because the cron mechanism treats any occurrence of [SILENT] in the reply as a signal to suppress sending, even if it is only part of a longer explanatory sentence.
Why this is not just a small technical detail
An automation system that sends a notification on every run even when nothing changed will quickly be trained out of sight by its users — when a genuinely important alert finally arrives, it sinks into the same stream of meaningless notifications that came before it. The principle of deliberate silence is exactly what keeps every alert that does appear genuinely worth reading.
Applied consistently to every kind of job
This principle applies uniformly to every application described in the earlier chapters: KPI reports (17.4) are sent only when the figures are noteworthy, site watching (18.2)/price watching (18.4) only alert when a threshold is crossed, log watching (18.5) only reports serious errors — there is no “send just to be safe” exception for any job type.
Notes
- Always test the
[SILENT]prompt by running it with “nothing changed” data before letting the job run automatically — confirm that nothing is actually sent in that case. - If an alert channel starts receiving notifications too often (several times a day for things that are not truly urgent), treat that as a signal to tighten the “worth noting” threshold in the prompt, not as normal behavior to accept.
- For jobs that combine multiple data sources, make sure
[SILENT]is evaluated after everything has been aggregated — avoid the case where one source has a small, insignificant change that still triggers sending a long, unnecessary report.
Delegation
- Isolated Sub-Agents
- Parallel Work
- Multi-Agent Board (Kanban)
- Background Sessions
- Multi-Step Pipelines
- Automatic Result Feedback
13. Delegation — When One Agent Isn’t Enough, Call in Reinforcements
This is the most technically complex area in the entire handbook, because Hermes provides two completely different multi-agent coordination mechanisms that are easily mistaken for one: delegate_task (subagents) and Kanban (the durable work board). Understanding exactly when to use which is the key to the whole chapter 13.
Two mechanisms, two philosophies
delegate_task (Subagent) | Kanban | |
|---|---|---|
| Nature | A function call | A work queue |
| Storage | In process memory, gone when the session closes | Durable in ~/.hermes/kanban.db, survives restarts |
| Scope | Within the same process | Across profiles, across servers |
| Fits | Short reasoning answers that don’t need a human | Work that crosses agent boundaries, needs human participation, or needs an audit trail |
| If the parent process is killed | The running child is cancelled and its result is lost | Continues to exist as a row in the database |
The most condensed sentence from the official documentation: delegate_task is a function call; Kanban is a work queue where every handoff is a row that any profile (or a human) can see and edit.
The six sub-sections follow strictly increasing complexity
- Isolated Sub-Agents (13.1) — the foundation: one fully isolated child agent.
- Parallel Work (13.2) — many child agents at once.
- Multi-Agent Board (Kanban) (13.3) — when subagents aren’t enough, you need a durable system.
- Background Sessions (13.4) — without blocking the parent session while waiting.
- Multi-Step Pipelines (13.5) — multi-stage chains of work with multiple roles.
- Automatic Result Feedback (13.6) — results come back to the right place, at the right time, without being lost.
Isolated Sub-Agents
13.1. Isolated Sub-Agents — Completely Isolated Child Agents
delegate_task — the foundational mechanism of every form of delegation
delegate_task(goal="...", context="...")
Each subagent receives: a completely fresh conversation (no inheritance of the parent’s history), its own terminal session, and a restricted toolset. Only the final summary returns to the parent agent’s context — all the intermediate tool calls and the child’s reasoning process never make it into the parent’s context window.
Security isolation — the child cannot have permissions the parent doesn’t
Each subagent inherits exactly the toolset the parent has enabled — the model cannot grant a child permissions the parent doesn’t have. Some tools are always blocked for subagents regardless of the parent: delegate_task (no recursion — except for subagents holding the orchestrator role), clarify (must not ask the user back), memory (no writes to the shared MEMORY.md), send_message (no cross-platform side effects), execute_code.
The most important principle: the subagent knows nothing about the parent’s conversation
This is the most common mistake when first using delegation: the subagent starts completely blank — if you hand it “fix the error we just discussed”, the subagent has no idea what that error is. Always pass explicit file paths, error messages, project structure, and specific constraints in the context parameter.
Notes
- Use
delegate_taskfor heavy-reasoning tasks where the intermediate results don’t need to be kept (reviewing a piece of code, searching for a pattern in a codebase) — this is exactly the “zero-context-cost” workload the tool was designed for. - Always write
contextas if handing the work to someone completely new to the project — missing context is the number-one cause of subagents going off track. - For high-quality tasks, don’t forget: the model configuration for subagents is global for the whole session (
delegation.modelin config.yaml); there is no per-task model parameter — if you need different models for different children in the same batch, this is exactly when you should move to Kanban (13.3), which supports per-task model overrides.
Parallel Work
13.2. Parallel Work — Running Multiple Child Agents at Once
Batch syntax — one tasks array, many parallel subagents
When the parent agent provides a tasks array, Hermes returns a single background handle, runs the subagents in parallel, and posts one aggregated result after every child is done.
Concurrency limits — deliberate, not an arbitrary technical cap
By default a maximum of 3 tasks run at the same time (configurable via delegation.max_concurrent_children or the DELEGATION_MAX_CONCURRENT_CHILDREN environment variable; there is no hard ceiling). A batch that exceeds the limit returns a clear tool error instead of silently truncating — avoiding the situation where you assume 5 tasks ran but only the first 3 were actually processed.
Results always follow the input order, not the completion order
Even if the children finish unevenly (the fast one done first, the slow one later), the returned results are always arranged in the original input index order — keeping the mapping between results and original requests consistent, so you don’t have to figure out which result belongs to which request.
Three classic patterns
- Parallel research: hand out three independent research topics, each subagent explores on its own, and the parent synthesizes them into one coherent report.
- Evaluating multiple options at once: for example, comparing 3 ways to add full-text search to an application (PostgreSQL tsvector, Elasticsearch, Meilisearch) — each subagent independently researches one option, with no cross-contamination between the evaluations since they are fully isolated.
- Big refactors split up: each subagent handles a different part of the same refactoring task.
Important warning: same directory is safe only for different files
Each subagent has its own terminal session and can work in the same project directory without colliding — as long as they edit different files. If two subagents might touch the same file, handle that file yourself after the children finish; don’t let two of them overwrite each other.
Notes
- Before handing out a parallel batch, make sure the tasks are truly independent — if they need to coordinate with each other or share state mid-way, this is not a parallel-subagent use case; move to Kanban.
- For multi-option evaluations, use the isolation property to its advantage to avoid bias — each subagent stands on its own merits, and the parent only synthesizes after all of them have finished independently.
- Monitor progress through the real-time tree view in the CLI (each subagent shows its own progress line) or through
/agents(alias/tasks) in the TUI to see the tree of running/finished subagents.
Multi-Agent Board (Kanban)
13.3. Multi-Agent Board (Kanban) — When Subagents Aren’t Enough
The problem Kanban solves — what delegate_task cannot do
delegate_task is a synchronous RPC call: the parent agent forks a child, waits for it to finish, and receives a summary. Fast and useful for quick, tidy reasoning tasks — but it hits clear limits when you need to: coordinate a parallel research team with human participation mid-way, run a recurring operational process that must survive restarts, or build a pipeline where a PM writes the spec, an engineer implements, a reviewer rejects, the engineer retries, and the reviewer approves — all with a full audit history of every attempt.
Architecture — each task is a row, each worker is a real OS process
Kanban is a durable, SQLite-based work board (~/.hermes/kanban.db), shared across every Hermes profile on the same server — unlike subagents, which only exist within a single process. Each task is a row in the database; every handoff is a row anyone can read/write; each worker is a full operating-system process with its own identity — not a fragile “swarm of subagents in the same process”.
Two doors, one database
- Agents drive the board through the
kanban_*toolset (kanban_show,kanban_list,kanban_complete,kanban_request_review,kanban_block,kanban_comment,kanban_attach…). - Humans/scripts/cron drive it through
hermes kanban ...(CLI),/kanban(slash command, working on the CLI and on every gateway platform), or the visual dashboard (a separate plugin).
Both doors go through the same kanban_db layer — ensuring every side sees exactly one consistent state, with no data drift.
The five standard Kanban work patterns it solves
- Research triage — multiple parallel researchers + one analyst + one writer, with humans stepping in mid-way.
- Scheduled operations — a daily newsletter that accumulates into a journal over several weeks.
- “Digital twin” — a durable assistant with its own name (inbox-triage, ops-review) that accumulates memory over time.
- Engineering pipeline — decomposition → parallel implementation across multiple worktrees (15.2) → review → retry → open PR.
- Fleet work — one specialist managing N targets (50 social accounts, 12 services to monitor).
Notes
- Choose Kanban over
delegate_taskas soon as any of the following conditions hold: you need human participation mid-way, survival across restarts, a full audit trail of multiple attempts, or work that must cross different profiles. - For genuinely multi-host needs (separate physical servers), run an independent board on each host and use
delegate_taskor a message queue to bridge between boards — Kanban does not automatically sync across multiple servers. - Don’t use Kanban for work that only needs a quick reasoning answer nobody will review — that is still
delegate_task’s territory; using Kanban for such simple work is like bringing a sledgehammer to crack a nut.
Background Sessions
13.4. Background Sessions — Without Blocking the Parent Session
The problem with the original synchronous version
The original delegate_task was synchronous: the parent agent calls the tool and stands frozen, waiting until every child finishes its work. A session that is handed both a research task and a documentation-writing task at the same time has to wait for one to finish before starting the other — the user can’t ask a follow-up question, can’t redirect a running task, and can’t start a third job while the first two are still being processed.
Async delegation — solving exactly that bottleneck
The async_delegation toolset lets the parent call delegate_task_async, immediately receive a task_id, and keep processing other messages while the child runs independently in the background — its full lifecycle managed through tools: spawn, check, steer, collect, cancel, list.
Results no longer lost when the process restarts
An important recent improvement: completions of background delegation are now durable — if the process is restarted mid-way, results are restored and delivered through a ledger with ownership checks, instead of disappearing completely. Along with that, each subagent dispatch now returns a transcript file directly — you can tail -f it to watch every tool call and every reply of the child in real time, an easy-to-read log for each child.
On the Desktop app
There is a dedicated “watch window” that streams the live activity of background subagents (delegate_task(background=true)) — visual monitoring without having to open a terminal and read raw logs.
Notes
- For work that must run fully independently — capable of running while the terminal is disconnected (not just “not blocking the current session” but also “surviving a full process restart”) — use a cron job (12.1) or
terminal(background=True, notify_on_complete=True)instead of async delegation — because async delegation is still bound to the running parent process (process-local), unlike cron, which runs completely independently. - Take advantage of
tail -fon each subagent’s transcript file when you need to debug a running background child without interrupting its process. - For long workloads running many background subagents at once, check with
/agents(/tasks) periodically — the visual tree shows which child is running and which has finished, so you don’t lose track with many parallel tasks.
Multi-Step Pipelines
13.5. Multi-Step Pipelines — Multi-Stage Work Chains
Kanban is the right tool for multi-role pipelines
This is the “Engineering pipelines” pattern mentioned in 13.3: decomposition → parallel implementation across multiple worktrees (15.2) → review → retry → open PR — a multi-stage chain where each stage can be handled by a different profile/role, and every stage transition is a traceable row.
Tasks carry full metadata for coordination
Each Kanban task carries: its assignee (a profile name), optional dependency links (task B only starts once task A completes), a workspace type (scratch / worktree / dir:<path>), and an optional tenant namespace — enough information for a dispatcher to automatically route the right work to the right worker in the right dependency order.
Automatic dispatcher — no human pressing every step
A background dispatcher continuously and atomically claims ready tasks (those whose dependencies are satisfied), then spawns the assigned profile as an independent operating-system process — not a fragile swarm of subagents in the same process that breaks on an incident.
A review-reject-retry loop with a full audit trail
This is exactly the PM → engineer → reviewer pipeline example mentioned in 13.3: the engineer finishes implementing and calls kanban_request_review; the reviewer is not satisfied and calls kanban_request_changes; the engineer fixes it and requests review again; and so on — the complete history of every attempt is fully preserved in task_comments/task_events, not compressed away over time like a normal context window.
Notes
- For multi-stage coding pipelines (chapter 15), combine worktrees (15.1/15.2) directly as the workspace type of each Kanban task — each implementation stage runs in its own worktree, avoiding collisions when many stages/tasks run in parallel on the same repo.
- Use explicit dependency links between tasks instead of manually coordinating the order — let the dispatcher handle “when is this task ready to start”, reducing the risk of a human forgetting a step or running things in the wrong order.
- For pipelines that need a full audit (for example compliance review, financial approval workflows), Kanban is the right choice precisely because the history of every request-review/request-changes is never compressed or lost — unlike normal conversation history, which can be compressed over time (mentioned in 19.3).
Automatic Result Feedback
13.6. Automatic Result Feedback — Results Automatically Find Their Way Back
The core problem: a finished answer must not be allowed to vanish
This is the point that closes chapter 13 with an important trust commitment: if the gateway “dies” right between generating an answer and the platform actually confirming that it was sent, that answer previously silently vanished — and you still paid for the model call you had spent without ever receiving the result.
The delivery-obligation ledger
The new mechanism records every final reply in a durable ledger in state.db right around the moment it is sent to the platform, and automatically redelivers it the next time the system restarts — closing a serious (P1) hole of silently losing results, applying to every channel: Telegram, Discord, Slack, and all the other platforms described in chapter 5.
Combined with the ownership-checked ledger for background delegation
As described in 13.4, results from background subagents use a similar mechanism — with ownership checks (ownership-checked) to ensure that results restored after a restart are delivered to exactly the right session/requester, without confusion or misdelivery.
The connection to 19.6 — where results need to reach the right place
This is exactly the infrastructure layer behind the “results must reach the right channel” principle described in 19.6 — not just a matter of configuring the right destination, but also of technically guaranteeing that once an answer has been generated, it will definitely arrive, even if an infrastructure incident happens exactly at the moment of sending.
Notes
- No extra configuration is needed to benefit from this mechanism — it is a default infrastructure guarantee, applying to every delegation task and every gateway channel.
- For important production workloads (cron jobs, long background delegation), the existence of this ledger mechanism is one more reason to feel confident running Hermes on an always-on VPS (chapter 1) rather than on a personal machine that can power off at any moment — results are not lost, but you still need continuously running infrastructure for the redelivery mechanism to have a chance to execute on restart.
- If you suspect a delegation result was “lost” before updating to the version with this ledger, this is exactly the kind of incident that updating Hermes (2.5) directly fixes — not a user-side configuration error.
Research
14. Research — From Looking Up Information to a Complete Research Product
This is the area where the foundation tools described in chapter 8 (Web Search, Web Browsing) converge with cron (chapter 12), delegation (chapter 13), and system skills (chapter 10) to form a real research pipeline — not just “search and answer”, but a system capable of continuous tracking, cross-referencing multiple sources, and always being able to trace back to the original evidence.
The through-line: real research is not one-and-done
Exactly as the official documentation emphasizes: real research is not just reading — it is reading, comparing, extracting, verifying sources, organizing by topic, following citations, and usually some form of analysis/synthesis on top of that. Because Hermes has cross-session memory (chapters 9, 20), its biggest advantage for long-running research (competitive intelligence spanning weeks, continuous literature review) is that the agent builds cumulative understanding over time, recalling earlier findings without needing to be briefed from scratch.
The five subsections follow the lifecycle of a research project
- Automatic Monitoring (14.1) — continuous watching, without pressing a button every time.
- Multi-Source Search (14.2) — don’t stop at a single source.
- Competitor Analysis (14.3) — a specialized application that demands tighter discipline than ordinary monitoring.
- Document Synthesis (14.4) — turning scattered sources into one coherent product.
- Sourced Reports (14.5) — making sure every claim is traceable to where it came from.
Automatic Monitoring
14.1. Automatic Monitoring — Continuous, Hands-Free Watching
Directly built on the cron mechanism from chapters 12 and 18
This is the research application of the “boring stack” principle described in chapter 18: the agent gathers information overnight and hands you a summary each morning — the morning briefing is the most popular first job because the risk is low and the usefulness is immediate, folding the calendar, key metrics, and an inbox scan into a single message before you start your workday.
Memory makes each briefing “smarter” over time
This is the difference from an ordinary cron script: memory makes each briefing sharper — the agent learns which numbers you actually care about and stops including the ones you always skip, following exactly the Work Conventions mechanism described in chapter 9.2.
Watch, not manual polling
Monitoring is a natural fit because the agent can observe continuously and only report when something changes — saving you from having to check manually. What you watch can be a competitor’s pricing page, a status page, inventory levels, or search rankings.
Notes
- As per the
[SILENT]principle from chapter 12.6, keep the workflow observable — the more steps the agent chains together on its own without review, the more important it is to log what it did and limit what it can touch. - For multi-step workflows (gather → process → next action), reuse skills saved from earlier runs — each skill is a reusable building block that makes the second run faster than the first.
- The daily briefing is the best “starter” job — low risk, immediate value — before moving on to more complex monitoring jobs like competitor analysis (14.3).
Multi-Source Search
14.2. Multi-Source Search — Searching Across Multiple Sources
Don’t stop at one search engine
Exactly per the toolset described in chapters 8.3/8.4, research collection comes from whatever sources are configured: web_search, web_extract, browser_navigate, or terminal (curl, dedicated CLIs) — a good research process doesn’t limit itself to a single backend; it picks the right tool for the right kind of source.
Combining Extract + Compare — the classic multi-source operation
Fetch these three competitor pricing pages and create a comparison table:
https://example-a.com/pricing
https://example-b.com/pricing
https://example-c.com/pricing
The standard flow: fetch the page → strip navigation/ads/boilerplate → return clean markdown → the agent analyzes and builds the comparison table — exactly the browser/web_extract workflow described in chapter 8.4, applied in parallel across multiple sources at once.
Keeping context across follow-up questions
Because Hermes keeps the conversation context, a follow-up question like “which of these frameworks has the best documentation?” automatically understands it refers to the frameworks from the earlier search — no need to repeat the whole context with every follow-up.
Running in parallel via Parallel Delegation (chapter 13.2)
When you need to cross-check several options or several independent sources at once, the most effective approach is to hand each source to its own dedicated subagent for independent research, avoiding cross-contamination between the evaluations, and then let the parent agent synthesize — exactly the “evaluate multiple options in parallel” pattern described in chapter 13.2.
Notes
- Pick the right tool per source type:
web_searchfor initial exploration,web_extract/browserwhen you need to read a specific page in depth (especially post-login or dynamically rendered content),terminalwhen the source has its own dedicated API/CLI. - When comparing multiple sources of the same kind (pricing pages, changelogs, documentation), always structure the request as a table from the start instead of letting the agent answer in prose — easier to cross-check and easier to reuse.
- For long-running research projects, leverage cross-session memory (chapter 9) so you don’t have to “brief from scratch” every time you come back — this is precisely the core advantage over stateless search tools.
Competitor Analysis
14.3. Competitor Analysis — Analyzing Competitors
Not just an ordinary page-diff watcher
This is the single most important thing to understand about the official Competitor News Monitor skill: it is not merely a page-diffing tool — it applies company news classification by category, source hierarchy, event de-duplication, and business-importance scoring. The goal is to watch a declared set of companies and report only developments that are truly important, new, and backed by evidence from the original source.
Set up once, run on schedule forever
The setup runs in the foreground exactly once — recording official company names, domains, products, aliases, geographic/language regions, the event categories to track, the frequency, the audience, and the “notable” threshold — after which the periodic checks run as a cron tick, pre-built with the competitor-watch automation blueprint.
Clear boundaries: when to use this skill, when not to
This skill is not for one-time research about a company (use web_search/web_extract directly instead) or for ordinary feed reading (use the separate blogwatcher skill) — this is an important dividing line to avoid using the wrong tool for the wrong need.
Why “report deltas, not dumps”
Because the agent remembers previous runs, it reports what actually changed, not the full data scanned every time — scanning a competitor’s changelog, pricing page, and release notes weekly, comparing against last week’s run, and summarizing only the parts that truly changed.
Notes
- Declare the “materiality” threshold clearly at the setup step — otherwise the job easily falls into reporting every trivial change, going against the
[SILENT]principle described in chapter 12.6. - Combine with multi-source (14.2): for each competitor, don’t just watch a single page but also the changelog, pricing page, and release notes — the source hierarchy in the skill helps separate news from official sources (company blog) from rumors/speculation from third parties.
- If you need an in-depth analysis of one specific competitor right now (not continuous monitoring), don’t use this skill — go back to direct
web_search/web_extractfor one-off needs.
Document Synthesis
14.4. Document Synthesis — Synthesizing Documents
From scattered sources into one coherent product
This is the step that connects gathering (14.1, 14.2) with delivering a finished product (14.5): the agent can pull new papers from arXiv, extract the methodology sections, cross-check claims across papers, write synthesis notes — and send you a morning summary of what changed.
Business application — the feedback synthesizer
Feed in support tickets, app store reviews, or sales call notes on a schedule, and get back recurring themes ranked by severity, plus suggested impacts on the roadmap — save this workflow as a skill so the output format stays consistent forever.
Academic application — the research-to-brief pipeline
Hand it a topic on Friday, the agent researches over the weekend, drafts a structured brief, and delivers it on Monday — a clear illustration of how document synthesis combines with cron (chapter 12) and background sessions (chapter 13.4) to run fully unsupervised.
For long-horizon academic writing projects
The dedicated research-paper-writing skill goes further still: tracking state across sessions, scheduling experiment monitoring, counting down deadlines, automatically checking arXiv on a schedule — combining delegation, scheduling, and memory across the entire research lifecycle, not just a single one-off synthesis.
Notes
- For synthesis work that repeats in a fixed format (weekly feedback synthesis, monthly research briefs), save the workflow as a skill from the very first run — guaranteeing a consistent output format across all future runs, following exactly the Reusable Procedures principle described in chapter 10.1.
- For synthesis projects that must run unsupervised over several days (like the weekend research-to-brief pipeline), combine cron + background delegation (chapter 13.4) instead of keeping an interactive session open the whole time.
- When the synthesized content will serve as the basis for real decisions (roadmap, strategy), always pair it with the Sourced Reports step (14.5) — synthesis without clear provenance is easily mistaken for the agent’s opinion rather than grounded synthesis.
Sourced Reports
14.5. Sourced Reports — Grounded, Traceable Reports
Core principle: every claim taken from an external source carries a citation
This is exactly the official Grounded Citations skill — every claim taken from an external source gets an inline numbered citation plus a “Sources:” list at the end, Perplexity-style. The scope is broad: from chat answers, to written documents (markdown, PDF, docx, slides), to full research reports.
When to use it, when to skip it
Use it for: research, comparisons, news summaries, “what is the current state of X”, any document written to disk that cites/paraphrases/reports facts from external sources, fact-finding the user will want to double-check, and multi-source synthesis where conflicting sources need to make clear who said what. Skip inline citations when the lookup is merely auxiliary to another task — a quick syntax/version check in the middle of coding, casual conversation, creative writing.
The “ledger” mechanism — citation numbers never come from the model’s memory
This is the most important technical point, and it guarantees integrity: a ledger script owns the url → [sequence number] mapping, so the numbers and URLs always come from actually retrieved data, never from the model’s memory — the model only emits the small integers it has been handed, and does not invent numbers or URLs on its own.
For high-risk work — the full fact-checking chain
That same ledger also serves as a fact-verification chain: a verbatim quote is attached to each source (rejected unless it actually appears verbatim in the fetched page content), claims from the model’s own knowledge are clearly marked [unverified], and the verify --evidence step will fail any draft that has a citation without actual evidence attached.
Notes
- For any report/document that will be used to make real decisions, always enable ledger-backed citations — don’t accept a synthesis that “sounds plausible” without a link back to the actual source.
- For extremely sensitive work (legal, financial, medical reports), use the
verify --evidencestep as a mandatory checkpoint before treating a draft as done — don’t rely on “skimmed it and it seemed fine”. - Combine directly with Competitor Analysis (14.3) and Document Synthesis (14.4): every synthesized report from those two processes should pass through this citation step before delivery — turning a convenient summary into a document genuinely trustworthy enough to act on.
Development
15. Development — Hermes as a Hands-On Coding Assistant
This is the area where most of the tools described in chapter 8 (Terminal, File Reading/Writing) and chapter 11 (GitHub via the gh CLI) come together into a complete software development workflow. The difference from an ordinary coding copilot: Hermes does not just suggest code inside the IDE — it can run commands itself, test itself, commit itself, open PRs itself, and most importantly, run multiple sessions in parallel on the same repo without colliding with each other.
The underlying mechanism: Git Worktree — running multiple agents in parallel, safely
This is the most important technical point to understand before diving into each sub-section. Hermes comes with a -w flag that automatically creates a throwaway worktree with its own branch:
hermes -w                      # interactive session inside a worktree
hermes -w -q "Fix issue #123"  # single query inside a worktree
Every CLI session with worktree: true enabled creates a new worktree under .worktrees/ with its own branch — the agent can modify files, commit, push, and open PRs without interfering with other sessions running in parallel on the same repo. By default, a new worktree branches from the most recently fetched remote tip (not the local HEAD, which may already be stale) — this keeps the PR diff reflecting only the actual changes, without inheriting discrepancies caused by a lagging local clone.
Checkpoints and /rollback — a safety net for changes made along the way
Besides git commit (used for major milestones), Hermes has its own per-worktree checkpoint mechanism — use /rollback as a safety net for small fixes made by tools, independently of the official git history.
The six sub-sections follow the lifecycle of a code change
- Repository Inspection (15.1) — understand the codebase before touching it.
- Feature Creation (15.2) — writing new features.
- Bug Fixes (15.3) — fixing bugs methodically.
- Tests and Lint (15.4) — confirming that changes are correct and clean.
- Pull Requests (15.5) — putting changes up for review.
- Code Review (15.6) — both self-review and reviewing other people’s code.
Repository Inspection
15.1. Repository Inspection — Understanding the Codebase Before Touching It
The three core tools for exploration
search_files (ripgrep-based, described in 8.2) is the main tool for locating relevant code before making changes — far faster than skimming file by file. Combine it with read_file to see the details, and terminal to run quick investigation commands (git log, git blame, tree).
AGENTS.md — the project map that already exists
As stated in 7.2, if the repo has an AGENTS.md, Hermes automatically loads the merged chain from the repo root down to the working directory — this is usually the best starting point before doing a manual investigation yourself, because it contains conventions that the maintainers have already written down.
Notes
- Always start a development task by having the agent investigate first (“find the files related to X before fixing”) instead of letting it jump straight into fixing — this reduces the risk of fixing the wrong place due to a misunderstanding of the structure.
- For a large repo without an AGENTS.md, consider using
/learn(10.4) to have the agent build a knowledge-base skill about the project architecture — useful if you plan to return to work on this repo many times. - Avoid running Hermes directly from a bare repo root when using worktrees — always work inside a specific worktree directory so the agent has a clear scope.
Feature Creation
15.2. Feature Creation — Writing New Features
Start with a dedicated worktree for each feature
The recommended principle: create a separate branch/worktree for every significant change — keep the diff focused and the PR small and easy to review. This is a habit to adopt from the moment you start creating a feature, not something to think about only when opening the PR.
Combine with AGENTS.md to follow existing conventions
When writing a new feature, AGENTS.md (7.2) ensures the generated code follows the project’s conventions — directory structure, naming style, architectural patterns already in use — rather than the agent applying a generic style that does not fit the codebase.
Notes
- For a feature that needs multiple coordinated steps (write code → write tests → update docs), consider using a bundle skill (10.1) if this is a process you repeat frequently in the project.
- Use checkpoints/
/rollbackwhen experimenting with different approaches for the same feature — safer than committing each attempt. - If you need to try multiple solutions to the same problem in parallel, open separate worktrees (one branch per approach) instead of trying them sequentially on the same branch — easier to compare, and you do not fear losing a discarded option.
Bug Fixes
15.3. Bug Fixes — Fixing Bugs Methodically
The standard process: reproduce → locate → fix → confirm
The investigation (15.1) applies directly to bug fixing: use search_files/git blame/git log to find the exact piece of code related to the bug, and read the context carefully before patching — avoid fixing the surface symptom without understanding the root cause.
A dedicated worktree for hotfixes
For an urgent bug that needs fixing on a different branch than the one where the main feature work is happening, hermes -w lets you open a completely separate worktree to handle the hotfix without affecting the in-progress feature in another session.
Notes
- For bugs reported by users via a GitHub issue, use the
github/*skill (11.2) throughgh issue viewto get the full context (description, comments, attached logs) before starting the fix — avoid fixing based on a short issue title that lacks sufficient information. - After fixing, always have the agent clearly explain the root cause in the commit message or PR description — not just describing “fixed bug X” without saying why the bug happened.
- For hard-to-reproduce bugs, consider using
terminalto write a reproduction script first, confirm the bug actually occurs, and only then start fixing — avoiding “fixing” something that is not the real cause.
Tests and Lint
15.4. Tests and Lint — Confirming Changes Are Correct and Clean
The Terminal tool is the center of this step
Running the test suite, linters, and type checkers all goes through the terminal tool (8.1) — with a Docker/Daytona backend, the test environment is completely isolated from the host machine, safer when running tests for a project you do not fully trust.
The fix-run-retest loop
The natural process: the agent runs the tests → sees a failure → reads the error → patches the code → runs the tests again → repeats until passing. This is where patch (instead of write_file, 8.2) shines the most — fixing exactly the broken part without overwriting code that was already correct.
Notes
- Always have the agent run the full test suite before reporting “done”, not just the tests for the part just fixed — to avoid regressions in other code that was not checked.
- For a project with many kinds of checks (unit tests, lint, type check, security scan), list all the commands that need to be run in AGENTS.md (7.2) — ensuring the agent does not skip any step even when not reminded each time.
- If the linter can auto-fix, have the agent run the auto-fix command first, and fix by hand only the parts the linter cannot handle automatically — saving time and reducing the chance of fixing it wrong.
Pull Requests
15.5. Pull Requests — Opening Structured PRs
Via the gh CLI, not via MCP
As stated in 11.2, GitHub is deliberately not in the MCP catalog — Hermes controls PRs directly via the gh CLI through the github/* skill set, stronger than an ordinary MCP server because it covers nearly all GitHub operations.
Worktrees guarantee a clean diff
Because a worktree by default branches from the latest remote tip (not an old local HEAD), the PR opened has a diff that reflects only the actual changes — not contaminated with commits that the main branch already had but the local clone has not picked up yet.
Automated triggers via webhooks — extending beyond manual operations
For a workflow you want to fully automate (for example: the agent automatically opens a PR when a cron job detects a periodic bug that needs fixing), combine hermes webhook subscribe to listen to GitHub events, or hermes cron for the agent to periodically check and propose PRs on its own.
Notes
- Always have the agent write a clear PR description: what problem is being solved, the approach taken, how it was tested — not just listing the changed files.
- For a PR going into a production repo, keep a human approval step before merging — Hermes can create the PR on its own, but the merge decision should always go through a human, especially if you do not yet fully trust the agent’s accuracy on that kind of task.
- With small, focused PRs (thanks to per-feature worktrees in 15.2), review will be much faster and more accurate than a big PR lumping together unrelated changes.
Code Review
15.6. Code Review — Reviewing Your Own Code and Other People’s
Three basic review methods via the CLI
# Review uncommitted changes in the current repo
hermes chat -q "Review my uncommitted changes, list the problems and suggest improvements"

# Clean output mode, suitable for cron/CI (only prints the final report)
hermes -z "review the diff in current git repo and output structured findings"

# Specify a particular model/provider for the review
hermes chat -q "review this PR" --provider anthropic --model claude-opus-4.7
Handling many files in parallel with subagents
For a large, multi-file PR, the review can be split up and delegated to subagents running in parallel via delegate_task — each subagent reviews a part, and the results are merged into a consolidated report, much faster than reviewing file by file sequentially.
Automating the entire review lifecycle
The difference from just using Claude Code/Cursor for manual review in the IDE: Hermes can trigger reviews automatically via GitHub events (hermes webhook subscribe), run periodic scans for new PRs (hermes cron), and then send the results via the Gateway to Telegram/Slack — nobody needs to proactively open the IDE to get a review.
Notes
- For reviews that need to go into a CI/cron pipeline, always use clean output mode (
hermes -zor equivalent) so the results can be parsed automatically, without being mixed in with interactive conversation. - Attach the team’s specific review checklist to AGENTS.md or a dedicated skill (10.4, using
/learnfrom existing coding convention docs) — ensuring reviews are consistent across runs, without relying on the model guessing the criteria each time. - When having the agent review its own PR (after creating it in 15.5), treat this as a supplementary step, not a replacement for human review — especially for changes that affect security or important business logic.
Content
16. Content
Content — Hermes as a content production machine. This is a clearly different area from chapter 17 (Business): if Business is “tidying up internal work”, then Content is “producing things that face outward” — articles, newsletters, social posts, images, audio. The common thread throughout: Hermes has no single “content tool” — it assembles content production from web search, image generation, TTS, and writing skills — all callable within the same conversation, so the final product is always grounded in data actually collected, not generic templates.
The foundation tools for the whole of chapter 16
Four core capabilities cover most content needs, packaged through the Tool Gateway of Nous Portal (one subscription, no need to juggle several separate API keys): web search (Firecrawl), image generation (FAL — 11 models such as FLUX 2, GPT-Image, Nano Banana Pro…), text-to-speech (OpenAI via the gateway, or 10 other TTS providers if you configure them yourself), and a cloud browser for deep research.
From here, 16.1–16.6 go through each concrete stage of a content production workflow: finding ideas, writing, packaging into a newsletter, posting to social networks, illustrating with images, and rendering as speech.
Idea Research
16.1. Idea Research
Diverse idea sources, not just plain web search
- Web search + browser automation to research topics, trends, and competitors.
- YouTube transcript skill: turn a video into a summary, mining insights from existing content instead of creating from scratch — useful when you want to “learn” from a topic-focused channel and turn it into a source for many future articles.
/learn(covered in 10.4): when you want Hermes to understand a field deeply enough to generate ideas with the right “flavor” — point it at documents, books, or case studies and let it build a knowledge-base skill.
A field-tested workflow in the style of “weekly competitive analysis”
A canonical example recorded in the documentation: an agent fetches the latest news about 3 competitors and compiles it into a comparison report on product positioning — each step consumes the previous step’s result, deciding on its own which tool to call. Apply the exact same pattern to content: research a topic → identify the angle still missing in the market → produce a grounded list of ideas.
Notes
- Wire this research step into a weekly cron (
/cron add "every 1w" "find trending topics in industry X, suggest 5 article ideas") — turning “brainstorming” from a whim into a steady source of ideas. - For topics that demand high accuracy, always require the agent to cite sources alongside each idea — easy to verify, and it avoids writing based on the agent’s own extrapolation.
Writing
16.2. Writing
No single official “content-writer” skill — a structured process instead
The effective approach per community experience: build a dedicated workspace for writing — separate files for voice/tone, editorial standards, article templates, reference examples, and operating instructions. A clear file structure makes the agent’s lookups more reliable than cramming everything into one prompt.
Building a “voice profile” from your own past writing
The recommended process:
- Feed the agent old articles/emails that embody the exact writing style you want.
- Optionally add writing by other people that you like, to widen the reference spectrum.
- Ask the agent to analyze and record a voice profile: the readership, the point of view, sentence style, recurring themes, editorial rules, and the article types you usually write.
- Test it on a narrow task first (e.g., draft only, no auto-publishing), with a human review — expand gradually as trust grows.
Notes
- Invest in the voice profile early — this is exactly the “skill-ification” of your personal/brand writing style, reusable for every future article, in the spirit of Reusable Procedures in chapter 10.1.
- Always keep a human approval step in the early stages — even when the agent writes in the right voice, publicly published content should still pass review, especially while the process is newly set up.
Newsletters
16.3. Newsletters — Periodic Editions
Combining cron + writing skill + communication skill
A newsletter is the textbook example of a scheduled recurring workflow — the exact formula discussed in chapter 17.4:
hermes cron create "0 8 * * 1" "Write the weekly AI newsletter for developers: 3 top news items + short analysis" \
  --skill web-search \
  --name "Weekly AI newsletter"
From existing content to newsletter format
A useful pattern: the agent can transform content you already have (articles, notes, URLs) into a structured newsletter outline — different from writing from scratch because it reuses existing material, saving effort when you already have sources.
Which channel to send it through
- The Email gateway (chapter 17.1) to send directly via SMTP to your recipient list.
- Or combine with the Google Workspace skill to draft in Docs first, review, and only then send.
Notes
- Use the
[SILENT]mechanism (discussed in 17.4) if you want the newsletter to go out only when there is content good enough — avoiding an “empty” issue just because the schedule arrived. - Because every cron run is a completely fresh session, the prompt must spell out the desired format, length, and voice — you cannot rely on “like always”.
Social Networks
16.4. Social Networks
From long-form content to many short formats
A common way of operating: from the same original research/article, the agent restructures it into multiple different formats — long-form post, thread, social summary — reusing a single research source instead of writing separately for each platform.
Publishing channels — via MCP / third-party integrations
For platforms that have an MCP server or a connection through Composio (similar to CRM in chapter 17.3), Hermes can publish directly; when not, the safe route is to have the agent draft the content, you review, and publish manually yourself — especially in the early stages of setting up the voice profile.
Notes
- Always experiment at a narrow scope before letting the agent publish publicly on its own — this point is emphasized throughout the documentation when it comes to content operating processes: start with a narrow task that has a human reviewer, then expand as trust grows.
- Because each platform has different character limits/formats, write those constraints explicitly in a skill or prompt (the same way a
SKILL.mdspells out its Pitfalls) so the agent doesn’t produce content that gets cut off on publish.
Images
16.5. Images
Ready-made tools — no complex configuration
Image generation from text prompts via FAL.ai, supporting 11 different models (FLUX 2 Klein/Pro, GPT-Image 1.5/2, Nano Banana Pro, Ideogram V3, Recraft V4 Pro, Qwen, Z-Image Turbo, Krea V2…) — pick a model via hermes tools. Since a recent update, image-to-image (editing an existing image) is also supported directly inside the same tool, with no separate command.
Quick activation via Nous Portal
If you don’t want to manage a separate API key for image generation, hermes setup --portal enables all 4 Tool Gateway capabilities (including image generation) with a single OAuth login.
Practical applications
- Illustrations for blog posts/newsletters — generated directly in the same conversation where you are writing the article, so the image stays tightly bound to the content instead of a generic stock photo.
- Editing an existing image (changing the background, adding details) via image-to-image when you need fine-tuning instead of regenerating from scratch.
Notes
- For brands that need a consistent visual style, write the style guide (colors, tone, layout) into a dedicated skill/reference — the same way you build a voice profile for text in chapter 16.2, just for images.
- Check copyright/similarity with existing content before using generated images for commercial purposes — that is the user’s responsibility; image models do not guarantee it on their own.
Audio
16.6. Audio
10 TTS providers, from free to high-end
Hermes supports text-to-speech through 10 providers: Edge TTS (free), ElevenLabs, OpenAI TTS, MiniMax, Mistral Voxtral, Google Gemini, xAI, NeuTTS, KittenTTS, Piper — plus the ability to attach any local CLI TTS via a custom command provider.
Choosing a provider by purpose
| Need | Suggestion |
|---|---|
| Creative content, the most natural voice | ElevenLabs — high quality, supports cloning your own voice |
| Offline, private, no network needed | Piper or KittenTTS — lightweight local engines |
| Already have a Nous Portal subscription | OpenAI TTS via the Tool Gateway — no extra API key needed |
How it works when playing long content
Hermes buffers each complete sentence, strips markdown/emoji/reasoning blocks before feeding them to TTS, then plays sentence by sentence in real time — with providers that support streaming (ElevenLabs, OpenAI), the latency to the first audio is the lowest.
Applications to content production
- Turn a drafted article/newsletter into an audio version to publish as a podcast or voice message.
- For long text that exceeds a provider’s per-request character limit, Hermes automatically splits it into sentence-level chunks and stitches them back together — no truncated content.
Notes
- For public content (podcasts, videos), choose a provider that allows a consistent custom voice ID across generations — avoid the voice changing with every run, which breaks the identity.
- For sensitive internal content that must be turned into audio, prefer a local provider (Piper/KittenTTS) so the data never leaves the machine — the same principle as choosing a read-only user for the database in chapter 11.3: keep the surface that handles sensitive data as narrow as possible.
Business
17. Business — Hermes in Day-to-Day Office Work
If the previous chapters were about technical foundations (Skills, Integrations), this is where all of it comes together into practical value: an assistant that can handle email, meetings, CRM, reports, data, and documents — the tasks that take up most of an office worker’s time yet are repetitive enough to be worth automating.
The three technical pillars behind every Business use case
- Gateway platform (Email, Slack, Teams…) — where work “arrives” to the agent.
- Skill Google Workspace / MCP SaaS (Sheets, Docs, CRM via Composio…) — where the agent “touches” real data.
- Cron scheduler — where repetitive work (weekly reports, daily KPI rollups) runs without you pressing a button every time.
A line from the official documentation worth quoting: cron-based automation “flips the model” — instead of a human having to kick things off, the agent wakes itself up on schedule, works, and then goes back to sleep — the essence being that most of the most valuable office work does not come from events, but from time (daily reports, weekly rollups).
Email Sorting
17.1. Email Sorting — Triage and Processing Your Inbox
The two ways Hermes touches email
- Email gateway adapter: IMAP/SMTP built in, nothing extra to install. When someone sends mail to the agent’s address, it reads it and replies right inside the thread.
- Skill Google Workspace / Himalaya: lets the agent act proactively on the mailbox (search, move, filter, label) via commands.
Basic configuration (gateway)
EMAIL_ADDRESS=hermes@gmail.com
EMAIL_PASSWORD=abcd efgh ijkl mnop   # App password, not your main password
EMAIL_IMAP_HOST=imap.gmail.com
EMAIL_SMTP_HOST=smtp.gmail.com
EMAIL_ALLOWED_USERS=you@company.com,colleague@company.com
EMAIL_POLL_INTERVAL=15
Automatic/noreply addresses are ignored automatically, avoiding meaningless reply loops.
Advanced search/filtering
gws gmail search "is:unread"
gws gmail search "from:boss@company.com newer_than:1d"
gws gmail search "has:attachment filename:pdf newer_than:7d"
Notes
- Always use a dedicated inbox for the agent, not your personal email — the password is stored in plaintext in
.env. - Configure
EMAIL_ALLOWED_USERSfrom the very beginning. - For an “email → ticket” flow, turn the mailbox into the starting point of a workflow: read mail → extract the information → create an item in CRM/Linear.
Meeting Minutes
17.2. Meeting Minutes — Capturing and Summarizing Meetings
Meeting data sources
- Google Meet: a dedicated bundled plugin for joining calls, transcription, and follow-ups.
- Microsoft Teams: a meeting-summary skill, replay jobs, Graph subscriptions.
- Voice memo: every chat platform can transcribe an audio file that is sent in.
The practical workflow
- Meeting ends → transcript or voice memo goes to the agent.
- The agent summarizes: key decisions, action items, owners.
- Write it to Docs:
gws docs create --title "Meeting Notes" --body "..." - Send the summary through the appropriate channel to those who were absent.
Notes
- For recurring meetings, attach it as a cron job — fixed schedule, runs on its own.
- Keep the full transcript (stored in Docs) clearly separate from the summary that gets sent (short, via chat).
CRM Updates
17.3. CRM Updates — Keeping Your Customer Database Current
The main path: MCP + OAuth
Connect according to the model described in 11.4 — OAuth 2.1, the tool-selection checklist at install time, and narrow permissions.
The signature use case
The agent reads email/chat, detects customer-related information → creates/updates CRM records on its own. The chain reaction: one email becomes a meeting, one Slack message becomes a ticket, one meeting note becomes a follow-up draft.
Notes
- Limit the CRM tool to “read + create + update specific fields”, removing delete operations from
tools.include. - For the auto-update flow after every call/email, include a confirmation step (send a draft before writing).
KPI Reports
17.4. KPI Reports — Scheduled Metric Reports
hermes cron create "0 9 * * 1" "Roll up the week's KPIs from CRM and Sheets, send via Slack" \
  --skill google-workspace \
  --name "Weekly KPI digest"
Every cron run is a completely fresh session — the prompt must carry enough context on its own.
[SILENT] — avoiding spam of meaningless reports
Only send when there is something worth noting.
Script-only for simple KPIs
--no-agent: the script runs directly, no model token cost.
Notes
- Always run it manually once before letting the job run automatically.
- A job moves to
blocked_configif a key/skill/target is missing — it sends exactly one alert, without repeating. - For financial KPIs, separate the calculation into a deterministic script; the LLM only interprets.
Data Analysis
17.5. Data Analysis — Crunching the Numbers
gws sheets get SHEET_ID "Sheet1!A1:D10"
gws sheets update SHEET_ID "Sheet1!A1:B2" --values '[["Name","Score"],["Alice","95"]]'
Chaining multiple steps
Example: the agent finds the latest news about 3 competitors → compiles it → puts it into a report, each step using the result of the previous one.
Notes
- Separate “fetching data” (deterministic script) from “interpreting it” (LLM).
- Sensitive data: use read-only credentials (11.3).
- Save results into Sheets/Docs instead of only answering in chat.
Document Preparation
17.6. Document Preparation — Preparing Documents
Format coverage: Word (docx), Excel/CSV, PowerPoint (pptx), PDF (create, merge/split, fill forms, OCR).
gws docs create --title "Q3 Meeting Minutes" --body "..."
Notes
- Documents sent to customers/partners: always create a draft for review before sending.
- Distinguish “extracting from a scan” (needs OCR) from “creating/filling/protecting a PDF” (the document-authoring skill).
- For periodic documents, combine with cron (17.4) to auto-generate a draft on schedule.
Monitoring
18. Monitoring — Hermes as a Proactive Monitoring System
This is the area that clearly differs from chapter 17 (Business) or 16 (Content): instead of responding when asked, this is what Hermes does quietly in the background, self-evaluating, and speaking up only when there is something worth saying. All six sub-sections below are built on the same underlying mechanism — the cron scheduler described in 17.4 — but applied in a “watch” direction rather than an “execute a task” direction.
The shared architectural principle: a “boring stack” — scripts do the mechanical work, the model does the reasoning
This is the most important point running through the entire chapter 18, clearly illustrated by the case study of building a competitor-tracking system: the standard architecture is YAML for the registry, Python for fetching/diffing, SQLite for persistent state, Hermes cron for the schedule, Hermes skills for reusable procedures, and messaging for delivering alerts. No dashboard, no vector database, no letting the agent “browse the web from scratch every morning on its own” — start deterministic (scripts do the mechanical work: fetch data, compare), and only add LLM synthesis after the diffs have proven valuable.
The [SILENT] mechanism — the heart of every monitoring job
This is the pattern repeated across all six sub-sections: a good monitoring job must stay silent when there is nothing worth saying. If there is nothing new, the agent replies exactly [SILENT] and nothing is sent — avoiding turning the alert channel into noise that gets ignored. Important note: always write prompts in the form “reply [SILENT] only if nothing changed”, and avoid letting [SILENT] get buried inside a long explanatory paragraph — because the cron mechanism treats any [SILENT] marker that appears anywhere as the signal to suppress sending.
Two running modes — with LLM and without LLM
hermes cron create "every 30m" "..." --script check.py                    # with agent, script only provides context
hermes cron create "*/15 * * * *" "..." --no-agent --script health.sh     # script-only, no token cost
With --script, the script runs before each turn and its stdout is fed in as context for the agent — the agent does only the reasoning part (“is this change noteworthy?”), while fetching/comparing is handled by the script. For simple watchdogs where the script already produces exactly the content to send (memory alerts, disk alerts, heartbeat), use --no-agent — the same scheduler, no LLM, no per-run cost.
Server Status
18.1. Server Status — Watching Over the Server
The most basic monitoring job
/cron add "every 2h" "Check server status and alert if down"
This is the classic opening example in every cron guide — a simple job, no special skill needed, just the agent checking and speaking up only when there is a problem.
A sample more comprehensive health-check job
hermes cron create "hourly" \
  "Check: API connectivity, memory usage, model availability. Report any issues" \
  --deliver telegram
Notes
- For simple periodic checks (ping, HTTP status code, disk usage), prefer
--no-agent --script— there is no reason to spend an LLM call just to check whether the server responds with 200. - Pair this job with backups (1.6) — watching server status frequently is an early way to detect signs of VPS trouble before it affects other important cron jobs.
- Set a frequency appropriate to the importance level — a production system should be checked more often (every 15-30 minutes) than a personal project (every few hours is enough).
Site Changes
18.2. Site Changes — Catching What Changes on a Website
The standard pattern: script diff + agent evaluation
script is the “secret weapon” for this — a Python script runs before each turn, handling the mechanical part (fetching, diffing), while the agent handles the reasoning part (is this change interesting). This is exactly the “boring stack” architecture described at the start of the chapter: normalized page snapshot → SQLite stores state → diff → agent classifies the importance level → alert.
A real example
/cron add "every 1h" "Compare the new snapshot of page X with the previous one. If there is a significant content change, summarize and alert. If not, reply [SILENT]." --script watch_site.py
Notes
- Always store the previous snapshot (SQLite or a file) to compare against — without persistent state, each run has no way of knowing “changed compared to what”.
- Start deterministic: use the LLM only to evaluate pre-filtered diffs, do not let the agent crawl on its own and “feel out” changes from scratch every time — it is both slow and wastes tokens for nothing.
- For pages that change frequently but not importantly (ad banners, view counters), filter at the script layer first — do not let the agent have to learn to ignore this noise through repeated runs.
News
18.3. News — Following a Topic in the News
A periodic news-digest job
hermes cron create "0 9 * * 1" \
  "Search for news about 'topic X' and compile a weekly report with links" \
  --deliver telegram
Useful for founders, researchers, or anyone tracking the competitive landscape — instead of manually searching every week, you receive a pre-compiled report delivered to the right channel.
Extension: watching tech repos/projects
The same pattern applies to tracking GitHub repositories (new issues, newly merged PRs, new releases) — use the gh CLI (covered in 11.2) inside the cron prompt, filter by time window, and report only when there is something new.
Notes
- For broad news topics, always bound the scope clearly in the prompt (specific keywords, preferred sources) — avoid rambling reports full of irrelevant items.
- Attach sources (links) to every report — as per the principle stated in 8.3, this lets you verify for yourself instead of just trusting the agent’s summary.
- For tracking many sources at once (multiple competitors, multiple repos), split them into separate small jobs per source instead of one big combined job — much easier to debug when one source’s fetch fails.
Prices
18.4. Prices — Tracking Prices
The same diff architecture, applied to numbers instead of content
This is a variant of 18.2 but focused on numeric values — tracking product prices, exchange rates, stock/crypto prices — the job alerts only when the price crosses a threshold or changes significantly from the last check.
A real example
/cron add "every 4h" "Check the price of product X on site Y. If the price drops more than 10% compared to the last check, alert immediately. If not, [SILENT]." --script check_price.py
Notes
- Always set explicit thresholds (percentage change, absolute price level) instead of letting the agent decide what is “noteworthy” — with numeric data, clear thresholds are far more reliable than the model’s qualitative judgment.
- Store the price history over time (not just the latest price) so you can detect trends, not just compare two adjacent points — useful later when combined with Data Analysis (17.5).
- For financial prices (stocks, crypto), the calculation should be fully separated into a deterministic script (as per the principle in 17.4); use the LLM only for a brief interpretation, to avoid the model improvising or rounding important figures incorrectly.
Logs
18.5. Logs — Watching and Analyzing System Logs
Periodic log checks, alert only on anomalies
hermes cron create "*/15 * * * *" \
  "Check ~/.hermes/logs/errors.log for new errors in the last 15 minutes. If there is a serious error, alert immediately with the relevant excerpt. If not, [SILENT]." \
  --no-agent --script check_errors.sh
Key log locations to know
When a job fails, error information is usually in two places: the chat channel where the job delivers its results (if delivery succeeded but the content is wrong), and ~/.hermes/logs/agent.log for scheduler messages (or errors.log for more detailed errors) — this is exactly the natural data source for a meta log-monitoring job, watching the health of the cron system itself.
Notes
- For plain error logs (clear patterns, no reasoning needed), use
--no-agent --script— grepping for known error patterns does not need an LLM to “read and understand”. - A log-monitoring job is a good early-detection tool when another cron job gets stuck in
blocked_config— this state only sends the alert once (not repeated on every tick), so if you miss that notification, a periodic log-monitoring job helps catch the problem. - Do not let the log-monitoring job itself become a source of log noise — keep the alert threshold high enough (serious errors only) to avoid a loop of alerts about the monitoring itself.
Alerts in Discord
18.6. Alerts in Discord — Sending Alerts via Discord
Discord is one of the standard delivery targets for every cron job
As stated throughout chapter 18, every monitoring job supports delivering results to Telegram, Discord, Slack, Signal, or a local file — Discord is especially suitable for teams, because a public channel in a server lets many people follow the same alert stream.
Configuring delivery to Discord
/cron add "every 6h" "Check repo X: new issues, newly merged PRs, new releases. If nothing new, [SILENT]." --deliver discord --name "Repo watcher"
Specific permission requirements — the common cause of silent delivery failures
Each messaging platform needs the correct permissions to receive messages — for Discord, the bot must have permission to send messages in the exact target channel; if it does not, delivery fails silently with no clear error displayed immediately.
You can send to multiple targets at once
--deliver telegram,discord
A single job can deliver results to multiple platforms at once via a comma-separated list — useful when you need both the team channel (Discord) and a personal alert (Telegram) for the same event.
Notes
- If an alert does not arrive in Discord even though the job reports success, check the bot’s permissions in the target channel immediately before doubting the prompt logic — this is the most common cause of silent delivery failure.
- With the default header/footer wrapping around cron responses (
cron.wrap_response: true), some Discord integrations may render it poorly — turn this option off in the config if the formatting breaks. - Use clear job names (
--name "Repo watcher") when sending many kinds of alerts into the same Discord channel — it helps distinguish the origin of an alert when many jobs dump into one channel.
Daily Use
- Messages from Phone
- Work While PC Is Off
- Session Resumption
- Multiple Profiles
- Corrections in Progress
- Results Delivered to the Right Channel
- Human Validation Before Sensitive Actions
19. Daily Use — Running Hermes in Your Daily Rhythm
If the previous chapters were about building infrastructure, configuration, and security, this one is about the daily experience of living with an agent — texting from your phone, picking up a conversation that was left half-finished, correcting course mid-task while the agent is working, or trusting it enough to let it do sensitive things on its own. The common thread through all seven sub-sections: Hermes is designed to be continuous, not a disconnected chat session every time you open it.
The big picture
Exactly as the official README describes it: a single gateway process serves Telegram, Discord, Slack, WhatsApp, Signal, and the CLI at the same time — with cross-platform conversation continuity. The seven sub-sections below are seven concrete facets of “living with” an agent like that:
- Texting from your phone (19.1) when you are not at your computer.
- Work continues while your PC is off (19.2), thanks to the always-on VPS architecture.
- Picking up exactly where you left off (19.3), no matter how much time has passed.
- Separating multiple agent “personalities” for different purposes (19.4).
- Correcting course right in the middle of the agent’s work (19.5).
- Results arriving where they need to arrive (19.6) — no mixing up channels.
- Stopping to ask before sensitive actions (19.7) — the final boundary of trust.
Messages from Phone
19.1. Messages from Phone — No App Needed, Just Your Usual Chat
Because Hermes runs a single gateway process serving Telegram, Discord, Slack, WhatsApp, and Signal at the same time, you do not need to install any additional app to drive the agent from your phone — just open the chat app you already connected (6.1) and text like you would a friend.
Voice memos work too
The gateway transcribes voice messages on every connected platform — quickly record an idea while on the move, send it in, and the agent converts it to text and processes it like any normal message.
Notes
- For channels you text from your phone regularly, prefer pairing (6.2) over having to look up user IDs in advance — just send a test message, request the code, and approve it once from the CLI.
- Voice memos are great for short ideas, but for complex requests with many conditions, typing is still more precise — the agent transcribes your words correctly, but it does not “understand intent” better if the spoken request itself was vague.
Work While PC Is Off
19.2. Work While PC Is Off — Why the VPS Model Exists
This is the core reason for the VPS model described in chapter 1.
Because Hermes lives on a $5 VPS or serverless infrastructure (Daytona, Modal) — not tied to your laptop — turning off your personal computer does not affect the agent at all. You can text via Telegram while it runs on a cloud VM you do not even need to SSH into.
Cron jobs still run on schedule
Scheduled jobs (daily reports, nightly backups, weekly audits — covered in 17.4) keep running on time even when nobody has any interface open at all — and this is only true when Hermes runs on always-on infrastructure, not on a personal machine.
Notes
- This is the most important reason to invest properly in chapters 1–2 (VPS + Installation) instead of running Hermes on your laptop because it is “convenient at first” — the “work while your PC is off” benefit only exists when the infrastructure is properly always-on.
- If a cron job is not running on schedule despite being configured, the first thing to check is whether the gateway service is actually running 24/7 on the VPS (2.6/2.4) — not the cron configuration itself.
Session Resumption
19.3. Session Resumption — Picking Up Exactly Where You Left Off
Two ways to resume an old session on the CLI
hermes --continue             # continue the most recent CLI session (-c)
hermes --resume <session_id>  # resume a specific session by ID (-r)
Before continuing, Hermes shows you a recap so you can re-orient yourself before going further — no need to scroll through the entire long history to remember what was left unfinished.
The storage mechanism underneath
All session history is stored in SQLite at ~/.hermes/state.db, using WAL mode plus a dedicated retry layer to handle concurrent writes from multiple processes — guaranteeing the data does not get corrupted even when several interfaces (CLI, gateway) write at the same time.
Continuous across platforms
The “cross-platform conversation continuity” feature means a session that started on your phone (via Telegram) can be continued from the CLI or the desktop app — they are not separate threads.
Notes
- For important work sessions that you need to resume precisely, use
--resume <session_id>instead of just--continue— this avoids accidentally jumping into a different recent session if you have several conversations running in parallel. - When a conversation gets very long, Hermes compresses it mid-way (keeping the first 3 and last 20 turns, summarizing the middle) — this is why the recap sometimes does not “remember” details from very early in the session, and it is not a bug.
Multiple Profiles
19.4. Multiple Profiles — Many Profiles, Many “Personalities” in Parallel
Why you need multiple profiles
Each profile is its own HERMES_HOME — meaning a completely separate set of SOUL.md, MEMORY.md, skills, and model configuration. Use this when you need the agent to play several different roles: a personal bot, a bot serving your team, an agent dedicated to a specific project — each with its own personality, memory, and permissions, with nothing bleeding into the others.
Connections to earlier chapters
- Each profile has its own SOUL.md (mentioned in 7.1) — changing one bot’s personality never affects another bot.
- Each profile has its own MEMORY.md/USER.md memory (20.1) — the team-serving bot does not “know” personal things from your private bot.
- You can put them on the same VPS (chapter 1) or on entirely different servers, depending on the isolation level you want.
Notes
- Do not share one profile for both personal use and sensitive work — separate profiles are the cheapest way to keep clear boundaries between contexts, instead of relying on channel overrides (7.3), which only separate system prompts/models, not memory or skills.
- For each new profile, backups (1.6) also need to be separated per
HERMES_HOME— do not bundle one backup schedule and then forget that multiple profiles are running in parallel.
Corrections in Progress
19.5. Corrections in Progress — Fixing Course While the Agent Is Working
You do not have to wait until the agent finishes to correct it
While the agent is still processing, typing a new message and pressing Enter redirects the current turn with exactly that correction — no need to start a new turn from scratch. The reasoning and tool work already completed remain intact in the context; only what comes next is steered in your direction.
Ctrl+C to stop completely, when needed
Ctrl+C # interrupt the current operation (press twice within 2s to force quit)
A terminal command that is mid-execution is killed immediately (SIGTERM, then SIGKILL one second later if it has not stopped).
Choosing behavior via display.busy_input_mode
display:
  busy_input_mode: steer   # or "queue"
steer lets you change direction mid-flight without interrupting at all — useful when you want to nudge the agent’s direction while it is working. queue prepares a follow-up turn without cancelling the work in progress — suitable when you just want to “bank” a follow-up question without accidentally wiping out work that is underway.
Notes
- Use the redirect (typing a new message) when you notice the agent is heading the wrong way but the work it has already done is still valuable — reuse the work in progress instead of throwing it all away.
- Only use Ctrl+C when you truly need a full stop (for example, the agent is about to run an unwanted terminal command) — because the running command is killed immediately, with no chance to finish gracefully.
- If you often need to send several notes in a row without cutting off the work in progress, switch
busy_input_modetoqueueas your default — this avoids accidentally cancelling a long task that is nearly complete.
Results Delivered to the Right Channel
19.6. Results Delivered to the Right Channel — Getting Output Where It Belongs
Why this is a problem you have to think about, not something that is right by default
With an agent operating across multiple platforms at once, getting a task’s result (a report, a file, a notification) to the right channel — instead of getting stuck in a CLI session nobody is watching, or landing in the wrong channel for the wrong recipient — requires active configuration, not a “it will be fine” default.
Delivery targets for cron jobs
As already stated in 17.4, each cron job has its own report delivery target (Telegram, Discord, Slack, Signal, or a local file) — declared explicitly when the job is created, never inferred implicitly from context.
Background tasks also need an explicit target
With /background, the task runs in a separate session, fully detached from the current session’s history — the result does not automatically “flow back” to the chat session you have open; if you want a notification when it completes instead of having to come back and check yourself, you need to configure the receiving end explicitly.
Channel overrides also affect the “voice” where results appear
Combined with channel_overrides (7.3): a channel can have its own system_prompt that shapes how results are presented — meaning the same task, delivered to #support and to #research, can be phrased differently to suit the readers.
Notes
- For every important cron job or background task, always declare the delivery target explicitly — never rely on the default, because the default is usually the place nobody monitors most often.
- If a report “vanishes” after running, the first thing to check is that job’s delivery target configuration, before wondering whether the job ran at all.
- For teams using many channels for many purposes, consider a clear naming convention for delivery targets (for example, always naming a job after the channel that receives it) — it reduces confusion when several cron jobs run in parallel.
Human Validation Before Sensitive Actions
19.7. Human Validation Before Sensitive Actions — Asking a Human Before Sensitive Actions
This is the closing point of the entire chapter 19 — the final boundary of trust.
Although everything in 19.1–19.6 is about letting the agent operate automatically, continuously, and across many channels — there still needs to be a human confirmation layer before performing actions that are irreversible or high-risk. This is exactly where the mechanisms from chapter 6 (Security) meet day-to-day operations in practice.
The approval mode mechanism — the default layer
hermes config set approvals.mode manual   # always ask before dangerous commands
hermes config set approvals.mode smart    # a secondary LLM assesses risk and auto-approves the less dangerous
For operations already known to be high-risk (mass deletions, DROP TABLE, overwriting system files), Hermes stops and waits for confirmation instead of just doing it — exactly the principle described in 6.3.
Write-approval gate for self-created skills
For changes the agent makes to its own skills (10.5/20.5), you can enable a dedicated approval gate so that no new behavior takes effect immediately without human review.
Applying this in practice to the sub-sections above
- For cron jobs (19.6) that perform actions with real impact (sending emails to customers, updating a CRM, publishing posts publicly), design a draft-first step: the responsible person reviews, then it is sent — as recommended in 17.3, 17.6, and 16.4.
- For redirecting/correcting mid-task (19.5), this is also a natural opportunity for a human to intervene before the agent goes further down a risky path — corrections in progress and human validation complement each other; they are not two separate mechanisms.
Notes
- Do not turn approval off entirely (“for convenience”) just because you have grown used to using the agent daily — familiarity is exactly when you are most likely to skip confirmation on a genuinely sensitive action out of complacency.
- For sensitive actions that are not in Hermes’s built-in list of dangerous patterns (for example, financial transactions, operations on real customer data in a CRM), design your own manual confirmation step at the workflow level (draft → approve → send) instead of relying completely on the built-in approval mechanism.
- Periodically review what is currently running fully automatically (without confirmation) and decide whether it really should stay at that automation level — trust should increase deliberately and gradually, not be granted by default from the start.
Improvement Loop
- Memorize What Matters
- Retrieve Past Decisions
- Turn a Method into a Skill
- Reuse the Skill
- Improve It with Each Use
20. Improvement Loop — Hermes’s Closed Learning Loop
This is the chapter that pulls together everything scattered across chapter 10 (Skills) and 7 (Context) into a single, continuous cycle — exactly as the slogan “the agent that grows with you” promises. Nous Research calls this the closed learning loop, and describes it as the one differentiating feature versus other agent frameworks on the market: most other agents run on a take-task → plan → execute → return-results model, then the session ends, nothing is retained, and the next session starts again from the same starting point.
Five steps, one closed loop
Hermes adds a whole layer after execution: it evaluates what just happened, extracts reusable patterns, and stores them — while continuously building a model of the user themselves (preferences, decision history, working habits) that persists across many sessions. The five sub-sections below are precisely the five consecutive steps of that loop:
- Memorize What Matters (20.1) — retain what is worth remembering.
- Retrieve Past Decisions (20.2) — bring back old decisions when needed.
- Turn a Method into a Skill (20.3) — turn a procedure into a reusable asset.
- Reuse the Skill (20.4) — reuse instead of starting over from scratch.
- Improve It with Each Use (20.5) — refine the skill after every use.
The key point: this is not an agent “retraining the model” — it is building a library of reusable procedures based on how you actually use it, plus a model of you that grows deeper over time.
Memorize What Matters
20.1. Memorize What Matters — Remembering What Matters
Memory is actively stored, not a log of the whole conversation
Agent-curated memory: Hermes decides for itself what is worth remembering — it does not store the entire transcript wholesale. Two core files:
~/.hermes/memories/MEMORY.md   # facts about the environment, projects, technical preferences
~/.hermes/memories/USER.md     # a profile of the user themselves
A real example of MEMORY.md content: preferred Python version, default editor, current projects, timezone — exactly the kind of information that repeats in every session if it is not remembered in advance.
Memory has deliberately limited size
Memory is intentionally capped (~2,200 characters for MEMORY.md, ~1,375 for USER.md). When full, the agent automatically consolidates old entries — not deleting willy-nilly, but compressing them while keeping the core.
How to actively request something be remembered
"Remember this for next time"
"Clean up the memory"
"Replace the old Python 3.9 note — I'm on 3.12 now"
After an effective working session, just saying the first sentence is enough for the agent to save the key points on its own.
The “frozen snapshot” property — the easiest thing to misunderstand
This is an important technical point to know: memory is a frozen snapshot — changes made during a session do not appear in the system prompt until the next session begins. The agent writes to disk immediately, but the prompt cache is not invalidated mid-session — a deliberate trade-off to keep prompt caching stable and avoid API costs spiking.
Notes
- Actively “seed” the memory from the very start: dedicate a first session to telling the agent your name, role, tools you often use, and current projects — instead of letting memory accumulate passively over weeks.
- Keep the roles clearly separate: memory is for facts (environment, preferences, what has been learned about you); skills are for procedures (multi-step operation sequences, specific tool usage instructions) — stuffing the wrong kind into the wrong place degrades both.
- Since memory changes only take effect in the next session, do not be surprised if the agent “forgets” something you just told it in the same session — this is designed behavior, not a bug.
Retrieve Past Decisions
20.2. Retrieve Past Decisions — Bringing Back Decisions Already Made
Cross-session search via FTS5
Unlike memory (which only holds a few condensed facts), retrieving the full context of an old decision/conversation uses full-text search (SQLite FTS5) plus LLM summarization when needed — allowing a past decision to be recalled in detail without the user having to retell it from the beginning.
"Which approach did I decide to use for X before?"
→ the agent calls session_search on its own to look it back up, instead of asking you again
The operating principle is clear: when the user mentions something from a previous conversation, or when the agent suspects relevant context exists from another session, it should use session_search to remember before asking the user to repeat themselves.
The difference from Memory — complementary, not a replacement
Memory (20.1) is a condensed summary, always present in every prompt. Session search is the full archive, queried only when needed — the two layers complement each other: Memory tells you “something happened”, session search tells you “exactly how it happened”.
Notes
- When you need the agent to recall a specific technical decision discussed long ago (not just a short fact), ask in a way that cues the context — the agent will look it up on its own instead of guessing or starting over from scratch.
- For decisions that truly matter and must be remembered accurately for the long term, consider proactively turning them into a condensed Memory entry (20.1) instead of relying only on session search — to avoid the case where old session content gets archived or is hard to retrieve exactly.
Turn a Method into a Skill
20.3. Turn a Method into a Skill — Turning a Method into a Skill
This is the step that connects “getting the job done” with “getting it done faster, repeatedly”
When Hermes notices it is performing the same multi-step procedure over and over, it can propose creating a skill that records exactly that procedure — this is the skill_manage mechanism from chapter 10.5, but viewed from the perspective of the overall improvement loop.
Specific trigger moments
- After successfully completing a complex task (5 or more tool calls).
- When it hits an error or a dead end, and then finds the right way.
- When the user corrects its approach.
- When it discovers a non-trivial workflow worth keeping.
The agent does not have to write it itself
The user can also write skills manually and add them to the skill directory — useful for repetitive workflows you want the agent to handle reliably from the very first time (report formats, code review checklists, external API integrations) instead of waiting for the agent to “learn” them through a few trial-and-error rounds.
Notes
- Not every multi-step task deserves becoming a skill — prioritize procedures you (or the agent) expect to repeat, not one-off work.
- If the environment needs tight control (as in chapter 10.5), turn on
write_approvalto review before a self-created skill by the agent takes effect — the “turn a method into a skill” step is where the most caution is needed, because this is the moment new knowledge gets “frozen” into a procedure that will be reused many times later. - When the agent proposes creating a skill after a difficult task, treat it as a good signal to review and give feedback right away — fixing a freshly created skill is far easier than fixing it after it has been reused many times and “sunk in” to the agent’s habits.
Reuse the Skill
20.4. Reuse the Skill — Reusing the Skill
The core value: not re-reasoning from scratch
The next time a similar request comes in, the agent can reuse the skill instead of re-reasoning every step from zero — this is the practical meaning of “self-improving”. Operationally, the progressive disclosure mechanism from chapter 10.1 guarantees this reuse is not expensive: the agent only sees the skill’s name + short description until it is actually needed, at which point the full content is loaded.
Calling directly via slash command
As stated in chapter 10.3, every skill automatically becomes a slash command — the fastest way to proactively “call up” an existing skill instead of letting the agent guess whether to use it:
/github-pr-workflow open a PR for the auth refactor
Portable skills — reuse that goes beyond one agent
Skills are compatible with the open agentskills.io standard — meaning a skill is not only reusable across many sessions on your own Hermes instance, but also portable, shareable, and can be contributed to the community through the Skills Hub (chapter 10.2) — reuse scales from the individual level up to the community level.
Notes
- Do not hesitate to call a known skill’s slash command directly instead of re-describing the request in natural language — a direct call guarantees the right skill is loaded, avoiding the agent picking a different approach by mistake.
- For skills used frequently in a fixed combination, group them into a bundle (10.1) so that “reusing” collapses into a single command instead of calling multiple skills in sequence.
- Track how often a skill is called back — this is a natural signal for which skills are worth investing in further improvement (step 20.5) and which may already be outdated, no longer fitting how you work today.
Improve It with Each Use
20.5. Improve It with Each Use — Improving It with Every Use
Closing the loop: use is not only for using, but for refining
This is the step that completes the cycle, reconnecting with chapter 10.5: a skill is not static after creation — it improves itself through use. Each time a skill is called back and the agent notices a detail that needs adjusting (a missing step, a newly encountered pitfall, a more efficient way of doing it), it can patch the skill in place — the Reuse → Improve loop repeats continuously, not just once.
Not only the agent self-corrects — the user is part of the loop too
The user correcting the agent’s approach (mentioned in 20.3) is itself an input to the improvement loop — every time you give feedback, it is a signal for the related skill (if any) to be updated accordingly, closing the loop between agent behavior and human feedback.
Controlling the speed of improvement via the write-approval gate
As stated in 10.5, in environments that need caution, enable the approval gate so that every change (including small patches in this improvement step) is reviewed before taking effect — most important at this step, because this is where skills in active use are edited, unlike the creation step (20.3) where the risk is still limited to a skill that has never been used.
Notes
- Treat a skill “being improved” as a good sign that you are using the agent enough and deeply enough — if after months an important skill has never been patched once, it may not have been tested through enough real situations yet.
- Periodically review the change history of important skills (via
/skills pendingif approval is on, or by reading the SKILL.md content directly) — this is also an indirect way to understand what the agent is “learning” about how you work. - This loop only truly delivers value if you keep reusing old skills instead of letting the agent start over from scratch each time (back to 20.4) — skipping the reuse step means severing the entire improvement loop right here.
Reference
- Official Documentation
- Awesome Lists & Community Resources
- Skill & Plugin Catalogs
- Ecosystem Blog Posts / Tutorials
- Cheat Sheet / Quick Reference
21. Reference — Lookup and Expansion Resources
If the previous 20 chapters are a complete map of how to run Hermes, this one is the place to come back to when you need to dig deeper into what this handbook summarizes, or when you need a specific command and do not want to dig through a long chapter from the beginning again. The five sub-sections below go from the most authoritative origins (21.1) to community-contributed resources (21.2, 21.4), to function-organized catalogs of extensions (21.3), and end with a practical cheat sheet for everyday quick lookup (21.5).
The principle for choosing sources
With a fast-moving project like Hermes — 7 gateway platforms at launch growing to 20+ in just over a year (chapter 5.6) — static documentation goes stale easily. So the principle that runs through this whole chapter: always prefer official sources when there is a conflict; use community sources for real-world examples and application inspiration, not for the core technical truth.
Official Documentation
21.1. Official Documentation — The Authoritative Sources
The main repository
github.com/NousResearch/hermes-agent
This is where the actual source code lives, along with the install script (chapter 2.1), the complete set of default skills (chapter 10), the changelog, and the full issue/PR history — the right source to “verify the source” before installing or reporting a bug, instead of trusting a third-party blog that may already be outdated.
The full documentation site
hermes-agent.nousresearch.com/docs
All 20 chapters in this handbook (from VPS and Installation to the Improvement Loop) originate here, directly or indirectly — when a technical detail needs re-verification (configuration syntax, the exact tool name, a default value), this is the first place to look, before any other source.
The User Stories pages — real stories, not marketing
hermes-agent.nousresearch.com/docs/user-stories
A collection of real user experiences, including the valuable “failed, then rebuilt it myself” stories — for example, one user recounts writing their own three-layer “memory kernel” (L1 Hindsight, L2 Graphiti, L3 MemPalace) after three failed attempts with the built-in memory, illustrating exactly the limit described in chapter 9.6 (when the built-in memory is not enough and you need to move to an external memory provider).
Notes
- When a community guide (21.2, 21.4) conflicts with the official docs, always trust the official docs — the community writes faster than the project itself can update its documentation, and easily goes stale with each release.
- Before reporting a bug or opening an issue, check the changelog in the main repository — many “bugs” are actually deliberate behavior changes between versions (like the mandatory dashboard authentication rule described in chapter 2.3).
- User Stories are a good source of real-world application ideas before you start fumbling your way from scratch — many good patterns (a personal memory kernel, cost-saving workflows) have already been tried and shared by others.
Awesome Lists & Community Resources
21.2. Awesome Lists & Community Resources — The Community Use-Case Collection
The standout list: awesome-hermes-usecases
github.com/aliaihub/awesome-hermes-usecases
The most notable feature of this repository is its “evidence rule” — every use case listed must link back to a verifiable origin: the official Hermes documentation, a Nous Research companion repository, a GitHub issue with real implementation details, or a first-person blog post. This is why this repository is more trustworthy than the usual “10 ways to use X” blog posts — every claim is traceable, in the exact spirit of the Sourced Reports described in chapter 14.5.
A few notable real-world examples from this repository
- Combining Matt Pocock’s open-source planning skills (
/grill-me,/to-prd,/to-issues) for up-front scoping, then handing off to Hermes subagents that implement the subdivided issues in parallel as vertical slices — with a human-in-the-loop (HITL) gate to block low-quality AI code before merge. This is a direct illustration of how to combine chapter 13.2 (Parallel Work) with chapter 15.5 (Pull Requests). - A self-monitoring improvement loop that reads session history, ranks the weakest skills, proposes patches or new skills, and reports on learning progress — a direct extension of the mechanism described in chapter 20.
- The
/kanbancommand (since v0.15) turns a single Slack message into a persistent multi-agent “swarm” with named workers, a verifier, and a synthesizer — persistently stored via~/.hermes/kanban.db, exactly the mechanism described in detail in chapter 13.3. - One always-on shared bot for a small team (coding, research, ops) with per-user sessions, Docker-isolated terminals, and an allowlist — the gateway also supports Discord, Slack, WhatsApp, Signal, Matrix, Email, SMS, and more; the Telegram flow is usually the cleanest starting point for any of those platforms.
- Production-style deployments on Chinese enterprise chat platforms — Feishu managed via launchd, WeCom with native media analysis and vision.
Notes
- Before designing a complex workflow from scratch, check this repository to see if someone has already done something similar — many patterns (HITL gates, swarms via Kanban) have been proven in practice.
- For use cases involving security or production, always follow the link to the verifiable origin rather than trusting the summary description alone — this repository’s evidence rule exists precisely for that purpose.
- “Awesome list” community repositories usually update faster than the official documentation for just-launched features — useful for keeping up with the latest use cases, but always cross-check against 21.1 when you need exact technical details.
Skill & Plugin Catalogs
21.3. Skill & Plugin Catalogs — Finding Extensions by Function
Skills Hub — covered in detail in chapter 10.2
The central lookup point when you need a specific skill you do not have yet, organized by source: official (in the main repository), skills-sh (the Vercel hub), well-known (sites self-publishing via /.well-known/skills/index.json), github (direct taps such as openai/skills, anthropics/skills, NVIDIA/skills), clawhub, lobehub, browse-sh (200+ browser-control skills for specific sites).
hermes skills search <keyword>
hermes skills inspect <source>/<skill name>
Always inspect before installing — the security principle from chapter 10.2, especially for community-sourced skills that have not been carefully vetted.
The open agentskills.io standard
Mentioned in chapter 20.4: Hermes skills are compatible with this standard, meaning a skill written for Hermes can be ported to other agents supporting the same standard, and vice versa — a skill written to the agentskills.io standard elsewhere usually plugs into Hermes with little modification. Worth a look if you plan to write skills for broad sharing outside the Hermes ecosystem.
The complete list of bundled skills
In the skills/ directory of the main repository (21.1) — organized by category (research, github, google-workspace…), each skill has a SKILL.md you can read directly on GitHub before deciding whether you need to install it.
Notes
- Before writing a skill from scratch (chapter 10.4,
/learn), always runhermes skills searchfirst — chances are someone has already written it, especially for common tasks (GitHub, Google Workspace, monitoring). - For sharing skills internally within a team, consider publishing to the
agentskills.iostandard from the start instead of writing in a structure that only works inside Hermes — this preserves reusability later if the team moves to another tool. - Read the
SKILL.mddirectly on GitHub (not just the short description) before installing any skill that affects important systems — the short description is not enough to fully assess the skill’s pitfalls and its real scope of action.
Ecosystem Blog Posts / Tutorials
21.4. Ecosystem Blog Posts / Tutorials — In-Depth Integration Guides from Third Parties
Articles per specific provider
For the search/tool providers described in chapter 8.3, many vendors write their own integration guides — for example, Tavily’s article on wiring tavily_research into a cron scheduler with a Telegram/Slack gateway, turning it into an automated “research analyst” that pings on a schedule while preserving the full citation chain from claim to source — a direct illustration of combining chapter 8.3 (Web Search) with chapter 12 (Automation) and chapter 14.5 (Sourced Reports).
Articles per multi-source workflow
Some other search providers illustrate the multi-source extract-and-compare pattern (described in chapter 14.2) — for example, a guide using a clean-content fetch tool (stripping navigation/ads) across multiple URLs at once to build a comparison table, and taking advantage of Hermes’s conversational context retention for follow-up questions.
Articles by reader role (Field Guides)
Another community content type worth consulting: guides organized by specific role (PM, researcher, founder…) rather than by feature — for example, a “PM’s Field Guide” listing six concrete use cases in increasing order of complexity: recurring competitive intelligence (chapter 14.3), a feedback synthesizer (chapter 14.4), a voice-consistent writer (saved as a skill after a few drafting sessions, chapter 16.2), and a complete research-to-brief pipeline (chapter 14.4 combined with chapter 13.4).
Notes
- Third-party articles are often optimized for SEO or to promote an accompanying product (such as articles pairing Hermes with another paid service) — read with a critical eye, separating the useful technical guidance from the embedded promotion.
- Prefer articles with concrete, immediately runnable command examples (
curl ... install.sh, real cron syntax) over ones that only describe general concepts — the former are much easier to verify for correctness. - Role-based field guides are a good starting point for newcomers not yet familiar with the technical structure of the official documentation — use them to find application directions, then return to the detailed chapters (8–20) in this very handbook to implement things technically correctly.
Cheat Sheet / Quick Reference
21.5. Cheat Sheet / Quick Reference — Fast Command Lookup
Surface symbols
| Symbol | Meaning |
|---|---|
| 🖥️ DESK | Desktop Application (chapter 4.3) |
| ⌨️ CLI | Terminal chat / TUI (chapters 4.1, 4.2) |
| 💬 MSG | Gateway messaging — Telegram/Discord/Slack… (chapter 5) |
| 📟 SHELL | Commands typed in the OS terminal, not inside a chat session |
Not every command appears on every surface — before reporting a “command not working”, first check the correct surface.
01. Session & Context — Managing sessions and context
| Command | Surface | Function |
|---|---|---|
/new [name] | 🖥️⌨️💬 | Start a new session |
/status | 🖥️⌨️💬 | View the current session status |
/resume [name] | 🖥️⌨️💬 | Continue a saved session |
/sessions | 🖥️⌨️💬 | Browse/continue the session list |
/title [name] | 🖥️⌨️💬 | Name a session |
/retry | 🖥️⌨️💬 | Resend the most recent message |
/undo [N] | 🖥️⌨️💬 | Undo the last N turns |
/compress | 🖥️⌨️💬 | Compress the conversation context |
/context [all] | ⌨️💬 | View context window details |
/branch [name] | 🖥️⌨️💬 | Branch off from the current session |
Corresponding to the CLI commands covered in chapter 19.3:
hermes --continue / --resume <id> # return to an old session (surface SHELL)
02. Control Active Work — Controlling running work
| Command | Surface | Function |
|---|---|---|
/queue <prompt> | 🖥️⌨️💬 | Queue the next prompt |
/steer <prompt> | 🖥️⌨️💬 | Redirect the running turn — this is the redirect covered in chapter 19.5 |
/background <prompt> | 🖥️⌨️💬 | Run separately in the background |
/agents | 🖥️⌨️💬 | View the active subagent/task tree (alias /tasks, chapter 13) |
/goal <text> | 🖥️⌨️💬 | Set/manage a standing goal |
/subgoal <text> | ⌨️💬 | Add a criterion to the active goal |
/heartbeat | ⌨️💬 | Set a periodic idle-time reminder prompt |
/stop | 🖥️⌨️💬 | Stop the running work |
The “While Hermes is working” box — the four commands to remember most
/queue      = do this next
/steer      = adjust the work in progress
/background = split off and run in the background
/stop       = stop it entirely
This is precisely the practical control set for the busy_input_mode covered in chapter 19.5 (steer vs queue) — the cheat sheet groups all four behaviors in one place for quick reference while the agent is running.
03. Models & Behavior — Models and behavior
| Command | Surface | Function |
|---|---|---|
/model | 🖥️⌨️💬 | Switch the model for the current session (chapter 2.1) |
/personality [name] | 🖥️⌨️💬 | Set a personality overlay (chapter 7.1) |
/approvals [manual|smart|off] | 🖥️⌨️💬 | View/set command approval mode (chapter 6.3) |
/yolo | 🖥️⌨️💬 | Toggle bypassing approval for dangerous commands |
/reasoning | ⌨️💬 | Manage the reasoning level |
/fast | ⌨️💬 | Set normal/fast mode |
/voice | ⌨️💬 | Control voice mode (chapter 8.7) |
/wake [on|off|status] | 🖥️⌨️ | Control the wake-word listener |
04. Skills & Knowledge — Skills and knowledge
| Command | Surface | Function |
|---|---|---|
/skills | ⌨️ | Find/install/manage skills (chapter 10.2) |
/learn <source> | ⌨️💬 | Create a reusable skill from documentation/a procedure (chapter 10.4) |
/memory | ⌨️💬 | View pending memory writes (chapter 9.6) |
/bundles | ⌨️💬 | List skill bundles (chapter 10.1) |
/init [notes] | ⌨️💬 | Generate/update AGENTS.md (chapter 7.2) |
/tools | 🖥️⌨️ | List/enable-disable toolsets (chapter 8) |
/browser | 🖥️⌨️ | Manage browser connections (chapter 8.4) |
/<skill-name> | 🖥️⌨️💬 | Run an installed skill directly (chapter 10.3) |
05. Automation & Agents — Automation and orchestration
| Command | Surface | Function |
|---|---|---|
/suggestions | ⌨️💬 | View automation suggestions |
/blueprint | ⌨️💬 | Start from a ready-made automation blueprint (e.g. competitor-watch, chapter 14.3) |
/cron | ⌨️ | Manage scheduled tasks (chapter 12.1) |
/kanban | ⌨️ | Manage the multi-agent collaboration board (chapter 13.3) |
/refine [focus] | ⌨️💬 | Save learnings from the current conversation — corresponding to the skill improvement mechanism in chapter 20.5 |
/handoff <platform> | 🖥️⌨️ | Hand the current session over to a messaging platform |
Corresponding to the SHELL command groups covered in chapters 12–13:
hermes cron create "<schedule>" "<prompt>" --deliver <platform> --skill <name>
hermes cron create "<schedule>" "<prompt>" --no-agent --script <file>
delegate_task(goal=..., context=...)
delegate_task(tasks=[...])
06. Recover & Inspect — Recovery and inspection
| Command | Surface | Function |
|---|---|---|
/rollback [number] | 🖥️⌨️💬 | List/restore file checkpoints (chapter 15) |
/snapshot | ⌨️ | Create/restore a Hermes state snapshot |
/diff | ⌨️💬 | View git changes |
/save | 🖥️⌨️ | Save the current conversation |
/usage | 🖥️⌨️ | View usage and limits |
/debug | 🖥️⌨️💬 | Generate a debug report |
/version | 🖥️⌨️💬 | View the Hermes Agent version |
/update | ⌨️💬 | Update Hermes Agent |
/help | 🖥️⌨️💬 | View the list of available commands |
Messaging / Gateway — Gateway environments only
| Command | Surface | Function |
|---|---|---|
/start | 💬 | Handshake with the gateway |
/sethome | 💬 | Set this chat channel as “home” |
/topic | 💬 | Manage Telegram DM topics |
/commands [page] | 💬 | Browse commands and skills |
/approve [session|always] | 💬 | Approve a pending command |
/deny | 💬 | Deny a pending command |
/pause [reason|off] | 💬 | Pause/resume new gateway work |
/platform [pause|resume|list] [name] | 💬 | Manage a gateway platform (chapter 5) |
/restart | 💬 | Restart the gateway |
⚠️ This command group only works in a gateway environment — it is not available on plain CLI or a standalone Desktop. /approve//deny is precisely the practical mechanism behind approvals.mode (chapter 6.3) when operating through Telegram/Discord.
Terminal Essentials — Commands typed in the OS shell
hermes                          # start a Hermes chat session
hermes model                    # configure provider/model (chapter 2.1)
hermes status                   # check Hermes status
hermes doctor                   # diagnose configuration/environment (chapter 2.4)
hermes gateway status           # check messaging gateway status
hermes update                   # update Hermes (chapter 2.5)
⚠️ Clearly distinguish the two easily confused commands: hermes model (SHELL) is used to configure a new provider/model; /model (inside a chat session) is used to switch the model of the current session — the two commands have entirely different scopes and do not replace each other.
Full SHELL command table by chapter
Basic installation and operation (chapters 1–2)
curl -fsSL https://raw.githubusercontent.com/NousResearch/hermes-agent/main/scripts/install.sh | bash
hermes doctor
hermes update
hermes gateway install / start / status / logs --follow
Sessions and navigation (chapters 15, 19)
hermes -w                             # session in its own git worktree
hermes --continue / --resume <id>     # return to an old session
Ctrl+C (x2 in 2s)                     # force-stop the running operation
Skills (chapter 10)
hermes skills search / inspect / install <name>
hermes skills trust / untrust         # project-local skills
Automation (chapters 12, 18)
hermes cron list / pause / resume / edit / delete
hermes webhook subscribe <source> --event <type>
Delegation (chapter 13)
hermes kanban ...
Security (chapter 6)
hermes config set approvals.mode manual|smart|off
hermes --yolo
hermes pairing list / approve / revoke / clear-pending
Notes
- Before concluding that “this command does not exist”, check the correct surface symbol — most confusion comes from typing an MSG-only command (such as
/approve,/pause) on plain CLI, or conversely typing/context(only available on CLI/MSG) and expecting it on Desktop. - The autocomplete tip from the original cheat sheet is very worth using: type
/followed by the first few characters and use autocomplete instead of trying to remember the exact full command name — especially useful for rarely used commands like/subgoal,/heartbeat,/blueprint. - It is intentional design, not an omission, that not every command appears on every surface — for example
/platformand the other MSG commands only make sense in a gateway context; on plain CLI there would be nothing to manage. - This cheat sheet prioritizes command coverage over explanation depth — for any command whose side effects are unclear, always go back to the corresponding detailed chapter (chapter numbers are noted next to each group) before using it on a production system.